
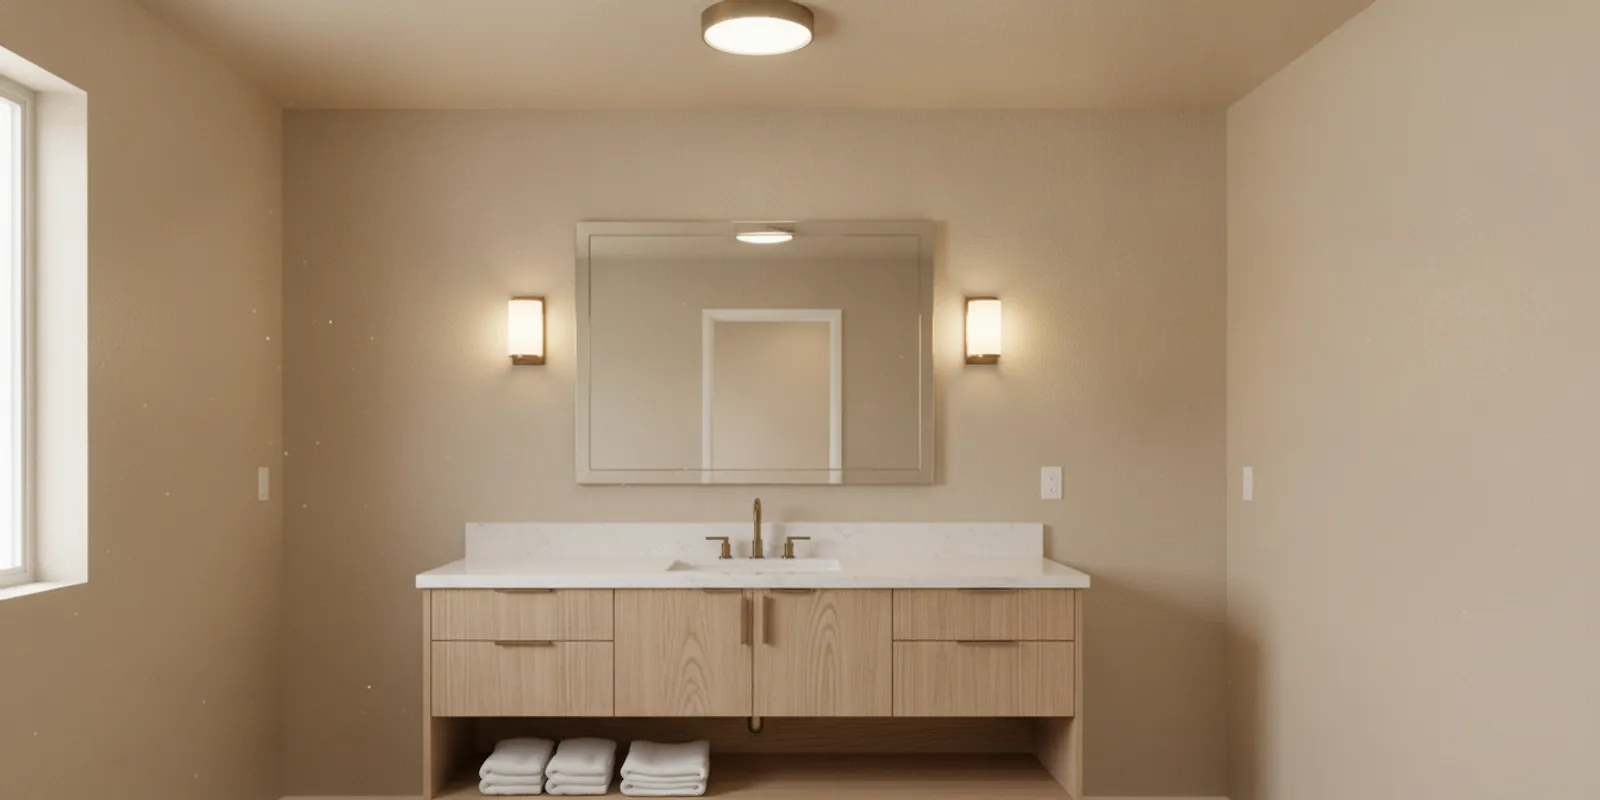
Choosing bathroom light fixtures is not only a matter of style. The right combination helps you see clearly at the mirror, move safely through the room, and choose products suited to the moisture near a shower or tub. This guide walks through the main fixture types, placement decisions, and safety checks to consider before buying.
Call AAA Electrical Services to discuss your lighting project
What should bathroom lighting do?
A well-lit bathroom has several jobs to do at once. It should provide even light for everyday tasks, reduce shadows on the face, help people move around at night, and look comfortable rather than harsh. A single bright ceiling light may illuminate the floor but leave deep shadows around the eyes at the mirror. A decorative vanity fixture may look attractive but fail to light the shower or the rest of the room.
Think in layers. General lighting illuminates the room as a whole. Task lighting helps with activities such as shaving, applying makeup, grooming, or cleaning. Accent lighting adds a softer visual layer, such as a subtle glow near shelving or a niche. Not every bathroom needs all three layers, but separating their jobs makes it easier to decide what to buy and where it belongs.
Also consider who uses the room and when. A family bathroom may need bright, easy-to-clean lighting for a range of routines. A small powder room may need little more than a flattering mirror light and general illumination. A bathroom used at night may benefit from a low-level light that does not require turning on every bright fixture. Start with the room’s actual uses, then choose products that meet them.
Which fixture types work well in a bathroom?
There is no single fixture that fits every bathroom. The best choice depends on ceiling height, mirror size, available wiring, moisture exposure, and the look you want. A combination of fixture types often gives better coverage than relying on one source.
Vanity bars
A vanity bar is a linear fixture mounted above a mirror. Its broad shape can spread light across much of the mirror, especially when it is sized to suit the mirror and vanity. Look for a design that distributes light evenly rather than creating a bright spot in the center. A fixture that is much narrower than a wide mirror may leave the outer areas dim.
Vanity bars are a practical option when there is not enough wall space for two separate sconces. Their position and shade design still matter. A bar mounted too high, too low, or too far forward can create glare or unwanted shadows. Compare the product dimensions with the mirror and the available wall space before selecting it.
Wall sconces
Pairing sconces on either side of a mirror can provide balanced light from both sides of the face. This arrangement is often helpful for grooming because light comes from more than one direction. Check that the mirror, faucet, medicine cabinet, and nearby doors leave enough space for the fixture and its installation.
Sconces can also support a specific design style, but appearance should not be the only selection criterion. Consider the direction of the light, whether the shade is comfortable to look at, how easily the fixture can be cleaned, and whether the product is appropriate for the location. A clear glass shade can look crisp, while a diffusing shade may soften the light and reduce direct glare.
Ceiling lights
Flush-mount and semi-flush-mount fixtures are useful when the ceiling is low or the room is compact. They provide general illumination without hanging far below the ceiling. A ceiling fixture can complement vanity lighting, but should not be expected to solve every task-lighting problem by itself.
For a high ceiling, a pendant may add a focal point, provided it does not interfere with safe movement or create an awkward obstruction. Check the fixture’s dimensions and the room layout, including the door swing, shower enclosure, and any tall users. A recessed light can offer a simple, low-profile look, but its suitability depends on the ceiling construction, product rating, insulation conditions, and the location where it will be installed.
Shower and tub-area fixtures
Lighting over or near a shower or tub is exposed to more moisture than a fixture in a dry part of the room. Use a product whose listing and installation instructions suit the actual location. Product descriptions may distinguish between damp-location and wet-location use; the right designation depends on where the fixture will be placed and how it could be exposed to water.
A decorative fixture that works beside a vanity may not be appropriate inside a shower enclosure. Do not assume that a sealed-looking cover makes a product suitable. Check the manufacturer’s label and instructions, and ask a qualified electrician if the location or product requirements are unclear. Also consider how the light will be accessed for cleaning and maintenance without reaching over a wet surface.
Night lights and low-level lighting
A small night light or a dedicated low-level lighting feature can help someone find the bathroom at night without switching on the brightest lights. Some fixtures have a built-in night-light mode. Others can be paired with a compatible control. The right option depends on the existing wiring, fixture instructions, and the needs of the people using the room.
A night light should complement, not replace, safe general illumination. Be mindful of glare and avoid placing a bright source where it shines directly into someone’s eyes from bed or from the doorway. Soft, indirect light near the floor can be more comfortable for nighttime use than a powerful ceiling light.
How do you plan the vanity lighting?
Mirror lighting often has the biggest effect on how useful a bathroom feels. When light comes only from above, the brow and chin can cast shadows on the face. Side lighting can reduce those shadows, while a wide, well-designed bar above the mirror can provide a workable alternative when side wall space is limited.
Before shopping, measure the mirror, vanity, and available wall area. Note the distance between the mirror and any side walls, medicine cabinet, trim, or shelving. Then compare those measurements with the fixture’s overall width, mounting plate, and shade projections. Product dimensions can be easy to overlook in a showroom or online listing, yet a fixture that does not fit the space can require a different choice or additional installation work.
Consider how the light reaches the face. A fixture with diffused light may be more comfortable than exposed bright lamps. If you choose a bar above the mirror, look for a design that spreads light over a broad area and does not create a sharp band of brightness. If using sconces, think about whether their height and position will illuminate the face evenly for the people who use the bathroom. There is no universal mounting measurement that works for every mirror, fixture, and household.
Finally, consider the mirror itself. A large mirror reflects more light but can also reflect a bare lamp directly into the eyes. A medicine cabinet may constrain where a fixture can go. A backlit mirror can add a soft glow, but it may not provide enough forward-facing illumination for detailed tasks. If you are deciding between mirror lighting and separate fixtures, compare what each option does in the room rather than choosing based on appearance alone.
Think about the mirror from the positions where it will actually be used. A seated person may need a different light distribution than someone standing at a tall vanity. If several people share the bathroom, compare their typical height and routine before settling on a fixture position. The mirror, wall lights, and sink should work together, with enough clear space to use the basin without bumping a shade or reaching around a fixture.
Shades also change how well a vanity fixture performs. A downward-facing shade may send plenty of light onto the counter but not enough toward the face. An upward-facing shade can brighten the ceiling and soften the room, yet leave the mirror less evenly lit. Diffusing material can reduce the harshness of the lamp, while an exposed bulb can produce a strong reflection in a mirror. Look at the fixture from the front and from the angles at which a user will stand.
When the bathroom has a wide double vanity, one narrow central fixture may not cover both sinks evenly. Two mirror areas may need separate sources, or a longer fixture may better distribute the light. Make sure each sink and mirror has a useful amount of illumination, and avoid placing a bright lamp exactly where it will create glare. For a very small vanity, a compact fixture can be more appropriate than an oversized bar that crowds the mirror and wall.
For a room used for careful grooming, choose light that makes details easy to see without producing a harsh contrast between the face and the rest of the room. It can help to turn on the other room lights while evaluating the vanity source. If the mirror area looks bright but the surrounding room is very dark, the contrast may feel uncomfortable. A balanced mix of task and general lighting often feels more natural than maximizing brightness at a single point.
Do not assume that adding more fixtures will automatically solve uneven lighting. Their placement, shade, lumen output, and control arrangement all affect the result. If a remodel gives you the option to move electrical points, discuss the intended mirror and fixture dimensions before the work begins. For an existing bathroom, select products that fit the present electrical locations unless a qualified professional has reviewed the changes you want.
How bright should bathroom lights be?
Brightness is usually described in lumens, while watts describe energy use. When comparing LED products, look at the lumen figure and the light distribution, not just the wattage. A bathroom with dark finishes or little natural light may need more illumination than a bright room with reflective surfaces. The ceiling height, room size, and number of fixtures also affect the result.
Instead of choosing one very bright fixture, several well-positioned sources can make the room easier to use. General ceiling light can cover the room, with separate mirror lighting for grooming. If one wall is especially dark or a shower is set behind a partition, that area may need its own light source, subject to proper product ratings and installation.
Look for dimmability only when the fixture, bulbs, and control are compatible. A dimmer can make the room more comfortable at night or for a bath, but incompatible equipment may flicker, buzz, or fail to dim smoothly. Check the instructions for each part of the system. If the switch wiring or control setup needs to change, have an electrician evaluate it rather than assuming any dimmer will work.
Light output also changes with the shade. Opaque or dark shades can direct more light upward or downward and reduce the amount that reaches the room. Frosted or diffusing materials can soften a source but may lower its apparent brightness. Read the product information and, where possible, view the fixture illuminated before making the final selection.
What color temperature and color quality should you choose?
Color temperature, measured in kelvins, describes whether light appears warmer or cooler. Lower values tend to look warmer and more amber; higher values look cooler or bluer. In a bathroom, consistency is often more important than chasing a particular number. If the vanity, ceiling, and shower lights look noticeably different from one another, the room can feel visually uneven.
Many homeowners prefer a neutral or slightly warm light for an inviting room, while some choose a cooler appearance for a crisp, bright effect. Consider the finishes and paint in the room. Warm light can make cream, wood, and warm stone appear richer; cooler light can alter how those colors look. If the bathroom is used for makeup or selecting clothing, pay attention to how accurately the light renders colors. Product packaging may provide a color-rendering rating, often labeled CRI. Compare it alongside color temperature rather than relying on the Kelvin number alone.
When replacing only one fixture, try to match the existing light color, or plan a coordinated change across the room. Samples or bulbs can help you see how a color looks against your actual tile and paint. Remember that daylight changes throughout the day, so a fixture that looks balanced at noon may feel different at night. If you have a dimmable system, test the light at the levels you expect to use.
What does a bathroom fixture’s moisture rating mean?
Bathrooms contain both dry and moisture-prone locations. Steam, splashing, and direct water exposure vary by fixture position. A product marked for damp locations is intended for moisture in the air, while a wet-location product is intended for greater exposure to water, as specified by its manufacturer. These labels are not interchangeable, and the product instructions should be followed.
Do not choose a fixture for a shower or tub area based only on style, price, or an online photograph. Confirm the exact listing and installation conditions for the intended location. Some products have specific requirements for a shower enclosure, ceiling, or other placement. A fixture’s rating can also depend on how it is installed, so a product appropriate in one position may not be appropriate in another.
If you cannot tell whether a location counts as damp or wet, or the product label is missing or unclear, pause before installation. A licensed electrician can assess the space and verify whether the selected fixture, wiring, and mounting arrangement are suitable. This is especially important when replacing a fixture over a shower, changing a recessed light, or adding a new circuit.
How do you match a fixture to bathroom size and style?
Scale matters. A small fixture over a wide mirror may look lost and leave the sides dim. A large fixture in a narrow powder room may dominate the space or conflict with a door, cabinet, or mirror. Compare fixture width and projection with the room’s actual dimensions. For an online purchase, check the measured drawing, not just the product photo.
Choose a finish that works with the room’s hardware, but it does not need to match every metal exactly. Repeating one finish in several places can create a coordinated look. Mixing finishes can work when there is a clear reason and the overall palette stays consistent. The fixture’s shade shape and light direction will affect the mood as much as the finish.
In a small bathroom, a low-profile ceiling fixture and compact mirror lights can preserve visual space. In a larger room, multiple lighting points may make the room feel more balanced. If the bathroom has a strong design feature such as patterned tile, use lighting that complements it without creating glare or harsh reflections. A fixture should be visually pleasing when switched off and useful when turned on.
A powder room often has a smaller mirror, less floor area, and fewer lighting tasks than a full bathroom. A carefully selected mirror light and modest general source may be enough. Check that the fixture does not crowd the mirror or make the room feel visually compressed. Because guests may use the room at different times, choose a light that is clear but not glaring, and consider whether the switch is easy to find from the doorway.
A primary bathroom may have separate sink areas, a shower, a tub, and multiple surfaces that reflect light differently. Plan each zone rather than expecting one central ceiling fixture to serve the whole space. A wall or partition can block light, and a dark tile finish may absorb more light than a pale one. Separate lighting points can address those differences, provided each product is appropriate to its location and installed correctly.
For a shared bathroom, consider whether users need different light levels at different times. Separate controls can let one person use the mirror lighting while another prefers dimmer general light. In a bathroom used by children or older adults, clear illumination of the floor, doorway, and changes in level can be useful. Avoid relying on decorative accent lighting to illuminate paths or areas where someone needs to see obstacles clearly.
Finish choices can affect how the fixture relates to the room. A dark fixture can stand out against a pale wall, while a light or metallic finish may blend in. Reflections from polished surfaces can make a bright light feel stronger, while matte materials may look softer. Take a sample or product photograph into the room if possible, and view it under both daylight and the existing bathroom lights before committing to a coordinated set.
Should bathroom lights be on separate switches?
Separate controls let you choose the lighting level for different activities. For example, you might want vanity lights without the ceiling light for a quiet nighttime visit, or brighter general lighting while cleaning. A separate control for an exhaust fan may also make the room simpler to use, although the fan and lighting arrangement depends on the existing wiring and equipment.
Controls may include ordinary switches, dimmers, timers, or smart devices. Before buying a control, confirm compatibility with the fixture or lamp type. Some LED products require a particular dimmer; others are not dimmable. Smart controls can depend on a neutral conductor, wireless network, hub, or other requirements. Review the manufacturer’s instructions and the electrical setup before choosing a device.
Adding a new switch or dividing one circuit into multiple controls can involve work inside walls or at the electrical panel. Do not assume that a convenient-looking switch can be added without checking the wiring and applicable requirements. A professional can explain whether a control change is practical and what needs to be updated.
What should you check before buying?
Use a short checklist before placing an order. It can prevent a return, an installation delay, or a fixture that does not perform as expected.
- Measure the space. Record the mirror width, ceiling height, mounting area, and clearances around doors, cabinets, and shower enclosures.
- Identify the location. Decide whether the fixture will be in a dry area, exposed to damp air, or exposed to water, then verify the product’s suitability for that exact location.
- Check light output and appearance. Compare lumens, color temperature, color rendering information, shade design, and whether the product is dimmable.
- Review the electrical details. Check voltage, lamp type, mounting method, dimmer compatibility, and any installation conditions shown in the product instructions.
- Inspect the mounting arrangement. Confirm the fixture can attach to the existing electrical box or that a qualified installer can make the needed changes.
- Plan maintenance. Think about how to clean the shade and replace or service components safely once the fixture is in place.
- Keep documentation. Save the label, instructions, and product information so they are available during installation and future maintenance.
If you are comparing several options, write down the key details in one place. A simple note with dimensions, light output, color, moisture rating, and control compatibility makes it easier to compare products on equal terms. A beautiful fixture is not a good fit if it is too large for the wall, not rated for its location, or incompatible with the existing controls.
Can you replace a bathroom light fixture yourself?
Some homeowners are comfortable with basic household maintenance, but electrical fixture replacement is not simply a matter of matching colors of wires. The existing wiring may be old, damaged, incorrectly connected, or unsuitable for the new fixture. Bathroom locations also introduce moisture considerations. Work involving a circuit, switch, electrical box, grounding, or a fixture exposed to water needs careful evaluation.
Do not work on energized wiring. Turning off a wall switch is not a reliable way to isolate power at the fixture. Even after a breaker is turned off, the circuit should be verified as de-energized using appropriate equipment and safe procedures. If you are not trained to do that, do not open the fixture or electrical box.
Stop and seek professional help if the wiring is unfamiliar, the box is loose, there are signs of heat or water damage, the fixture does not match the existing mounting, or the work requires a new circuit or control. A licensed electrician can assess whether the existing wiring and support are suitable and install the fixture in accordance with its instructions and applicable requirements. For background on choosing a qualified professional, see this guide to hiring an electrician.
What are signs that a bathroom light needs attention?
A fixture that flickers, repeatedly stops working, produces a burning odor, becomes unusually hot, or shows scorch marks should not be ignored. Water stains, corrosion, loose mounting, crackling sounds, or a breaker that trips repeatedly can also point to a problem. A single failed lamp may be a simple replacement issue, but repeated failures or symptoms that return after a lamp change call for inspection.
If you notice heat, smoke, a burning smell, or sparking, do not touch the fixture. If it is safe to do so, switch off the circuit at the breaker and keep people away. If there is an active fire or immediate danger, contact emergency services. Do not restore power until the cause has been checked by a qualified professional.
For less urgent issues such as intermittent flickering, note when it happens and whether other lights or appliances are affected. That information may help an electrician narrow down the problem. Avoid repeatedly resetting a breaker that trips, and do not remove a fixture to investigate unless you are qualified to work safely.
How can you keep bathroom fixtures in good condition?
Follow the product’s cleaning and maintenance instructions. Turn the light off and allow it to cool before cleaning, and do not spray water or cleaning products directly onto a fixture. Use a soft, suitable cloth and avoid abrasive materials that can damage finishes or lenses. For fixtures near a tub or shower, be especially careful not to introduce moisture into electrical components.
Check that wall-mounted fixtures remain secure and that shades, lenses, or covers are intact. Replace damaged parts only with components approved for the product. Do not bypass a cover or substitute an unlisted part because it appears to fit. If a fixture has corrosion, moisture inside its housing, or damaged wiring, stop using it and arrange an inspection.
When replacing a lamp, use the type and maximum rating specified by the fixture manufacturer. A lamp that produces more heat than the fixture is designed for can create a hazard. LED lamps often use less energy than older lamp types, but compatibility and enclosure requirements still matter. Keep the product paperwork so that the correct replacement can be identified later.
What should you consider in an older bathroom?
Older bathrooms may have dated fixtures, but age alone does not tell you whether the wiring is safe or unsafe. Renovations, prior repairs, moisture, and the condition of boxes and connections all matter. If you see brittle insulation, loose wires, corrosion, missing covers, or signs that a fixture has been exposed to water, have the installation evaluated before choosing a replacement.
A new decorative fixture may not correct an underlying issue. For instance, a loose electrical box needs attention before a heavier fixture is attached. A fixture change may also reveal that the box is not positioned where the new product needs it, or that an older control is incompatible with a modern dimmable LED. Include these possibilities in your planning rather than assuming the replacement will be a direct swap.
During a larger bathroom remodel, coordinate lighting decisions with the electrician and other trades before walls and ceilings are closed. This gives the team a chance to consider fixture locations, switches, mirror dimensions, ventilation, and access for future service. If you are uncertain about an existing electrical issue, an electrical troubleshooting visit can help identify the concern and the next steps.
How do bathroom lighting choices affect energy use?
LED fixtures and lamps can use less electricity than older incandescent options, but the amount depends on the product and how long it is used. Compare the product’s energy information and expected light output. Choosing a lamp that is too dim may lead people to add more lighting later; choosing more output than needed can create glare and unnecessary use.
Controls can help reduce use when they suit the household. A dimmer may allow lower light levels for routine use, while a timer can help manage a fan or other equipment designed for timed operation. Occupancy sensors can be useful in some bathrooms, but consider whether they may turn lights off unexpectedly when someone is still in the room. Choose controls around the room’s actual use and verify compatibility with the fixture.
Energy efficiency should not override product suitability. A lamp must fit the fixture, meet its ratings, and be appropriate for the location. Read the product details rather than assuming every LED lamp can be used in any enclosed or damp fixture.
How do you coordinate lighting with an exhaust fan?
The exhaust fan helps manage moisture and air quality, while the lights serve visibility. Some bathrooms have a fan and light combined in one unit. Others have separate equipment. If you are replacing a combined fixture, check that the new product fits the ceiling opening, duct arrangement, electrical connections, and room requirements. A unit that looks similar may have different dimensions or wiring needs.
Keep access and maintenance in mind. Fans collect dust and need periodic care according to the manufacturer’s instructions. A light and fan on separate controls can offer flexibility, but changing the controls may require electrical work. If a fan is noisy, weak, or not clearing moisture, replacing only the light may not address the underlying ventilation issue.
For an existing system, look at the product labels and note how it is controlled before shopping. Ask an electrician or HVAC professional to clarify which parts of the project fall within their scope. Avoid assuming that a new combination fan-light can be connected safely to an old setup without checking it.
What mistakes should you avoid?
A few common selection mistakes can make a bathroom less comfortable or create an installation problem. A little planning helps prevent them.
- Using only one overhead source. This can leave the mirror dim even when the room’s floor is bright. Add task lighting where needed.
- Ignoring moisture exposure. Choose a fixture for its actual location and follow its instructions, especially near showers and tubs.
- Buying by appearance alone. Check dimensions, brightness, light distribution, listing, and control compatibility as well as finish.
- Mixing very different light colors. Different color temperatures can make adjacent areas appear mismatched. Coordinate the sources or test them together.
- Overlooking glare. Exposed lamps and reflective mirrors can be uncomfortable. Consider shade design and viewing angles.
- Assuming an old box is ready for any fixture. The box, mounting, and wiring may need evaluation, especially for a heavy or differently shaped product.
- Choosing a dimmer without checking compatibility. Confirm that the dimmer and LED fixture or lamps are designed to work together.
- Trying to diagnose a hazard by touch. Heat, odor, sparking, water, or damaged wiring are reasons to stop using the fixture and get qualified help.
How can you build a simple bathroom lighting plan?
Before purchasing anything, sketch the room and mark the mirror, vanity, shower, tub, door, cabinets, and existing electrical points. Then label the areas where light is most needed: the mirror, the general room, and any darker section such as a shower alcove. This rough plan makes gaps easier to spot.
- Start with the tasks. List what happens in the room, including grooming, bathing, cleaning, and nighttime visits.
- Choose the main light sources. Decide whether the ceiling needs a flush mount, recessed lights, or another appropriate option, and select mirror lighting that reduces shadows.
- Match products to locations. Check moisture suitability and product instructions for every fixture, especially in areas exposed to steam or water.
- Coordinate appearance and controls. Compare color temperature, finish, dimming capability, and switching arrangement.
- Verify the installation conditions. Review dimensions and existing electrical points, then ask a licensed professional to assess wiring or changes beyond a straightforward product selection.
Use the plan to compare options rather than buying several fixtures at once based only on pictures. If you already have a fixture you like, note its dimensions and light quality before replacing it. If the bathroom is being remodeled, discuss lighting before finishing surfaces so fixture locations and control needs can be addressed in the right sequence.
When should you call an electrician?
Call a licensed electrician when you need a new fixture installed and are unsure about the wiring, when the box or mounting is damaged, or when you want to add or relocate a switch, outlet, or circuit. Professional help is also appropriate for recurring flicker, unexplained breaker trips, moisture or corrosion inside a fixture, and any signs of overheating or damaged wiring.
A qualified professional can examine the existing electrical conditions, explain what work is needed, and provide an upfront price before work begins. The exact scope depends on what is found at the home and on the fixture you choose. Do not rely on a phone description alone to determine the exact repair price; an on-site assessment is needed to identify the work.
AAA Electrical Services provides residential electrical service in the Sacramento area. The team can discuss your lighting concern and confirm scheduling. For a broader overview of fixture selection, you can also read this guide to choosing light fixtures.
Call to ask about bathroom lighting service
Frequently asked questions
Can I use any light fixture in a bathroom?
No. A fixture must be appropriate for the location where it will be installed. Check whether the product is listed for the moisture exposure in that area, and follow the manufacturer’s installation instructions. A fixture suited to a dry wall near the door may not be suitable for a shower enclosure.
Are wall sconces better than a light above the mirror?
Neither arrangement is right for every bathroom. Side sconces can provide balanced light from both sides of the face, while a properly selected vanity bar can work well where wall space is limited. Consider the mirror width, fixture size, light distribution, and available space before choosing.
Do bathroom lights need to match?
They do not have to be identical, but a consistent light color and complementary finishes help the room feel coordinated. Different styles can work together if they share a visual element, such as a finish or shape, and provide the needed lighting in their respective locations.
Why does my bathroom light flicker?
Flickering can have several causes, including a failing lamp, an incompatible dimmer, a loose connection, or another electrical issue. If changing a compatible lamp does not resolve it, or if there is heat, odor, noise, water damage, or repeated breaker tripping, stop using the fixture and arrange a professional inspection.
Should I replace bathroom lights during a remodel?
A remodel is a useful time to review fixture positions, controls, mirror dimensions, and moisture exposure before the walls or ceiling are finished. You do not necessarily need to replace every fixture, but it is sensible to have the existing setup checked if you are changing the layout or adding new lighting.
Plan for both appearance and safe use
The most useful bathroom lighting plan combines clear mirror light, comfortable general illumination, and fixtures suited to their locations. Measure before you shop, compare product instructions and light quality, and treat flickering, heat, moisture, or damaged mounting as reasons to get professional help. A little planning can make the bathroom easier to use every day and help you choose fixtures that fit the room.