
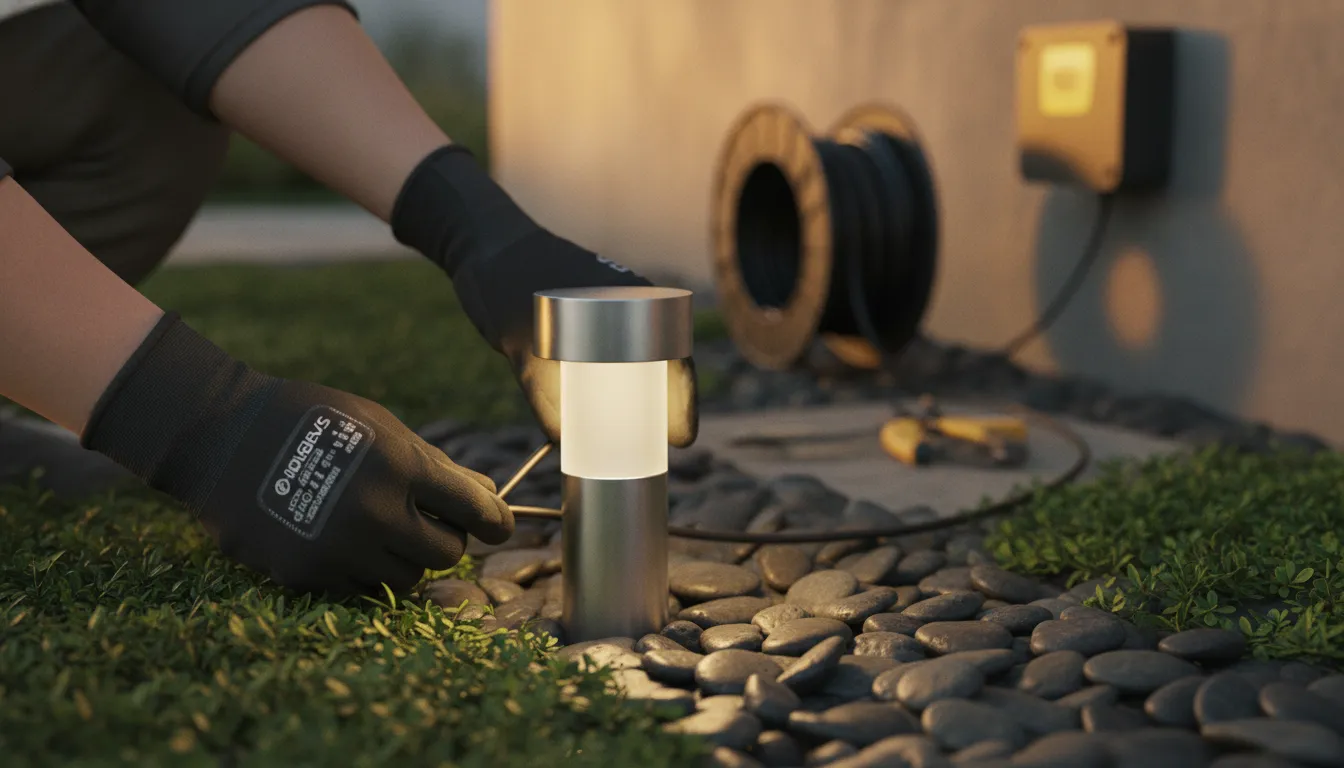
Outdoor lighting can make paths easier to see, help family and guests move safely, and bring attention to the features you love about your yard. But a reliable setup takes more than placing a few lights in the ground. You’ll need to plan fixture locations, choose outdoor-rated components, route cable safely, and connect the system according to the manufacturer’s instructions. This guide explains how to install outdoor lighting step by step, from mapping your layout to testing each fixture after dark. You’ll also learn when to pause and call a licensed electrician, especially if your project involves household wiring or electrical concerns.
Key Takeaways
- Plan the layout first: Mark paths, steps, focal points, fixture locations, cable routes, and transformer placement before installation.
- Choose compatible outdoor-rated components: Match fixtures, cable, connectors, and transformer capacity to your plan, and follow each product’s instructions.
- Test and adjust the system after dark: Check every light, refine fixture angles, and contact a licensed electrician for household wiring or electrical issues.
Gather Tools and Materials for Landscape Lighting
Gather your fixtures, cable, transformer, connectors, and tools before you start. Check the product instructions first, since parts and installation requirements vary by system. Low-voltage lighting is a common choice for residential yards, but electrical work beyond the low-voltage system may require a licensed electrician.
Low-voltage fixtures, cable, transformer, and waterproof connectors
For a typical low-voltage setup, you’ll need compatible fixtures, landscape cable, a transformer, and connectors rated for outdoor use. Add the wattage of all planned fixtures, then choose a transformer with enough capacity for the total load. Confirm the recommended cable gauge, connector type, and maximum run length in the product instructions.
Low-voltage systems are widely used in residential landscapes and carry a lower shock risk than line-voltage lighting. Even so, follow the manufacturer’s safety guidance, particularly near pools, ponds, and other wet areas. This guide to low-voltage landscape lighting outlines common components and options for outdoor installations.
Outdoor-rated components, controls, and manufacturer instructions
Choose fixtures, cable, connectors, and mounting hardware designed for outdoor use. Ground stakes work for many garden beds, while steps, walls, eaves, or paved areas may need different mounting options. Check product labels and instructions to make sure each component suits its location and exposure to moisture.
A timer, photocell, or compatible smart control can help set when your lights turn on and off. Before installation, read the instructions for both the fixtures and transformer, and keep them handy while you work. The VOLT Lighting guide explains common mounting options and fixture considerations. If your project involves household wiring or electrical issues, contact a licensed professional through AAA Electrical Services.
Shovel, wire cutters, and other useful tools
Set out a flat shovel for preparing a cable trench and wire cutters or strippers suited to your cable. A tape measure, work gloves, a mallet for ground stakes, and a flashlight can also come in handy. Use tools that fit the product instructions, and take care not to nick or crush the cable during installation.
Plan your cable route and check for underground utilities before digging. Bury or protect the cable as directed by the manufacturer and local requirements. Once the connections are made, test every fixture. If one doesn’t turn on, check its connection first, since a loose splice is a common cause. This installation demonstration from Ask This Old House shows how to route cable and check that fixtures work.
Plan Your Landscape Lighting Layout
Before choosing fixtures, think about how you use your yard after dark. A clear plan can make paths and steps easier to see while giving trees, gardens, and gathering areas a comfortable glow. Sketch your property, mark where people walk and spend time, then note possible fixture and cable locations. Planning ahead helps you spot practical issues before installation, including glare, uneven coverage, and areas that may need more light.
Mark walkways, entrances, steps, and outdoor living areas
Walk around your property after sunset and mark areas where better visibility would help. Include entrances, walkways, stairs, changes in elevation, and routes between the house and spaces such as a patio or garden. Pay attention to the top and bottom of steps, where shadows can make it harder to see where to place your feet.
On your sketch, note where people sit, gather, and move through the yard. This helps you plan lighting that supports those activities without shining directly into someone’s eyes. A landscape lighting planning guide recommends considering safety, layout, and long-term care from the start. Use your notes as a practical first draft, then refine fixture positions to fit the space.
Choose focal points, such as trees, garden features, and architecture
Pick a few features you’d like to notice after dark. A mature tree, garden bed, water feature, or architectural detail can become a focal point. You don’t need to light everything. Leaving some areas darker gives the eye room to rest and helps illuminated features stand out.
Consider what each fixture will highlight and where you’ll view the result. Upward-facing light can emphasize a tree’s shape, while a softer wash can reveal texture on a wall. Avoid aiming fixtures toward windows, seating areas, or neighboring homes. The goal is a balanced scene, not a uniformly bright yard. TLC Incorporated suggests focusing on features such as entryways, paths, and trees and leaving some space unlit.
Map fixture locations, cable routes, and transformer placement
Mark proposed fixture locations on your sketch, then draw the cable routes that connect them. Keep routes practical and accessible, and note obstacles such as paving, planting beds, and retaining walls. Also mark a possible transformer location near a suitable outdoor power source, where you can reach the unit for adjustments and maintenance.
A detailed plan lets you review fixture spacing and identify installation challenges before work begins. It may also help you determine whether separate cable runs make sense. Follow the manufacturer’s instructions for cable routing and transformer placement, and check local requirements before installation. Planning the layout in advance can help prevent uneven spacing, excess brightness, and glare.
Plan for glare, plant growth, voltage drop, and future additions
Check your proposed fixture positions from the places where people will see the lights, including patios, walkways, and rooms near windows. Make sure beams won’t shine into someone’s eyes or spill toward a neighbor’s home. Consider how shrubs and trees may grow, too. Foliage can block a beam over time, so leave room to trim plants or adjust fixtures.
Cable length can affect the voltage reaching lights, which may cause uneven brightness on longer runs. Check the fixture and transformer instructions for guidance on cable length and layout. If you’re unsure how to account for voltage drop, ask a licensed electrician. It’s also useful to leave room in your plan for future additions, such as lighting for a new path or seating area. This overview of common installation mistakes explains why plant growth and fixture aim deserve attention from the start.
Choose the Right Landscape Lighting Fixtures
Choose fixtures according to how you use each part of your yard and what you want to highlight. Start with practical needs: make walkways and steps easier to see, then add lighting for trees, architectural details, and outdoor gathering areas. Combining several fixture types often creates a more comfortable, balanced effect than relying on one bright light.
Before you buy, consider where each fixture will go, what it needs to illuminate, and how the light will look from nearby windows, seating areas, and neighboring properties. Check product instructions and ratings to confirm that fixtures and connectors suit their intended outdoor locations. If your project involves line-voltage wiring or electrical work at the panel, ask a licensed electrician for help. Sacramento-area homeowners can contact AAA Electrical Services for residential electrical work.
Add path lights to walkways and entrances
Path lights help people see where they’re walking and make entrances easier to find after dark. Place them along walkways, driveways, and garden paths, spacing them to show the route without creating a runway effect. Staggering fixtures instead of placing them directly opposite each other can create a more natural pattern and help limit glare.
Consider the mature size of nearby plants when choosing locations. Shrubs and ground cover can eventually block a fixture or its light, so leave room for growth and routine maintenance. The Lumens landscape lighting guide shares additional placement tips, including typical path light height. Near an entrance, aim for clear visibility of the approach and threshold without shining light into the home or a visitor’s eyes.
Use spotlights, floodlights, and well lights for trees and architectural features
Spotlights and uplights can draw attention to a tree, textured wall, column, or other feature. Aim the beam at the feature, not at a window or seating area. A narrow beam can emphasize a trunk or architectural detail, while a wider beam can cover more of a canopy or wall.
Floodlights cast light across a broader area, so they can suit larger features and open spaces. Well lights sit at or near ground level and can illuminate trees or walls without a fixture standing above the landscape. Place them where foot traffic, lawn equipment, and water are less likely to damage them. The Vision Outdoor Lighting guide explains how different fixture types can highlight outdoor features. Check the beam angle after dark and adjust it to keep light where you want it.
Add step, deck, and hardscape lights to stairs, patios, and retaining walls
Steps, decks, and changes in elevation need lighting that helps people see edges and transitions. Step lights can be mounted on stair risers or nearby walls to illuminate the treads. Position them so light falls across the walking surface rather than directly into someone’s eyes as they climb or descend.
Deck lights can attach to railings, posts, or nearby structures. For patios and retaining walls, choose fixtures designed for the mounting surface and the conditions they’ll face, such as moisture or foot traffic. Follow the product instructions before mounting or burying a fixture. VOLT Lighting’s fixture guide describes common uses for step and deck lights. If installation requires new wiring or changes to existing electrical work, have a licensed electrician assess the setup.
Use downlights and string lights for ambient illumination
Downlights create a soft overhead glow when mounted in trees, under eaves, or on other suitable structures. Aim them toward the ground to add comfortable light to a patio or seating area without flooding it with brightness. For a natural effect beneath a tree, place the fixture to cast light through the branches, while keeping the beam away from neighbors’ windows.
String lights can add a relaxed feel to patios, pergolas, and outdoor dining areas. Choose lights rated for outdoor use and follow the instructions for mounting, support, and connection. Keep them clear of walkways and places where wind or contact could damage them. This Old House’s landscape lighting guide covers downlighting and string lights, as well as other ways to layer outdoor lighting. Pair ambient fixtures with path or step lights so decorative lighting does not have to provide all the visibility.
Match fixture ratings, beam spread, and color temperature to the setting
Check each fixture’s outdoor rating and installation requirements before buying. A fixture exposed to rain, soil, sprinklers, or foot traffic needs to be designed for those conditions. Also confirm that the cable, transformer, and connectors are compatible with the fixtures and suitable for your layout.
Beam spread affects how widely light reaches. A narrow beam can highlight a tree trunk or column, while a wider beam may suit a broad wall or garden bed. Color temperature shapes the overall feel: warmer light often feels comfortable around patios and planting, while cooler light can look crisp on some modern surfaces. When possible, test a fixture after dark before installing several. Govee’s outdoor lighting buying guide outlines specifications to compare, including beam angle, brightness, power type, and durability.
Follow Landscape Lighting Safety Essentials
Landscape lighting adds visibility around paths, steps, and entrances, but outdoor electrical work needs careful planning. Before installing anything, read the product instructions, check local requirements, and make sure your layout accounts for buried utilities and existing irrigation. Use components designed for outdoor conditions, and keep electrical connections protected from moisture.
Low-voltage systems still connect to your home’s electrical supply through a transformer. Switch off and unplug the system before handling its connections, and don’t work on wiring while it’s energized. If a project involves line-voltage wiring, a new circuit, or an electrical problem you can’t identify, leave the work to a licensed electrician. A qualified professional can check that the installation is appropriate for your home and meets applicable requirements.
Stop if you notice damaged wires, a breaker that trips repeatedly, or a receptacle that feels warm or looks discolored. Avoid improvising a repair or using a connection that isn’t intended for outdoor use. These precautions help protect your household, your property, and the lighting system.
Locate underground utilities before digging
Have underground utilities marked before digging trenches or placing stakes. Electrical lines, gas pipes, water lines, and communications cables may run through your yard, even when their locations aren’t obvious. Contact your local utility-marking service and wait for the markings before you begin. If a planned cable route crosses a marked area, revise the layout instead of digging there.
After utilities are marked, follow the cable manufacturer’s instructions and local requirements for installation. Plan around irrigation lines, and route cable where it’s less likely to be damaged by gardening or routine yard work. Mapping the route first can also help you avoid rework and place fixtures where they’re easier to maintain. See this guide to common landscape lighting installation mistakes for more planning considerations.
Use outdoor-rated equipment and a GFCI-protected receptacle
Choose fixtures, cable, connectors, and controls that are rated for outdoor use. Outdoor conditions expose equipment to moisture and temperature changes, so indoor products may not be suitable. Check labels and manufacturer instructions to confirm that each component is appropriate for its location, and use connectors designed for the cable and fixture.
The transformer should connect to a suitable outdoor receptacle with GFCI protection. A ground-fault circuit interrupter, or GFCI, is designed to interrupt power when it detects a ground fault, helping reduce the risk of electric shock. Don’t use an exposed connection or an indoor extension cord as a substitute for a suitable outdoor power source. Review recommendations for outdoor-rated equipment and GFCI protection before choosing components.
Turn off power before handling transformer connections
Before connecting or adjusting wires at the transformer, switch off the system and unplug it from the receptacle, when the manufacturer’s instructions allow. Never handle wiring while the equipment is energized. Check the manual for the correct connection sequence, compatible cable and connectors, and the transformer’s load limits.
Keep the transformer accessible and install it as directed by the manufacturer. Don’t open the unit or attempt repairs unless the product instructions specifically identify the work as suitable for homeowners. If you notice damaged insulation, corrosion, overheating, or signs of water inside the equipment, leave it disconnected and contact a licensed electrician. This outdoor lighting installation guide also advises turning off power before electrical work begins.
Call a licensed electrician for line-voltage wiring or electrical issues
Low-voltage landscape lights use a transformer to supply power to the fixtures, but the transformer connects to your home’s electrical supply. Have a licensed electrician handle work on household wiring, a new circuit, or a receptacle. Line-voltage landscape lighting also requires professional installation to help ensure the work follows applicable electrical codes.
Stop the project if you find exposed or damaged wiring, a breaker that trips repeatedly, or a warm or discolored receptacle. Don’t bypass a breaker or cover damaged insulation as a workaround. A licensed electrician can identify the cause and recommend a suitable repair. Sacramento-area homeowners can learn about AAA Electrical Services’ residential electrical services for help with electrical work.
Install Landscape Lighting Fixtures and Cable
Once you’ve mapped your lighting plan and gathered compatible, outdoor-rated components, install the fixtures and cable according to the product instructions. Careful placement and protected connections help your lights work reliably through everyday yard use and changing weather. If the installation involves household wiring, or you’re unsure whether an existing outdoor outlet is suitable, have a licensed electrician assess it. Sacramento-area homeowners can contact AAA Electrical Services for help with residential electrical work.
Inspect components and mark fixture locations
Unpack each fixture and check for cracks, loose parts, or missing hardware. Make sure your lights, cable, connectors, and transformer are compatible, then read the manufacturer’s instructions before installation. Mark each fixture location with a stake or another visible marker. Walk the route from the angles where people will use it, including paths, windows, and seating areas. This gives you a chance to catch potential glare, dark gaps, or awkward placements before you dig. A thoughtful layout can help avoid common problems such as poor coverage or early system failure, as JD’s Landscaping Services explains.
Prepare stable bases and position fixtures
Set each light on firm, even ground so it stays upright and keeps its intended direction. Many low-voltage fixtures come with ground stakes, which work well in soft soil. If the ground is hard, rocky, or uneven, don’t force the stake, since you could damage the fixture. Loosen the soil or choose a nearby location with a more stable base. Keep lights away from mower paths, sprinkler heads, and spots where people might trip over them. Place path lights beside, rather than directly in, walkways to illuminate the route without shining into people’s eyes. VOLT Lighting’s guide provides an overview of common fixture styles and placement considerations.
Route cable along the planned path, following product instructions and local requirements
Lay out the cable along your planned route, keeping it near the edge of a walkway or garden bed where routine digging is less likely to reach it. Before breaking ground, check for underground utilities and follow the cable manufacturer’s instructions for burial depth and protection. Requirements can vary by product and location, so don’t assume the same depth works for every installation. Use a flat shovel to make a narrow trench, and take care around tree roots, irrigation lines, and other buried systems. The Ask This Old House installation guide shows one approach to routing landscape lighting cable; use your product instructions and local requirements as your guide.
Leave service slack and protect cable from damage
Leave a little extra cable near each fixture and at the transformer. This service slack makes it easier to reposition a light, replace a connector, or complete maintenance without pulling on the entire cable run. Avoid stretching wire tightly between fixtures, and keep it away from sharp edges, digging tools, and areas where it could be crushed. Don’t bury connections where you can’t reach them later. Before covering the cable, check for kinks, exposed sections, and locations where water could collect. Properly protecting the wire from moisture and yard work helps the system hold up over time, a point also highlighted in JD’s Landscaping Services’ installation advice.
Connect fixtures with compatible waterproof connectors
Choose connectors rated for outdoor use and designed to work with your cable and fixtures. Follow the connector’s instructions carefully: some types pierce the cable insulation, while others require you to prepare the wire ends first. Check that every connection is secure and protected from moisture. Avoid makeshift fixes such as ordinary indoor wire nuts or exposed electrical tape, which may not provide a dependable outdoor seal. Keep connections accessible for future inspection, but position them away from standing water and places where gardening tools could strike them. If a connector is loose, corroded, or incompatible with the cable, replace it with a suitable part before turning on the system.
Aim and layer lights to reduce glare and light spill
After positioning and connecting the fixtures, turn on the system and adjust each beam from the places where people will see it. Aim path lights at the walking surface, and direct spotlights toward trees or architectural details rather than windows or neighboring homes. Layer different fixtures to provide useful coverage: path lights for safe movement, accent lights for focal points, and softer illumination around seating areas. Once it’s dark, walk the yard and look for glare, overly bright spots, or areas that still feel dim. Make small adjustments until the lighting feels balanced. VOLT Lighting recommends checking fixture aim with the lights on, which helps you judge the effect in real conditions.
Connect Landscape Lighting to a Transformer
A low-voltage transformer converts household power to the lower voltage used by many landscape lighting systems. To help your lights work reliably, match the transformer to the fixture load, plan cable runs carefully, and follow the instructions for your specific equipment. Transformer designs vary, so don’t rely on a wiring diagram from another model.
Before starting, check whether your transformer plugs into an outdoor receptacle or requires a hardwired connection. Use a GFCI-protected receptacle for plug-in equipment, and have a licensed electrician handle new household wiring or any work on line-voltage connections. AAA Electrical Services offers residential electrical services in the Sacramento area if you need help assessing your home’s electrical setup.
Keep the transformer accessible after installation. You’ll need to reach it to check connections, adjust settings, or troubleshoot the system. Planning the location and cable routes before you connect anything can also make future changes easier.
Add fixture wattages and choose a transformer with adequate capacity
Check the label or product instructions for each fixture’s wattage, then add the wattages for all the lights connected to the system. Choose a transformer that can support the combined load and is compatible with your fixtures’ voltage. Follow the manufacturer’s capacity guidance, and leave suitable room for any planned additions.
If you’re dividing the lights into separate runs or zones, record which fixtures belong to each one. This makes it easier to review the load and identify a problem later. Avoid estimating the total based on fixture count alone, since different lights can use different amounts of power. Landscape lighting guidance from NSL USA highlights the importance of selecting equipment suited to the installation.
Place the transformer near a suitable outdoor outlet, where you can access it
For a plug-in transformer, choose a spot near an outdoor GFCI-protected receptacle. Keep the transformer accessible for adjustments and service, and follow the manufacturer’s directions for mounting, clearance, and weather protection. Avoid locations exposed to standing water, sprinkler spray, or damage from gardening equipment.
Think about cable routes and possible additions before settling on a location. A convenient position can make it easier to check the system without disturbing plants or hardscaping. Planning ahead for landscape lighting changes can help you account for future adjustments. If the available outlet is not suitable, or the transformer needs hardwired power, have a licensed electrician assess the work.
Connect cable to the transformer terminals using its wiring diagram
Turn off and unplug the transformer before connecting low-voltage cable. Use the wiring diagram for your exact model to identify the correct terminals for each run. Some transformers have multiple terminals or voltage taps, so don’t assume the connections are the same across products. Prepare the cable ends and secure them as directed in the manufacturer’s instructions.
Before restoring power, check that the connections are firm and that no bare conductor extends beyond the terminals. Close the transformer enclosure as instructed, then turn the system on and check each fixture. If a light stays off, switch off the transformer before inspecting its connection. This Old House’s installation demonstration shows why checking the fixtures after connecting the system is an important step.
Account for cable length, voltage drop, and separate cable runs as needed
Voltage can drop along a low-voltage cable, especially when a run is long or carries a large fixture load. The result may be dimmer lights at the far end. Cable length and gauge, fixture wattage, and the layout all affect performance, so check the product instructions when planning your runs.
For a spread-out yard, separate cable runs may help distribute power more evenly. Some systems also provide different voltage terminals, but use them only as the manufacturer directs. NSL USA’s advice on landscape lighting explains how voltage drop can affect distant fixtures. Test the lights before covering or concealing cable, so you can make adjustments while connections remain accessible.
Set the timer, photocell, or other controls
Set the transformer controls to match how you use your outdoor spaces. A timer lets you choose operating hours, while a photocell responds to outdoor light levels. Some systems also work with smart-home controls. You might, for example, schedule path lights to come on in the evening and switch off later at night.
Follow the transformer instructions to set the clock, photocell sensitivity, or zones. Position the photocell as directed, since light from nearby fixtures can affect its readings. This Old House’s guide to landscape lighting explains common control options, including timers and photocells. After dark, check that the system switches on and off when you expect, then adjust the settings as needed.
Test and Adjust Your Landscape Lighting
Restore power and check every fixture
Once all fixtures and connections are in place, restore power at the transformer and walk your property to check each light. Confirm that every fixture turns on, and look for loose, exposed, or damaged connections. If a fixture stays off, check its connector first, since a loose or poorly made splice can interrupt power.
Follow the manufacturer’s instructions when testing the system. Turn off power before handling connections, and don’t touch household wiring. Check every light before covering or concealing cable so you can address any problems while connections remain accessible. VOLT®’s landscape lighting installation guide also recommends restoring power and confirming that each fixture works.
Troubleshoot dim, flickering, or nonworking lights
If a light is dim or flickers, start by checking whether its connector is secure and compatible with the cable. Then consider the system layout. In a low-voltage setup, long cable runs can cause voltage drop, which may leave fixtures farthest from the transformer dim or unlit. Different fixture power requirements on the same circuit can also lead to uneven brightness.
Compare your setup with the manufacturer’s wiring instructions, and make sure the total fixture wattage is within the transformer’s capacity. The landscape lighting troubleshooting guide from NSL USA explains how voltage drop and mismatched fixtures can affect performance. If you find damaged wiring or suspect a household electrical issue, stop and contact a licensed electrician. Sacramento-area homeowners can reach out to AAA Electrical Services for residential electrical help.
Adjust fixture angles and brightness after dark
Test your lights after sunset, when you can see where each beam falls. Aim spotlights toward the feature you want to highlight, such as a tree or wall, instead of toward eye level. Position path lights to illuminate the walking surface without creating harsh, bright patches. Make one change at a time, then step back to see how it affects the whole area.
If a fixture feels too bright, adjust its aim or use a lower-output lamp approved for that fixture. You can also review the transformer’s control settings. VOLT® recommends aiming fixtures carefully to reduce glare and inspecting wire connections regularly, especially at splice points where corrosion may develop. Always follow the fixture manufacturer’s guidance when changing lamps or adjusting equipment.
Check for glare, dark spots, and light spilling into windows
Walk your paths, patio, steps, and other outdoor areas from several angles. Look for dark spots that make steps or uneven ground difficult to see, along with bright areas that overpower nearby features. Check the view from inside your home, too. A light aimed toward a window can disrupt the room and send illumination where it isn’t needed.
To correct the problem, rotate or shield the fixture, lower its angle, or move it closer to the feature you want to light. Check that light does not spill toward neighbors or straight into the sky. As JD’s Landscaping Services explains, aiming a fixture incorrectly can send light into windows. Make small adjustments, then review the result from the places where your family spends time.
Improve Landscape Lighting Efficiency and Effect
An effective landscape lighting plan does more than brighten a yard. It helps people see paths, steps, and entrances while drawing attention to trees, garden beds, and outdoor features. To get that balance, choose fixtures for specific tasks instead of adding lights wherever an area feels dark. Aim each beam carefully, and leave some areas softly lit so the yard feels comfortable rather than washed out.
Efficiency also depends on when and how long your lights operate. LED fixtures, solar lights in sunny locations, and automatic controls can help limit energy use. Keep the layout flexible, too. Plants grow, outdoor furniture moves, and new features can change where light is needed. Check your setup from time to time, especially after landscaping work or seasonal growth.
When you make changes, follow the fixture and transformer instructions, use outdoor-rated equipment, and avoid handling electrical connections while power is on. If a project involves line-voltage wiring or you’re unsure whether a component is suitable for outdoor use, contact a licensed electrician. These simple habits can help your lighting remain useful, safe, and pleasant to look at.
Choose LED fixtures and use solar lights where conditions suit them
LED fixtures generally use less energy than traditional bulbs and can last longer, which may reduce how often you need to replace them. Choose outdoor-rated fixtures that fit the location, and check the manufacturer’s instructions for compatible lamps, installation, and maintenance.
Solar lights can be a practical option for accents in areas that receive plenty of direct sunlight. They don’t need a cable run, but their output depends on how much sunlight their panels receive. In shaded areas, or where dependable light is important for steps and entrances, wired low-voltage fixtures may be a better choice. Before deciding, review the benefits and considerations of low-voltage landscape lighting, especially if your plan includes areas near water.
Use timers, photocells, or motion sensors to control operating hours
Automatic controls help your lights operate when you need them, without staying on longer than necessary. A timer can switch lights off at a set time, while a photocell turns them on as daylight fades. Motion sensors are useful near driveways, gates, and side paths where light is most helpful when someone approaches.
Match each control to the fixture and transformer, and follow the manufacturer’s setup instructions. Think about how you use each part of the yard: a patio may benefit from steady evening light, while a side passage may only need illumination when someone walks through. This Old House’s landscape lighting guide covers timers, photocells, and smart controls that can help manage operating hours.
Layer light for safe movement and visual interest without overlighting
Give each fixture a clear purpose. Path lights can mark walkways, step lights can make changes in elevation easier to see, and spotlights can highlight a tree or architectural detail. Combining these different types creates a more balanced effect than relying on one bright light to illuminate the entire yard.
Pay attention to where each beam lands. Aim lights at the surface or feature you want to illuminate, rather than toward people’s eyes, windows, or neighboring properties. Not every area needs the same brightness. A thoughtful mix of illuminated and shaded areas can make a yard feel welcoming while keeping routes visible. For ideas on matching fixture types to specific uses, see VOLT Lighting’s guide to landscape lighting.
Reassess placement as plants grow and outdoor spaces change
A lighting layout can change as your yard does. Growing shrubs and tree branches may block a beam, and new planting beds, garden features, or seating areas can change where light is most useful. Check your fixtures periodically and after major landscaping work. If a light is hidden or no longer aimed at the right spot, try repositioning it before adding another fixture.
During these checks, look for shifted fixtures, damaged cable, and loose connections. Keep connections accessible for maintenance, and follow product instructions when adjusting or servicing equipment. A fixture placed too close to a plant may become blocked as the plant grows, as JD’s Landscaping Services explains. For help with outdoor electrical work or lighting changes, contact a licensed professional.
Avoid Common Landscape Lighting Mistakes
A landscape lighting system should make it easier to enjoy your yard, not create new maintenance or safety concerns. A little planning helps you avoid common problems, from dim fixtures to glare spilling into a neighbor’s windows. Before installation, read the instructions for your fixtures, cable, connectors, and transformer. Product requirements can vary, so use the recommendations for the specific system you’ve chosen.
As you work, keep the cable route and fixture locations in mind. Leave connections accessible where required, and check that every component is rated for outdoor use. Once the system is in place, test it after dark and make adjustments before you finish the job. If the installation involves line-voltage wiring, damaged household wiring, or questions about your home’s electrical supply, ask a licensed electrician for help. Sacramento-area homeowners can contact AAA Electrical Services for residential electrical service.
Don’t overload the transformer or overlook voltage drop
Add the wattage of all the fixtures you plan to connect before selecting a transformer. Choose one with enough capacity for the total load, and check its instructions for recommended operating limits. If you expect to add lights later, account for those fixtures when planning the system rather than connecting them without checking the transformer’s capacity.
Cable length and layout also affect performance. Voltage can drop over a long cable run, which may cause fixtures farther from the transformer to appear dimmer. Follow the manufacturer’s guidance for cable size, maximum run length, and connection points. Depending on the layout, separate cable runs may help distribute power more evenly. Transformer capacity and voltage drop are worth checking before installation, especially if your plan covers a large yard.
Don’t use indoor fixtures or unprotected outdoor connections
Choose fixtures, cable, connectors, and controls that are rated for outdoor use and suitable for their installation location. Indoor components may not be designed to handle moisture, temperature changes, soil, or yard debris. Using them outdoors can lead to premature failure and may create a safety concern.
Use connectors compatible with your lighting system, and follow the manufacturer’s directions for protecting and positioning each connection. Don’t leave wiring exposed where it could be damaged by rain, gardening tools, or routine yard work. Check the system occasionally for loose, exposed, or damaged components. Outdoor installation guidance can help you spot risks, but always follow the instructions for your specific products. If you find damaged wiring or have concerns about the electrical supply, stop work and contact a licensed electrician.
Don’t crowd fixtures, create glare, or shine light toward neighbors
Adding more fixtures doesn’t automatically improve visibility. Lights placed too close together can make a walkway or garden feel harsh, while a beam aimed directly at someone’s eyes can cause glare. Space fixtures to create an even, comfortable effect, and aim each light at the path, plant, or architectural feature you want to illuminate.
Check the view from several spots, including inside your home and near neighboring properties. Adjustable heads, shields, or a different fixture position can help keep light out of windows and away from people’s eyes. Use varied light levels to add depth, and leave some areas softly lit rather than trying to illuminate every corner. This approach can make the yard easier to enjoy at night while limiting unnecessary light spill.
Check cable requirements and plan for access before burying it
Read the product instructions and check applicable local requirements before routing or burying cable. Plan a route away from areas where digging, planting, or regular yard work could damage it. Mark the cable path as you install it, and keep connections accessible wherever the manufacturer’s instructions call for access.
Test the system after dark before covering the cable or completing the installation. You’ll be able to spot dim fixtures, loose connections, and aiming issues while adjustments are still easy to make. Leave service slack where the product guidance recommends it, and take a photo or make a simple map of the cable route. This record can save time if you need to troubleshoot or make changes later.
Test lights at night and perform routine maintenance
After installation, turn on every fixture and walk through the yard after dark. Look for flickering or dim lights, dark patches along paths, glare, and beams shining toward windows or neighboring properties. Adjust the fixture positions or angles, then check the results from different viewpoints.
Routine checks help keep the system working as intended. Clean lenses, trim plants that block the light, test timers or sensors, and look for exposed or damaged cable. Reassess the layout as trees and shrubs grow or as you change your patio, garden, or walkways. If a fixture repeatedly fails or you discover a wiring problem, have a licensed electrician inspect it rather than guessing at the cause.
Related Articles
- Lighting Install
- Outdoor Lighting Electrician Fair Oaks
- Outdoor Lighting Installation Cost Explained
- Lighting Installation for Davis Homes
- Lighting Installation Contractor West Sacramento
Frequently Asked Questions
Can I install low-voltage landscape lighting myself?\ Many homeowners can install a low-voltage system by following the product instructions and local requirements. Work involving household wiring, a new circuit, or line-voltage lighting should be handled by a licensed electrician.
How do I choose the right transformer for landscape lights?\ Add the wattage of every fixture connected to the system, then select a compatible transformer with enough capacity for that total. Check the manufacturer’s guidance, and plan for any lights you may add later.
Why are some of my landscape lights dimmer than others?\ Dim lights can result from loose connections, an overloaded transformer, or voltage drop along a long cable run. Check the system instructions and connections with the power off. If the issue continues, ask a licensed electrician to inspect it.
How can I keep landscape lighting from shining into windows or a neighbor’s yard?\ Test the lights after dark from paths, patios, nearby rooms, and property edges. Adjust the fixture angle or position, or use a suitable shield, so the beam falls on the intended path or feature.
How often should I check my landscape lighting?\ Inspect the system periodically and after landscaping work. Clean fixture lenses, check for damaged cable or loose connections, test timers and sensors, and reposition lights if growing plants block their beams.