
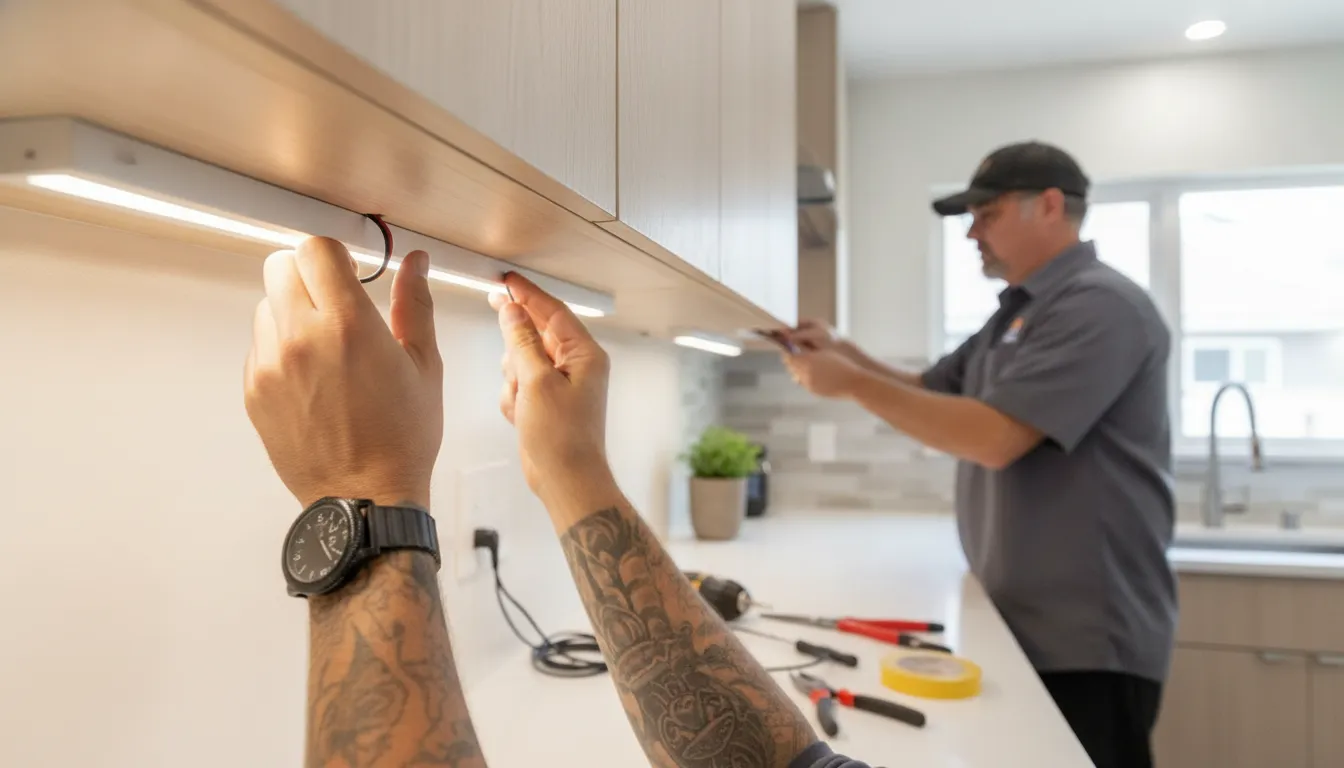
Dark countertops can make meal prep harder than it needs to be. Under-cabinet lighting puts light where you work, helps reduce shadows, and can give your kitchen a more finished look. The right setup depends on your cabinets, the fixture style you prefer, and how you’ll power the lights. Before you shop, it helps to understand the differences between LED strips, puck lights, and linear fixtures, along with the steps involved in planning and installation. This guide explains how to install under cabinet lighting, from measuring cabinet runs and choosing compatible components to mounting fixtures and routing wires. You’ll also learn when it’s safer to call a licensed electrician.
Key Takeaways
- Choose lights for your kitchen’s needs: LED strips and linear fixtures suit long counters, while puck lights work well for focused areas.
- Plan the setup before buying: Measure cabinet sections, map wire routes, and check that the fixtures, power supply, and dimmer are compatible.
- Use an electrician for wiring changes: Hire a licensed professional for hardwired lights, new circuits, outlet changes, or uncertain wiring.
What Types of Under-Cabinet Lighting Can You Install?
Under-cabinet lighting can brighten work surfaces, reduce shadows, and add a finished look to your kitchen. Common options include flexible LED strips, puck lights, and linear fixtures. Think about how much countertop you want to illuminate, the look you prefer, and how you’ll power the lights before choosing.
Use LED strips for flexible, even coverage
LED strips sit close to the underside of a cabinet and can provide a continuous line of light across a countertop. They work well for long cabinet runs and can often be cut at marked points to fit your layout. Some attach with adhesive backing; others fit into a mounting channel.
Check the product’s brightness, color temperature, and dimming options before you buy. If you plan to use a dimmer, confirm that it’s compatible with both the strip and its power supply. A cabinet lighting guide from Kichler covers common fixture styles and installation considerations.
Choose puck lights for focused task lighting
Puck lights are compact, round fixtures that cast focused pools of light. Place them above specific work areas, such as a chopping board or coffee station, when you want targeted illumination rather than a continuous glow. Test their positions before mounting them to see how the light falls across your countertop.
The spacing between fixtures affects how even the coverage looks. Puck lights placed too far apart can leave dim areas between each pool of light. Models may be battery-powered, plug-in, or hardwired, so check the instructions for mounting and power requirements. Home Depot’s under-cabinet lighting guide includes examples of puck lights and other fixture types.
Install linear fixtures for continuous illumination
Linear light bars are rigid fixtures that spread illumination along a cabinet section. They’re available in different lengths and brightness levels, with plug-in and hardwired options. Choose a bar that suits each cabinet run to create consistent task lighting without the separate bright spots that puck lights can produce.
Measure the cabinet sections before you shop. Longer runs may need several fixtures, or a model designed to connect with additional bars. Check where the cords, connectors, or wiring will sit, especially around corners. If you’re considering a hardwired fixture, review its installation instructions and electrical requirements. A licensed electrician can help with connections if you’re unsure about the existing wiring.
Add diffusers and channels to soften LED dots and reduce glare
Some LED strips show individual points of light, especially when installed close to a reflective countertop or backsplash. A channel with a frosted diffuser can soften those points and make the light appear more uniform. The channel also gives the strip a protected, finished mounting surface and helps keep it aligned beneath the cabinet.
Choose a channel designed for your strip’s width and type. Before mounting it, hold it in position and turn on the lights. Check the result from different spots in the room, including where you usually stand while cooking. A diffuser can reduce harsh glare, but it may also soften the light output. Make sure the setup still provides enough illumination for your work surface.
Pick plug-in, battery-powered, or hardwired fixtures
Plug-in fixtures are a practical choice if you have an accessible outlet and want to avoid changing the home’s wiring. Plan the cord route before mounting the lights so it stays neat and clear of the countertop. Battery-powered fixtures work well in small areas or where outlets aren’t convenient, but remember to recharge or replace the batteries.
Hardwired fixtures offer a more permanent setup and can keep visible cords to a minimum. They may require electrical connections or changes to existing wiring, so check the fixture instructions and power requirements before starting. If you need help choosing or installing kitchen lighting, AAA Electrical Services’ residential electrical team serves homeowners across the Sacramento area.
Which Power Option Should You Choose?
The best power option depends on your kitchen layout, the fixtures you select, and whether you want a quick update or a permanent installation. Before you buy, check where power is available and read the fixture instructions. If your plan involves household wiring, an electrician can help confirm the setup is safe and suitable.
Choose plug-in lights if you have an accessible outlet
Plug-in under-cabinet lights are a practical choice when you have an outlet within reach. They don’t require a new electrical connection, so installation is often simpler than hardwiring. Before purchasing, measure the distance from the outlet to the fixture and plan a tidy route for the cord along the cabinet.
Keep cords away from heat, water, and places where they might snag. Use the power supply and accessories specified by the manufacturer, and don’t overload the outlet. If the cord won’t reach without an extension or awkward routing, consider another power option. Kichler’s cabinet-lighting guide describes plug-in and direct-wire fixtures to help you compare the available setups.
Install hardwired fixtures for a permanent setup
Hardwired lights can create a built-in look without a visible plug or cord leading to an outlet. They’re often a good fit during a kitchen remodel or when you’re already planning electrical work. Some fixtures can connect in a series, but the wiring route and connections must follow the product instructions and applicable electrical requirements.
Hardwiring may involve connecting to a household circuit, so don’t rely on guesswork. Turn off the correct breaker and verify the wiring is de-energized before any electrical work. If you’re adding a circuit, changing an outlet, or unsure about the existing wiring, contact a licensed electrician. Sacramento-area homeowners can ask AAA Electrical Services about residential lighting installation.
Use battery-powered lights when wiring isn’t practical
Battery-powered lights can brighten a cabinet when there’s no convenient outlet and you’d rather not alter household wiring. They can suit a small area, a rental kitchen, or a spot where you want a simple lighting update. Some models include rechargeable batteries, motion sensors, or switches that make everyday use easier.
Think about how often you’ll use the lights and how easily you can remove them for charging or battery replacement. Battery-powered fixtures may be less convenient for long runs or frequent, extended use. Follow the manufacturer’s instructions for mounting, charging, and replacing batteries, and keep battery and charging components away from moisture and heat. A battery-operated LED light is one example of a no-wiring option for a dark kitchen area.
Check voltage, power-supply capacity, dimmer compatibility, and circuit load
For LED strips and other low-voltage fixtures, check that the power supply matches the lights’ voltage and total power requirements. If you’re connecting multiple sections, make sure the supply can handle the entire installation. For example, a 12-volt strip needs a compatible supply, not simply one that fits the connector. Follow the fixture specifications rather than assuming components will work together.
Confirm that any dimmer or control is compatible with the specific lights and power supply. If the installation connects to household wiring, circuit capacity matters too. An electrician can check the circuit and connections before you add the lights. AAA Electrical Services provides residential electrical services for Sacramento-area homeowners who need help planning or completing lighting work.
What Tools and Materials Do You Need?
Your supply list depends on the type of under-cabinet lighting you choose and how you plan to power it. Gather everything before you start, then check that each component works with your fixtures. For hardwired installations, follow the product instructions and get professional help if you’re unsure about the wiring.
Gather lights, a compatible power supply, connectors, and mounting hardware
Choose fixtures that suit your cabinet layout, such as LED strips, puck lights, or linear fixtures. Some products include a power supply, while others require a separate driver. Check the fixture’s specifications to confirm that the power supply matches its voltage and can handle the total wattage of all connected lights. Use only connectors designed for your lighting system, since parts from different products may not work together safely. Depending on the fixture, you may also need mounting clips, screws, adhesive, or an aluminum channel with a diffuser. If you plan to use a dimmer or connect multiple light sections, confirm compatibility before purchasing any components.
Get a measuring tape, pencil, level, drill, and screwdriver
A measuring tape helps you plan fixture positions and check the length of each cabinet run. Use a pencil to mark the placement, then check the marks with a level before mounting the lights. A drill and screwdriver can help secure fixtures, channels, and clips. Choose fasteners and drill bits suited to your cabinet material, and take care not to drill into areas that may contain wiring or plumbing. If you can’t tell what’s behind a cabinet surface, don’t drill there until you’ve checked. Measuring and marking carefully can help prevent uneven spacing and make it easier to conceal the wiring once the lights are installed.
Use a voltage tester and wire strippers for applicable electrical work
If your project involves household wiring, you’ll need a voltage tester to check that power is off before any wiring is handled. Wire strippers are used to prepare wires when the fixture’s instructions call for them. Use these tools only if you know how to operate them safely and can identify the correct circuit. A tester does not replace training or experience, and wiring errors can create a shock or fire risk. If you’re installing hardwired lights, changing an outlet, or aren’t sure whether the existing wiring is suitable, contact a professional for residential electrical services. Stop if you can’t confirm the circuit is de-energized or the wiring is in good condition.
Follow the manufacturer’s instructions and use compatible controls or dimmers
Read the instructions for your fixtures and power supply before you begin. They explain how to mount the lights, connect sections, and use the system as intended. Check whether the lights support a wall dimmer, an inline control, or a smart switch, and verify that the control is compatible with both the fixtures and their driver. Using an incompatible dimmer can cause flickering or keep the lights from working properly. Keep the instructions available as you install the system, and follow the specified limits for connections and power. The Kichler cabinet-lighting guide also recommends reviewing product instructions before installation.
How Do You Plan the Lighting Layout?
A thoughtful layout can make under-cabinet lighting more useful and keep fixtures and wiring neat. Before buying supplies, consider what each counter area is used for. A spot where you chop vegetables or read recipes may need bright, even task lighting. A coffee station or display area may work better with softer light. Also note the locations of outlets, switches, appliances, and cabinet hardware, since they can affect fixture placement and wire routes.
Measure and sketch the cabinet runs before choosing fixture lengths or connectors. Check the manufacturer’s instructions for limits on cuts, connections, and run length, as these vary by product. The Kichler cabinet lighting guide recommends planning tape and hard-strip systems in advance so you can have compatible parts ready. If your plan involves hardwiring, adding an outlet, or changing a circuit, ask a licensed electrician to review the work. Homeowners in the Sacramento area can contact AAA Electrical Services for help with residential lighting installation.
Measure cabinet runs and mark fixture positions
Measure the underside of every cabinet where you want lighting, and record each run separately. Include gaps, corners, and changes in cabinet depth. These measurements help you choose fixture lengths and estimate the number of connectors and other components you’ll need. Mark the planned start and end points with a pencil, then check that the marks line up across adjoining cabinets.
Before settling on a position, check how the fixture will sit behind the cabinet’s front lip. Many installations place lights about 1 to 2 inches back from the front edge, though wider strips may need to sit farther back. Follow the product instructions, and use The Home Depot’s installation guide for additional placement guidance.
Place lights near the cabinet’s front edge to illuminate the countertop
The goal is to direct light onto the countertop, rather than concentrating it on the backsplash. Placing fixtures near the cabinet’s front edge often helps spread light across the work surface, making everyday tasks like chopping and reading a recipe easier. When possible, position the fixture body behind the cabinet lip so it stays out of direct view.
The best location depends on the cabinet design, fixture shape, and beam angle. Before mounting anything, hold the light in a few possible positions and switch it on. Check the counter from your usual working spots to see where the light falls. Moving a fixture slightly forward or back can change the coverage and reduce shadows from your hands. Taskrabbit’s guide to under-cabinet lighting also recommends placing lights toward the front to illuminate the work surface.
Choose the right brightness and color temperature for the space
Consider how much light each area needs and how it should look alongside your existing kitchen lighting. A main prep counter usually benefits from clear, even illumination. A small area used for serving or display may call for a softer effect. Check the fixture’s brightness information, and compare coverage across the full cabinet run so one section doesn’t appear much brighter than the next.
Color temperature describes whether white light looks warmer or cooler. Choose a setting that feels comfortable and works with your cabinets, counters, and other lights. Some LED systems offer adjustable correlated color temperature, or CCT, so you can change the shade of white. If you plan to use a dimmer, confirm that both the fixtures and dimmer are compatible. Test the light in the room before installation, since colors can look different under daylight and indoor lighting.
Plan corners, connections, power access, and wire routes
Sketch each cabinet run and mark where fixtures meet, where corners fall, and where the power supply will sit. Check whether the system supports corner connectors or requires a separate fixture for each run. Follow the manufacturer’s limits for connecting sections and extending a strip, since unsupported cuts or connections can keep the lights from working properly.
Choose a power supply that matches the lighting system, and place it somewhere accessible for service without leaving it prominently visible. Plan a wire route that avoids heat, moisture, sharp edges, and moving cabinet hardware. Make sure cords can reach the outlet or connection point without stretching or crossing the countertop. The Kichler guide to cabinet lighting can help you plan tape and hard-strip systems and identify parts to have ready before installation.
Test the lights’ placement and check for shadows and glare
Before attaching fixtures permanently, hold them in place or use temporary mounting as directed by the manufacturer. Turn the lights on and check the countertop from the areas where you cook, clean, or prepare food. Look for dark patches, harsh reflections, and bright points that draw your eye. If the coverage feels uneven, shift the fixtures slightly and test again.
Check the layout with the kitchen’s other lights both on and off. Daylight can change how the color and brightness appear, so it’s helpful to review the setup at more than one time of day. If the system is dimmable or has adjustable color temperature, test those settings too. A quick placement check can reveal shadows or glare before you commit to mounting the lights, and help you make small adjustments while the fixtures are still easy to move.
How Do You Install Under-Cabinet Lighting?
Once you’ve chosen your fixtures and planned where they’ll go, install them according to the manufacturer’s instructions. The steps vary by lighting type: battery-powered and plug-in fixtures are generally easier to mount, while hardwired lights connect to your home’s electrical system and call for extra care. Before you begin, lay out the fixtures, power supply, connectors, and mounting hardware, then check that every component is compatible.
If you’re hardwiring lights, identify the correct breaker and use a voltage tester to confirm the wiring is de-energized before handling it. Kichler’s cabinet-lighting guide also recommends turning off power at the circuit box during installation. For battery-powered or plug-in models, follow the fixture’s instructions and disconnect the power supply before making adjustments.
Keep the instructions nearby, and don’t guess if a step or connection is unclear. Hardwiring, adding a circuit, or changing an outlet is a job for a licensed electrician. Homeowners in the Sacramento area can learn more about AAA Electrical Services’ residential lighting services. Once the setup is planned and the appropriate safety checks are complete, work through the steps below.
Turn off the correct breaker before hardwiring and verify the power is off
If your fixtures connect directly to household wiring, switch off the breaker serving the work area before you begin. A wall switch alone isn’t enough to confirm the wiring is safe to handle. Use a voltage tester suitable for the circuit, and check that the wires are de-energized before touching them. If the tester detects voltage, or you can’t confidently identify the correct breaker, stop and contact a licensed electrician.
For plug-in lights, unplug the power supply before installing or adjusting the system. For battery-powered models, remove the batteries if the instructions call for it. Check the fixture label and installation guide to confirm how your lights are powered and which safety steps apply. Never handle exposed wiring while it may be energized.
Clean and dry the mounting surfaces
Wipe the underside of the cabinets where the lights or channels will sit. Remove dust, grease, and cooking residue so adhesive-backed mounts can hold properly and other hardware can sit flush. Let the surface dry completely before attaching anything. If you’re unsure which cleaner is safe for your cabinet finish, check the cabinet maker’s guidance and test the cleaner in an inconspicuous spot first.
Mark the planned fixture positions lightly with a pencil, then check for obstructions such as hinges and handles. For adhesive mounts, press them into place as directed and allow any recommended setting time. Some systems require clips or screws instead. Follow the fixture instructions, and don’t use adhesive in place of hardware the manufacturer requires.
Test the lights and power supply before attaching them
Before mounting the fixtures, connect the light sections, controller, and power supply as instructed, then briefly test the system. Check that each section turns on and that any dimming or color controls work. Testing first can help you catch a faulty component or connection before the lights are attached beneath the cabinets.
Use only the power supply and connectors specified for your lighting system. Disconnect the system before adjusting any plug-in or low-voltage connections, and don’t use damaged wires. For hardwired fixtures, don’t energize unfinished wiring to test it. If a section flickers, stays dark, or becomes unusually warm, switch the system off and follow the manufacturer’s troubleshooting instructions before continuing.
Mount fixtures or channels with the specified hardware
Once the lights pass the initial test, position each fixture or channel along your marks. Place the lights near the cabinet’s front edge, if that suits your layout, to direct illumination onto the countertop. Use a level to check alignment, and look at corners and spaces between sections before fastening anything in place.
Secure the fixtures with the clips, screws, or other hardware supplied or approved by the manufacturer. If drilling, check the cabinet’s construction and what may be behind the surface first. Don’t substitute different hardware unless the instructions allow it. For LED strips, use the specified channel if the system has one, and avoid stretching or sharply bending the strip. Secure each section to help prevent sagging or peeling.
Connect light sections and the compatible power supply as directed
After mounting the fixtures, connect the light sections with the system’s designated connectors. Follow any direction or polarity markings, and make sure each connector fits without force. Connect a controller, dimmer, or power supply only if it’s listed as compatible with your lights. Using mismatched components can cause problems or damage the system.
Keep plug-in and low-voltage connections accessible where the instructions require, and don’t cut, splice, or modify cables unless the manufacturer specifically permits it. Hardwired fixtures require connections to household wiring, which should follow the fixture instructions and local electrical requirements. If you’re not trained to do that work, have a licensed electrician complete it. Stop if any wiring or connection doesn’t match the instructions.
Secure wiring, restore power, and test the system
Arrange cords and low-voltage wires along the cabinet using approved clips or channels. Keep them away from heat, water, sharp edges, and moving parts. Don’t pinch cords behind a fixture or leave connections hanging where they could be pulled loose. Check that the power supply has the clearance and ventilation specified by the manufacturer.
Before restoring power to hardwired lights, make sure the installation is complete and any required covers are in place. Turn the breaker back on, then test each light, switch, and control. For plug-in fixtures, reconnect the power supply and check the same functions. Look for flickering, dark sections, loose fittings, or unusual heat. If anything seems wrong, switch the system off and consult the instructions or a licensed electrician before using it.
How Do You Conceal Wires and Avoid Common Mistakes?
Plan where the wires will go before you mount the lights. A little measuring and a dry fit can help you keep cables tidy without pinching or damaging them. Follow the fixture and power-supply instructions, and use only the channels, clips, and connectors approved for your lighting system.
Route cords along cabinet edges with approved channels or clips
Run low-voltage cords along the back or underside of cabinets, where they’re less visible and less likely to snag. Secure them with clips or a cable channel designed for the cord, following the product instructions. Keep the wiring accessible for inspection, and don’t pinch it behind a cabinet or force it through a narrow gap.
Never run an ordinary plug-in power cord inside a wall. Concealed wiring must be suitable for that installation and meet local electrical requirements. If you want a clean, hidden route but aren’t sure how to achieve it safely, ask a licensed electrician. The Home Depot under-cabinet lighting guide offers examples of wire-routing approaches for different fixture setups.
Use light-rail molding or diffuser channels to hide wires and create a neat finish
Light-rail molding can hide fixtures and wiring beneath a cabinet’s front edge. A diffuser channel can cover an LED strip, soften its light, and make individual LED points less noticeable on the countertop. Choose a channel designed for your specific light, and check that it has room for the cable and connectors.
Before attaching the molding or channel, hold it in place and check its appearance from across the room and while standing at the counter. Make sure it won’t interfere with cabinet doors or drawers, and confirm it won’t block the light where you need it. Follow the manufacturer’s directions for cutting, joining, and mounting the pieces, especially around corners.
Measure carefully to prevent uneven spacing, gaps, or awkward corners
Measure each cabinet run separately instead of assuming every section is exactly the same length. Mark where the fixtures, power supply, and wires will sit before cutting or mounting anything. At corners, check the product instructions to see whether light sections should meet, leave a gap, or connect with a compatible corner piece.
Dry-fit the fixtures and channels, then use a level to check alignment before securing them. This gives you a chance to adjust uneven spacing while the pieces are still easy to move. If you need to cut an LED strip or channel, use the designated cut points and specified connectors. Cutting in the wrong place can damage the strip or leave part of the system inoperable.
Keep wires away from heat, moisture, and moving parts
Route wires away from cooktops, ovens, sinks, and other places where heat or moisture could damage components. Keep cables clear of cabinet doors, hinges, and drawer slides so they won’t be pinched or pulled during everyday use. Check the fixture and power-supply ratings to confirm they’re appropriate for the installation location.
Don’t put a power supply in a cramped or enclosed space unless the manufacturer says it’s suitable for that placement. Some components need room around them to manage heat. If the planned route passes near a heat source or damp area, review the product guidance before proceeding. The Kichler cabinet-lighting guide also covers fixture placement and conditions to consider around cabinet lights.
Avoid loose connections, overloaded outlets, and unsupported cuts or splices
Use connectors made for your lighting system, and check that each connection is fully seated and secured as directed. Don’t twist wires together and cover them with tape, or leave a splice exposed or unsupported. Keep connections accessible unless the product is specifically designed and approved for concealed installation.
Check the power supply’s capacity before connecting multiple lights, and don’t exceed its stated load. Avoid using extension cords as a permanent solution. If you’re hardwiring fixtures, changing an outlet, or aren’t sure the circuit can support the installation, contact a licensed electrician. AAA Electrical Services provides residential electrical services for homeowners in the Sacramento area.
Test the lights before concealing connections
Before you install covers or hide wires behind molding, turn on the system and check every section. Look for dark spots, flickering, unexpected differences in brightness, or connectors that aren’t secure. Test the switch or dimmer as well, and confirm it’s compatible with the lights and power supply.
If anything doesn’t work as expected, turn the system off and follow the manufacturer’s troubleshooting instructions before adjusting connections. For hardwired fixtures, switch off the correct breaker and verify that the wiring is de-energized before touching it. Once the lights work consistently, secure the wires, install the covers, and test the system again to make sure nothing shifted during the finishing work.
How Do You Work Safely With Electricity?
Under-cabinet lighting may involve more than attaching fixtures, especially when hardwiring is part of the project. Read the manufacturer’s instructions before you begin, and don’t proceed if you’re unsure about any electrical step. These precautions can help reduce risk, but they don’t replace the skills of a licensed electrician.
Turn off the correct breaker and confirm the wiring is de-energized
Before working on hardwired lights, switch off the breaker that supplies power to the work area. A wall switch alone may not cut power to every wire in the fixture box. Use a properly rated voltage tester to check the wiring before touching it, and confirm the tester works as instructed. If you can’t identify the correct breaker or verify that the wires are de-energized, stop and call an electrician. Kichler’s cabinet lighting instructions also recommend turning off power at the circuit box before working with electrical components. Keep household members from switching the breaker back on while work is in progress.
Follow fixture ratings and use the specified bulbs, power supply, and connectors
Check each fixture’s label and instructions before connecting components. Use the specified bulb type and wattage, and make sure LED lights are paired with a compatible power supply, connectors, and dimmer. Components that appear to fit may still be incompatible. A mismatch can cause flickering, damage, or excess heat. If you’re adding lights to an existing system or replacing its power supply, confirm that every part supports the system’s voltage and total load. Follow the fixture maker’s limits rather than guessing. Kichler’s lighting guidance explains why using bulbs within the fixture’s recommended wattage helps prevent overheating.
Keep electrical components away from water and manage heat properly
Keep lights, wiring, connectors, and power supplies away from sinks and other sources of moisture. Install each component in a location suitable for its rating, and leave enough space for heat to dissipate. Don’t cover a power supply or place it in a cramped spot unless the manufacturer’s instructions allow it. Before mounting the lights, make sure the surface is clean and dry. Route cables away from water, hot appliances, sharp edges, and moving parts. If the area is regularly exposed to heat or splashes, check the fixture instructions for placement requirements before installation. Kichler’s installation advice also stresses keeping electrical work away from water.
Stay within the power supply and circuit capacity
Before connecting multiple fixtures, check their combined power requirements against the power supply’s capacity and the circuit’s limits. Adding lights without checking the load may cause overheating, tripped breakers, or equipment failure. Follow the manufacturer’s limits for the number of fixtures and connections, and avoid overloading outlets or power strips. If you’re unsure whether an existing circuit can support the lights, don’t guess. A licensed electrician can assess the circuit and determine whether the project needs a different power supply, outlet, or circuit. The installation video cited in this guide recommends professional help when you can’t confirm the system’s power and circuit capacity.
Stop if you find damaged or unclear wiring, or wiring that doesn’t match the instructions
Pause the project if you find frayed insulation, scorch marks, loose connections, unfamiliar wiring, or anything that doesn’t match the fixture instructions. Don’t guess how wires should connect, and don’t try to repair damaged wiring with tape or improvised splices. Leave the power off and have a licensed electrician inspect the issue. The same applies if wire colors differ from the instructions or you can’t identify a safe connection point. Homeowners in the Sacramento area can contact AAA Electrical Services for help with residential electrical work. Stopping when something looks wrong is safer than continuing without knowing what you’re handling.
When Should You Hire a Licensed Electrician?
Plug-in under-cabinet lights may be straightforward to install when you follow the fixture’s instructions. But if the project involves your home’s wiring, pause before getting started. A licensed electrician can help you choose compatible components and complete electrical work safely.
Get professional help with hardwiring, new circuits, or outlet changes
Hire a licensed electrician if your lighting project involves connecting fixtures directly to household wiring, adding a circuit, or installing or moving an outlet. These changes affect your home’s electrical system and should be completed using the right materials and methods. An electrician can also check whether your planned lights are suitable for the existing circuit.
Hardwiring may seem simple, but the connections need to be made correctly and in line with applicable electrical requirements. Kichler recommends professional help for cabinet lighting projects involving hardwiring, new circuits, or outlet changes. If you’re unsure what your fixture requires, check the instructions and talk with an electrician before installing it.
Ask for help if you’re unsure about wiring, circuit capacity, or safe connections
Stop and contact an electrician if you find unfamiliar wiring, damaged insulation, loose connections, or wiring that doesn’t match the fixture’s instructions. Get help if you can’t identify the correct breaker or confirm that power is off. Don’t guess or attempt to work around an uncertain electrical setup.
Circuit capacity matters, too. Connecting several light sections to one power supply may exceed its rating or the circuit’s capacity. An electrician can assess the planned setup and help determine whether the power supply, connectors, and controls are compatible. If you’re unsure how the wiring should be connected, let a professional handle the work rather than risk an unsafe installation.
Contact AAA Electrical Services for residential lighting installation in the Sacramento area
If your project needs hardwiring, a new circuit, an outlet change, or a professional assessment, AAA Electrical Services provides residential electrical services in the Sacramento metropolitan area. Its licensed, background-checked, and drug-tested technicians serve local homeowners with clear upfront pricing and a 100% satisfaction guarantee.
You can contact the team to discuss your under-cabinet lighting project and what the installation involves. Before scheduling, check AAA Electrical Services’ service locations to confirm coverage in your area.
Related Articles
- Lighting Installation Folsom Homes — Friendly Guide to Upgrades and…
- Lighting Installation for Davis Homes: Friendly Tips for Efficient…
- Lighting Installation Contractor West Sacramento — Trusted…
- Lighting Replacement Services Lincoln — Friendly, Fast Residential…
- A Practical Guide to Choosing Ceiling Lights
Frequently Asked Questions
What type of under-cabinet lighting works best for a kitchen?\ LED strips and linear fixtures provide even light across longer counters, while puck lights create focused pools of light. Choose based on the area you want to illuminate and the look you prefer.
How far from the cabinet’s front edge should I place the lights?\ The ideal position depends on the cabinet and fixture. Hold the lights in a few spots and test how they illuminate the counter before mounting them. Keep the fixture out of direct view when possible.
Can I install under-cabinet lighting myself?\ Plug-in and battery-powered fixtures may be suitable for a DIY installation if you follow the manufacturer’s instructions. Hardwiring, adding a circuit, or changing an outlet should be handled by a licensed electrician.
Can I use a dimmer with LED under-cabinet lights?\ Often, but the dimmer must be compatible with both the lights and their power supply. Check the product specifications before buying or connecting a dimmer.
When should I call an electrician for under-cabinet lighting?\ Call a licensed electrician if the project involves household wiring, or if you find damaged or unfamiliar wiring, can’t confirm the power is off, or aren’t sure the circuit can support the lights. Sacramento-area homeowners can contact AAA Electrical Services for help.