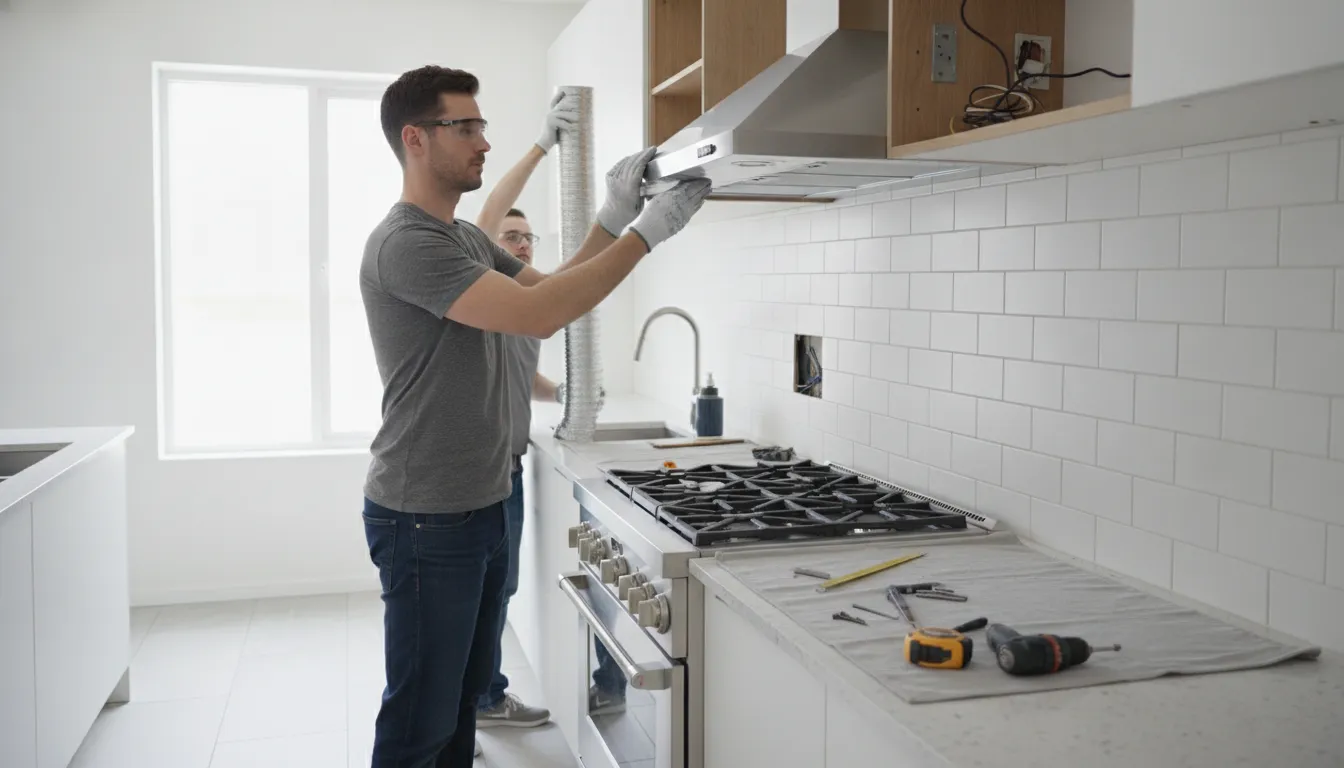
Grease on nearby cabinets, lingering cooking odors, and visible steam can all be signs that your kitchen ventilation needs attention. A properly selected and installed range hood can capture some of these cooking byproducts and carry them outside. Before starting kitchen exhaust fan installation, consider your cooktop’s size and location, the hood’s capture area, and whether your home can accommodate ductwork. A ductless model works differently from one that vents outdoors, so it’s important to understand what each can and can’t do. This guide covers the choices, measurements, duct planning, and electrical checks that can help you prepare for a safer, more effective setup.
Key Takeaways
- Pick a hood that fits your setup: Check cooktop coverage, mounting clearances, fan capacity, noise, and filter care before choosing a model.
- Plan the exhaust route before installation: Use the specified duct size and materials, vent outdoors, and check for hidden utilities and local requirements before cutting.
- Bring in a professional when the work calls for it: A licensed electrician can assess new circuits, wiring, and panel capacity; get qualified help with roof work or complicated duct routes.
What Does a Kitchen Exhaust Fan Do?
A kitchen exhaust fan, usually built into a range hood, draws cooking byproducts away from the cooktop. It can help reduce lingering odors, greasy residue, and excess moisture, but its performance depends on the hood, filters, and ventilation setup.
Remove smoke, odors, grease, heat, and moisture
Cooking releases smoke, odors, grease particles, heat, and moisture into the air. A range hood captures some of these byproducts near the cooktop and moves them away from the cooking area. A properly installed hood can help reduce lingering smells and airborne grease, supporting better kitchen air quality. XO Appliance explains why effective ventilation matters.
For the best results, choose a hood that fits your cooktop and use it while cooking. Letting the fan run for a few minutes afterward can help clear remaining fumes. Clean or replace filters as the manufacturer instructs, and keep the exhaust path clear. If installation requires new wiring or a dedicated circuit, a qualified electrician can check your home’s electrical setup. AAA Electrical Services provides residential electrical services for homeowners in the Sacramento area.
Compare ducted and recirculating hoods, and know their limits
A ducted hood moves air through ductwork and vents it outdoors. When correctly sized and installed, it can carry smoke, odors, heat, and moisture out of the kitchen. The duct must terminate outdoors through an appropriate wall or roof cap, rather than releasing air into an attic or another indoor space.
A recirculating, or ductless, hood pulls air through filters and returns it to the room. Its filters can capture some grease and reduce some odors, but it does not vent air outside. As a result, it is less effective at removing heat and moisture. Aire Serv’s installation guidance highlights the importance of proper setup for removing cooking fumes and steam. Check the hood’s instructions to understand what its filters can handle and how often to clean or replace them.
Which Kitchen Exhaust Fan Fits Your Kitchen?
Start with your kitchen layout, cooktop, and cooking habits. The right hood should fit the space, capture cooking fumes effectively, and be practical to maintain. Before choosing a model, check its installation instructions and consider how it will connect to an outdoor vent.
Compare wall, under-cabinet, island, and insert hoods
Wall-mounted hoods sit above a cooktop against an exterior wall. Under-cabinet models fit beneath cabinets, making them a practical option when the cooktop is positioned along a counter. Island hoods hang from the ceiling above a cooktop in an island, so the ceiling needs to support the unit and accommodate ductwork. Insert hoods fit inside custom cabinetry or a decorative surround, creating a built-in appearance.
Each style has different space and installation requirements. Consider where your cooktop sits, what cabinets or framing are nearby, and whether a duct can reach an exterior wall or the roof. Reviewing range hood styles and installation considerations can help you identify options that suit your kitchen.
Match hood type and width to the cooktop, cabinets, and layout
Choose a hood that aligns with the cooktop and fits the available space. If it is too narrow, smoke and grease may escape around the sides. If it is too wide, it may interfere with cabinets or nearby fixtures. Check the manufacturer’s recommended hood width and mounting height, then measure your cooktop and surrounding cabinetry before buying.
The layout also affects which hood will work best. A cooktop on an island needs a model designed for that open position, while a wall-mounted hood is intended for a different setup. If installation requires new wiring or a circuit, ask a qualified electrician to assess the electrical work. AAA Electrical Services provides residential electrical installation and repair in the Sacramento area.
Consider capture area, noise, filters, and cleaning
A hood’s capture area is the space beneath it that collects rising cooking fumes. A larger area may help contain smoke and grease, especially with a wide cooktop or frequent high-heat cooking. Still, the hood needs to fit your kitchen and meet the manufacturer’s installation specifications.
Check noise ratings at the fan speeds you’re likely to use, particularly if your kitchen opens onto a living or dining area. Look at the filter type, too: find out whether filters are washable or need replacing, how often they require attention, and how easily they can be removed. A hood that’s straightforward to clean is easier to maintain over time. Consider capture area, noise, and filter needs as part of your selection.
How Do You Size and Position the Hood?
The right hood needs to fit your cooktop, sit at the correct height, and work with the duct route and electrical setup in your home. Check the hood and cooktop manuals before you mark or cut anything, since product requirements can differ. If you’re unsure about wiring, clearances, or local requirements, get advice from a qualified professional before installation.
Center the hood and follow manufacturer clearances
Position the hood directly above the cooktop so it can capture smoke, grease, and cooking vapors. Use the manufacturer’s template or mounting bracket to mark the centerline, mounting points, and duct opening. A hood should generally be at least as wide as the cooktop. For a large cooking surface or frequent high-heat cooking, a wider hood may improve capture.
Mounting height affects both performance and safety. As a general reference, electric cooktops often call for 24 to 30 inches of clearance, while gas cooktops may call for 30 to 36 inches. These measurements vary by model, so follow the hood and cooktop instructions and check local requirements. XO Appliance’s range hood guide provides additional clearance guidance.
Choose CFM based on cooktop size, fuel type, cooking habits, and duct resistance
CFM, or cubic feet per minute, measures how much air the fan moves. The right rating depends on your cooktop’s size and fuel type, how often you cook, and whether your cooking produces heavy smoke or heat. Gas ranges may need more airflow than electric cooktops, but choosing the highest available CFM isn’t always best. A powerful fan can create more noise and may require makeup air to replace the air it exhausts.
The duct route also affects performance. Long runs and multiple bends can restrict airflow, so consider the planned ductwork when selecting a hood. Aire Serv’s kitchen exhaust fan guide recommends matching fan capacity to the kitchen and positioning it for effective ventilation.
Check duct size, electrical capacity, local requirements, and makeup-air needs
Read the product instructions to confirm the hood’s required duct diameter and electrical supply. Requirements vary by model, so don’t assume an existing duct or outlet will be suitable. Check whether the hood needs a dedicated circuit, whether your electrical panel can support it, and whether local rules require a permit or makeup-air system. These requirements can depend on the fan’s capacity and your home’s setup.
Plan a duct route that terminates outdoors, and check for framing, wiring, and plumbing before making openings. If you’re unsure about circuit capacity or electrical requirements, ask a licensed electrician to assess the installation. Sacramento-area homeowners can learn about AAA Electrical Services and its residential electrical work.
How Should You Plan the Outdoor Duct Route?
A good duct route helps your kitchen exhaust fan carry smoke, grease, heat, and moisture outside. Before cutting into a wall or roof, check the hood’s installation manual for duct size, materials, and venting requirements. Then trace the path from the hood to the exterior, choosing the shortest practical route while avoiding structural and utility conflicts.
Use the specified duct size and smooth, rigid metal ductwork
Match the duct size to the hood manufacturer’s specifications. A smaller duct can restrict airflow, while an incompatible size or fitting may affect how well the fan performs. Following the specified dimensions also makes it easier to find compatible parts if the system needs service later.
Smooth, rigid metal ductwork is generally recommended for kitchen exhaust. Its smooth interior helps air move through the duct and is easier to clean than flexible, ridged material. Check the installation manual before buying supplies, and use fittings approved for your hood. XO Appliance’s range hood installation tips offer additional guidance on choosing and setting up ductwork.
Keep the route short and direct, with few bends
Plan the duct path to be as short and straight as your home’s layout allows. Each bend adds resistance, which can reduce airflow. If turns are unavoidable, use gradual bends where possible and follow the hood manufacturer’s limits for duct length and fittings.
Avoid flexible ducting for the main exhaust run. Its ridges can impede airflow and collect grease, making the duct harder to clean. Before settling on a route through the ceiling and roof, check whether a nearby exterior wall could provide a simpler path. A direct route can make the installation and future maintenance more manageable.
Vent outdoors through a wall or roof cap with a backdraft damper
A ducted kitchen exhaust fan should discharge outdoors through a wall or roof cap, not into a cabinet, attic, garage, or other enclosed area. Exhaust carries moisture and grease, which can contribute to damage and affect indoor air quality if they collect inside the home.
Choose an exterior cap designed for ventilation and fitted with a backdraft damper. The damper should open while the fan runs and close when it is off, helping limit outside air from entering through the duct. Fit and seal the cap according to its instructions to help keep out rain and pests. Once the fan is installed, check that the damper moves freely. Aire Serv’s kitchen exhaust fan guidance also recommends routing exhaust outdoors.
Avoid attics, garages, shared ducts, and conflicts with framing or utilities
Do not discharge kitchen exhaust into an attic, garage, crawl space, or wall cavity. These areas can trap moisture and grease instead of carrying them out of your home. Give the hood its own duct, too. Connecting it to another appliance’s duct can interfere with airflow.
Before drilling or cutting, check the wall, ceiling, or roof for framing, wiring, plumbing, and other hidden systems. If you cannot confirm what lies behind a surface, pause rather than guessing. A qualified professional can help identify a safe route. If the work involves electrical wiring or a new circuit, contact a licensed electrician. AAA Electrical Services serves homeowners in the Sacramento area.
What Should You Check Before Installation?
Before installing a kitchen exhaust hood, confirm that the unit, duct route, mounting location, and electrical setup suit your kitchen. Taking time to check these details can help you avoid damage, unexpected work, and a fan that doesn’t perform as intended.
Start with the hood’s installation manual. It will explain the required mounting height, duct size, clearances, and wiring setup. Then plan the duct route to an exterior wall or roof, and check whether cabinets, framing, plumbing, or wiring could get in the way. Don’t drill or cut until you know what’s behind the surface and where the hood will be securely supported.
Check with your local building department about permits and inspections, especially if the project involves new wiring, structural changes, or a new exterior opening. Requirements vary by location and project. If you’re uncertain about the electrical work or the route for the duct, ask a qualified professional before starting. AAA Electrical Services can help Sacramento-area homeowners assess electrical needs and plan residential projects.
Review instructions, local codes, permits, and electrical requirements
Read the installation manual before buying materials or making openings. Requirements differ by model, so check the specified mounting height, duct diameter, clearances, and wiring instructions rather than relying on measurements from another hood. Confirm whether the unit needs a dedicated circuit and whether your existing electrical setup can support it.
Ask your local building department whether the work requires a permit or inspection. Rules may apply when you add a circuit, alter framing, or make an opening through an exterior wall or roof. The manufacturer’s installation guidance is a useful starting point, but it doesn’t replace local requirements. If you’re unsure how to interpret the instructions or the project involves new wiring, consult a licensed electrician before proceeding.
Locate studs, framing, wiring, and plumbing before drilling or cutting
Check what’s behind the wall, ceiling, or cabinet before making an opening. Use a stud finder to locate framing, and look for nearby signs of wiring or plumbing, such as outlets, switches, sinks, and fixtures. If possible, inspect the area from both sides.
A stud finder won’t identify every hidden utility, so don’t treat it as a guarantee that a spot is clear. If you can’t confirm the route, pause and ask a professional to inspect it. Avoid cutting an inspection hole where wiring or plumbing may be present. Before making a larger opening, confirm that the duct path is clear and that the hood can attach to studs, ceiling framing, or suitable blocking.
Turn off the breaker and verify the power is off before electrical work
Switch off the breaker supplying power to the work area before handling wires or making electrical connections. A wall switch alone isn’t enough. If you don’t know which breaker controls the circuit, identify it before beginning.
Use a properly rated voltage tester to check the wires and verify that power is off. Follow the tester’s instructions, and confirm that it’s working as directed before relying on its reading. Keep the breaker off while you work, and make sure it can’t be switched on accidentally. If you find damaged wiring, unfamiliar connections, or no suitable circuit, stop and contact a licensed electrician. Working on wiring without knowing how it’s configured can put you at risk of electric shock or create a fire hazard.
Wear eye and hand protection, use a stable ladder, and get help lifting
Wear safety glasses and work gloves when drilling, cutting, or handling metal ductwork. Debris can fall while you’re working overhead, and duct edges may be sharp. Use a ladder that gives you comfortable reach, set it on a firm, level surface, and keep your body centered between the rails.
Range hoods can be heavy and awkward to hold in place. Ask another person to help lift and support the hood while you fasten it to the wall or framing. Don’t try to hold the unit with one hand while attaching hardware with the other. Clear the area before lifting, and follow the manufacturer’s instructions for support and mounting. If the hood is difficult to handle safely, arrange professional installation.
How Do You Install a Kitchen Exhaust Fan?
A kitchen exhaust hood needs secure support, a correctly routed duct, and safe electrical connections. Follow the instructions for your specific model and check local requirements before cutting into a wall, cabinet, or ceiling. If the job involves unfamiliar wiring, a new circuit, or a complicated duct route, have a qualified professional handle that work.
Mark hood, duct, and wiring locations before cutting openings
Use the hood’s template or installation instructions to mark its position, the duct opening, and the wiring entry point. Center the hood over the cooktop and follow the manufacturer’s required clearance above it. Measure carefully, then confirm the hood will fit your cabinets or wall before making any cuts.
Check what’s behind the surface, including studs, framing, wiring, and plumbing. A stud finder can help, but don’t cut if you can’t confirm what lies behind the wall or ceiling. Marking each opening before cutting helps prevent misalignment and damage. Aire Serv’s installation guidance also recommends planning the hood and duct positions first.
Secure the hood to studs, ceiling framing, or suitable blocking
A hood needs solid support to hold its weight and withstand fan vibration. Follow the manufacturer’s instructions to locate mounting points, then fasten the hood or bracket to wall studs, ceiling framing, or suitable blocking. Drywall alone is not a reliable anchor for a heavy unit.
For an island hood, confirm that the ceiling framing can support the appliance before lifting it into place. Ask someone to help hold and position the hood while you secure it. Keep the unit level, and check its height and fit before fully tightening the fasteners. If the framing does not line up with the mounting points, don’t rely on improvised anchors. Add proper blocking or consult a qualified professional.
Seal duct joints with approved foil tape and close unused hood openings
Connect the hood to the duct specified by its manufacturer. Use smooth, rigid metal duct where required, and make sure each section fits without crushing or restricting the passage. Seal duct joints with approved aluminum HVAC foil tape. Cloth duct tape is not a suitable substitute.
Check for unused exhaust openings on the hood and close them with the covers or materials specified in the instructions. Air leaks can reduce the hood’s ability to capture cooking fumes and allow grease-laden air to escape into cabinets or wall cavities. Seal every joint carefully, and make sure the duct carries exhaust outdoors, not into an attic, garage, or other indoor space.
Wire as directed, then test the fan, damper, and airflow
Before electrical work, switch off the correct breaker and verify that the power is off with an appropriate tester. Follow the hood’s wiring diagram and local electrical requirements. Don’t assume that wire colors or connection methods are the same for every model. If you need a new circuit, find unfamiliar wiring, or have questions about grounding, contact a licensed electrician. AAA Electrical Services provides residential electrical services in the Sacramento area.
Once installation is complete, restore power and test the controls, lights, and each fan speed. Confirm that the damper opens and air exits through the outdoor vent. Listen for unusual noise or vibration, and check for air leaking at duct joints. If airflow seems weak or the damper doesn’t move freely, turn off the fan and address the problem before using it.
What Installation Mistakes Should You Avoid?
Don’t undersize the hood or duct or ignore mounting clearances
A hood that is too small may miss smoke, steam, and grease before the fan can capture them. Choose a model suited to your cooktop and cooking habits, and follow the manufacturer’s instructions for hood width, airflow capacity (CFM), duct size, and mounting height. The hood should cover the cooking area effectively, while maintaining the clearances specified for both the hood and the cooking appliance. Mounting it too high can reduce how well it captures cooking emissions; mounting it too low may interfere with cooking or expose the hood to excessive heat. Aire Serv’s range hood installation advice offers helpful guidance on sizing and placement.
Don’t use flexible plastic duct, crush duct sections, or connect multiple fans to one duct
Flexible plastic duct can restrict airflow and collect grease. Use the duct material and size specified by the hood manufacturer, typically smooth, rigid metal ductwork. Keep duct sections round and unobstructed, and avoid sharp bends or crushed areas that impede airflow. A shared duct can also cause one fan’s exhaust to move through another opening. Plan a dedicated route for the hood unless the manufacturer’s instructions and local requirements specifically permit another setup. XO Appliance’s range hood guide explains why duct material and layout matter.
Don’t leave duct joints unsealed or vent exhaust indoors
Unsealed joints can leak air and grease into cabinets, walls, or ceiling cavities. These leaks reduce airflow and can leave residue in places that are difficult to inspect and clean. Seal duct joints with the material recommended by the manufacturer, such as approved foil tape, and close any unused hood openings. A ducted hood must discharge outdoors through an appropriate wall or roof cap. Do not vent it into an attic, crawl space, garage, or other indoor area, where moisture, odors, and grease can accumulate.
Don’t overlook makeup-air needs, permits, or local codes
A powerful exhaust fan can remove indoor air faster than it is replaced. In some homes, the resulting negative pressure can affect fuel-burning appliances and draw combustion gases, including carbon monoxide, back inside. Check the hood instructions and local requirements to find out whether makeup air is needed. Before cutting openings or altering wiring, confirm whether permits or inspections apply. California homeowners can review the state’s adopted building codes and contact their local building department for requirements specific to their home. If the work involves new wiring or you are unsure about electrical capacity, contact a licensed electrician, such as AAA Electrical Services.
When Should You Hire a Professional?
Installing a kitchen exhaust fan can involve electrical work, duct routing, and cutting into a wall or roof. If the job goes beyond your experience, pause and bring in a qualified professional. Sacramento-area homeowners can learn more about AAA Electrical Services’ residential electrical services and ask about help with related electrical work.
Call a licensed electrician for new circuits, uncertain wiring, or panel-capacity concerns
Hire a licensed electrician if your hood requires a new circuit, you find damaged or unfamiliar wiring, or you’re unsure whether your electrical panel can handle the appliance. Don’t assume a nearby outlet or an open breaker is suitable. Check the hood’s installation instructions for its electrical requirements, then have an electrician assess the circuit and panel if anything is unclear.
Incorrect electrical work can create shock and fire hazards. Stop if you see signs of damage or don’t know how to make a safe connection. A licensed electrician can identify what the installation requires and explain any needed repairs. For concerns about your home’s panel, review AAA Electrical Services’ panel repair and installation. Aire Serv’s installation guidance also recommends professional help when new circuits or uncertain wiring are involved.
Get help with complex duct routes, roof penetrations, and weatherproofing
A straightforward duct route through an exterior wall may be manageable for an experienced DIYer. But routes through ceilings, attics, or roofs can involve framing, insulation, weatherproofing, and careful placement of the exterior vent. If the plan requires cutting through a roof or working around complex obstacles, have a qualified contractor assess the route before making openings.
Improperly sealed or routed ductwork can let moisture into your home or affect the hood’s performance. A professional can check for obstacles, plan the exhaust path, and seal exterior openings against the elements. XO Appliance’s installation tips explain why complex duct routes and roof penetrations may call for expert help. If the project also involves new wiring, arrange for a licensed electrician.
Stop if you find hidden utilities or have questions about grounding or code requirements
Before cutting into a wall, ceiling, or roof, check for wiring, plumbing, and framing. If you uncover an unexpected utility, stop. Don’t cut or move it to clear space for the duct. Pause as well if you’re unsure about grounding, required clearances, permits, or local code requirements.
Installation details depend on the hood and your home. A professional can assess the conditions and help determine the right next step, reducing the risk of damage or unsafe connections. The California Building Standards Commission provides information about state building standards, but local rules may also apply. Contact your local building department or a licensed electrician if you’re unsure how requirements affect your project.
How Do You Maintain the Hood and Duct?
Regular checks can help your kitchen exhaust system move air effectively and make it easier to notice problems early. Follow the hood manufacturer’s care instructions, and turn the fan off before cleaning or inspecting it. If you spot an electrical issue, contact a licensed electrician rather than attempting a repair.
Clean or replace filters as the manufacturer instructs
Grease filters catch cooking particles before they enter the hood and duct. As grease builds up, it can restrict airflow and make the fan work harder. Check your owner’s manual for the recommended cleaning schedule and method. Some metal filters can be washed, while other filters need to be replaced.
Before removing a filter, switch off the fan and let the cooktop area cool. Clean washable filters as directed, then let them dry completely before reinstalling. Use the specified replacement type, and make sure it sits securely. Following the manufacturer’s filter care and maintenance guidance can help keep the system working as intended. If you notice damaged wiring while cleaning, arrange service from a qualified professional, such as AAA Electrical Services.
Check the exterior vent and damper for grease, blockages, or damage
Periodically inspect the outdoor vent from a safe, accessible location. Look for leaves, nests, or other debris that may block the opening, as well as visible grease buildup or damage to the vent cap. When the fan is running, the damper flap should open freely. It should close when the fan is off.
Avoid climbing onto a roof or removing a vent cap if you can’t do so safely. A stuck damper, blocked outlet, or loose cap may need professional attention. Also check for gaps where the duct joins the hood, since air leaks can reduce the exhaust captured over the cooktop. This installation demonstration shows why sealing hood openings and checking airflow matter.
Related Articles
Frequently Asked Questions
Can I install a kitchen exhaust fan myself?\ A simple installation may suit an experienced DIYer, but the work can involve wiring, ductwork, and openings in walls or roofs. If you need a new circuit, find hidden utilities, or feel unsure about mounting or sealing the hood, pause and call a qualified professional.
Is a ducted range hood better than a ductless one?\ A ducted hood sends air outside, while a ductless model filters some grease and odors before returning air to the kitchen. Ductless hoods may be a practical option when outdoor venting isn’t possible, but they don’t remove heat and moisture from the room as a ducted system can.
How do I choose the right hood size and fan strength?\ Check the hood manufacturer’s recommendations for your cooktop’s width, fuel type, and mounting height. Consider how often you cook and how much smoke or heat your meals produce. The duct route also matters, since long runs and multiple bends can reduce airflow.
Does a range hood need its own electrical circuit?\ That depends on the hood’s specifications and your home’s electrical setup. Check the installation manual, and ask a licensed electrician to assess the circuit if the instructions call for new wiring or you’re unsure about panel capacity. Sacramento-area homeowners can contact AAA Electrical Services for residential electrical help.
Why might my kitchen exhaust fan have weak airflow?\ A clogged filter, blocked outdoor vent, stuck damper, or restricted duct can reduce airflow. Turn off the fan before checking the filter, and inspect the exterior vent only if it’s safely accessible. If cleaning doesn’t help or you notice unusual sounds or electrical issues, arrange a professional inspection.