
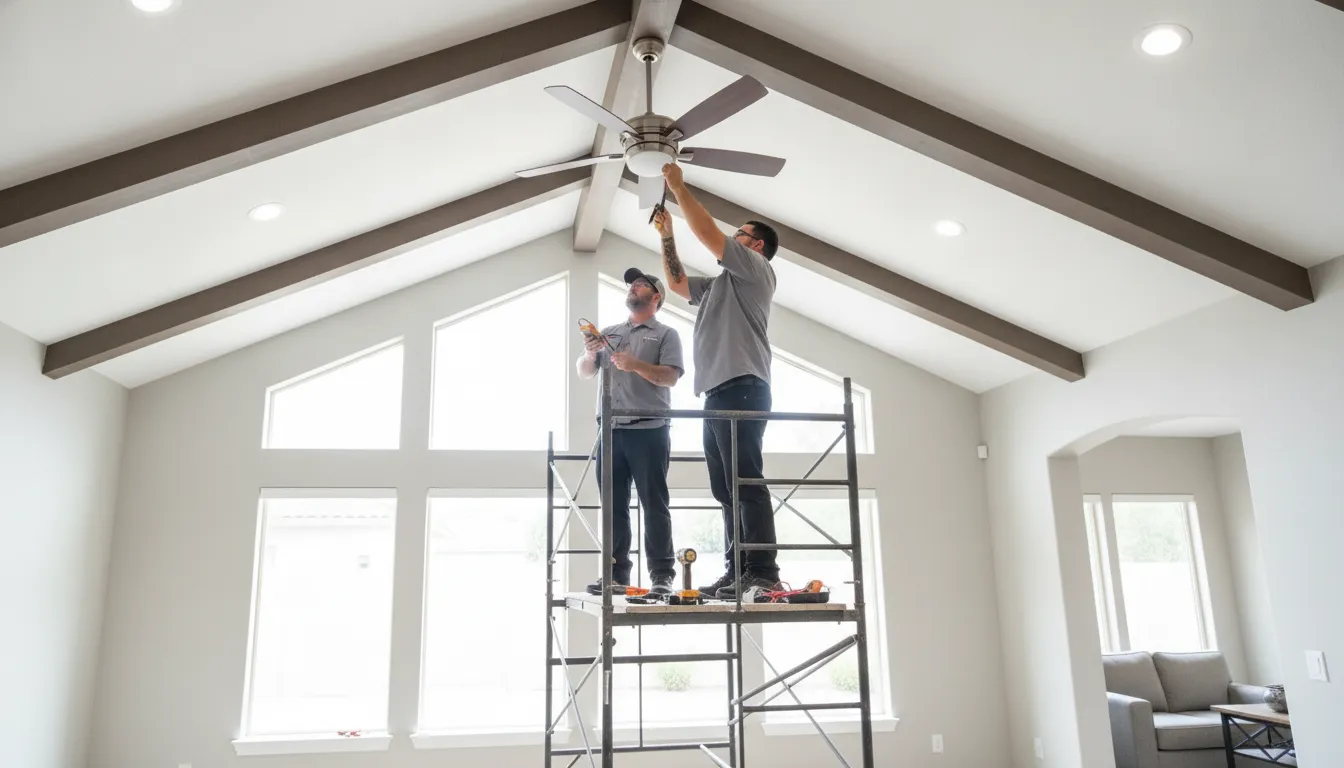
Replacing a light fixture with a ceiling fan may seem like a straightforward home project, until you look up at a vaulted ceiling. High installations add extra steps: you must confirm the ceiling box can support a moving fan, choose compatible mounting hardware, and reach the work area without overreaching. Understanding how to install a ceiling fan on a high ceiling can help you plan the job and recognize when it’s beyond a DIY setup. This guide covers fan selection, downrod length, tools, safe access, mounting, and testing. If you’re in the Sacramento area and aren’t sure about the wiring or ceiling support, AAA Electrical Services can help.
Key Takeaways
- Choose a fan suited to the room and ceiling: Check room size, airflow, blade clearance, ceiling slope, and compatibility with the downrod and controls.
- Verify support and safe access before installation: The fan needs a fan-rated box secured to ceiling framing, and the work requires equipment appropriate for the ceiling height.
- Call a licensed electrician when the setup is uncertain: For wiring, mounting, or access concerns, Sacramento-area homeowners can contact AAA Electrical Services for help with ceiling fan installation.
What Ceiling Fan Works Best on a High Ceiling?
Match the blade span and airflow rating to the room
Choose a fan based on the room’s size and layout, not ceiling height alone. Larger rooms generally need a wider blade span and a higher airflow rating to circulate air effectively. Check the manufacturer’s recommendations for room size and airflow before you buy. In open-plan spaces or rooms with beams, consider how the layout may affect air movement.
A fan with longer blades and a DC motor may suit a large room, as DC motors are often quiet and energy-efficient. Compare the specifications and choose a model that can circulate air comfortably without excessive noise. If you’re unsure what will work in your space, ask the manufacturer or a licensed electrician for advice. They can also assess whether the existing wiring and mounting point are suitable for your chosen fan.
Check motor, controls, and downrod compatibility
A fan’s motor affects how it operates, including its noise level and available speeds. DC motors are often quieter and more energy-efficient than standard AC motors, though features vary by model. Consider how you’ll use the fan, then compare its speed settings and control options. A remote can make adjustments convenient when the fan is well above the floor.
Check that the fan supports a downrod long enough for your ceiling height, and confirm that the rod is compatible with the fan and its mounting hardware. Don’t assume a downrod from another model will fit. Review the product specifications and installation instructions before purchasing. If you need help selecting a fan or checking the electrical setup, AAA Electrical Services’ residential electricians can assess your options.
Choose a fan and mount rated for sloped or vaulted ceilings
If your ceiling is sloped or vaulted, make sure the fan is approved for angled installation. Depending on the ceiling’s pitch and the fan design, you may need a longer downrod, an angled ceiling adapter, or both. Check the manufacturer’s instructions to confirm which parts are required and what ceiling angles the fan can accommodate.
The electrical box and mounting bracket must also be rated to support a ceiling fan and secured to the framing. A standard light-fixture box may not provide adequate support. If you’re uncertain about the ceiling angle, hardware, or structural support, ask a licensed electrician to inspect the installation point. Hunter’s ceiling fan installation guide explains when an angled mount adapter or longer downrod may be needed.
Use remote controls when the fan is out of reach
For a fan mounted high above the floor, choose controls you can operate without reaching the fixture. A remote lets you adjust the speed or light from across the room. Some fans also work with wall controls, so check which options are supported and whether the controls are included or sold separately.
Consider future maintenance when comparing models. Reaching a high fan to operate a pull chain or replace a bulb can be difficult, so look for accessible controls and consider LED lighting. Before buying, confirm that the remote is compatible with the fan and controls the functions you need. If installation or maintenance requires a tall ladder, scaffold, or lift, contact a licensed electrician instead of working at an unsafe height.
How Do You Choose Fan Height and Downrod Length?
Measure ceiling height, slope, and total fan drop
Measure from the floor to the ceiling at the planned fan location. If the ceiling slopes, note its angle and check whether the fan can mount safely on that surface. Some installations need an angled ceiling adapter and a longer downrod. Since mounting requirements vary by model, check the fan’s instructions before buying parts.
Next, calculate how far the complete fan will hang below the ceiling. Include the canopy, downrod, motor housing, and light kit, if there is one. This total drop helps you estimate the blade height above the floor. Hunter’s installation guide offers guidance on ceiling height, slope, and mounting requirements.
Keep blades at least 7 feet above the floor and follow manufacturer requirements
As a general safety guideline, keep fan blades at least 7 feet above the floor. Always check the manufacturer’s instructions too, since clearance requirements and mounting options vary by model. If your fan has a light kit, include its height when calculating the total drop.
A longer downrod can bring a fan on a high ceiling closer to the room’s occupied area while maintaining clearance below the blades. Don’t choose a downrod based on ceiling height alone. Calculate the finished blade height after accounting for every component, then follow the fan’s instructions and any applicable local requirements.
Check clearance from walls, beams, lights, and other obstructions
Before settling on a location, compare the fan’s blade span with nearby walls, beams, cabinets, and light fixtures. The blades need enough open space to rotate freely and circulate air. Hunter recommends keeping the fan at least 30 inches from walls and other objects, but check your model’s instructions for its specific clearances.
Look beyond the ceiling, too. Doors, tall furniture, and nearby fixtures may create hazards or interfere with airflow. If a beam or sloped ceiling limits your options, don’t squeeze the fan into a tight space. A licensed electrician can help assess the location and confirm that the mounting arrangement is appropriate.
Choose a compatible downrod for effective airflow
A downrod lowers the fan from the ceiling, which can help place it where it circulates air effectively in a high-ceiling room. The right length depends on the ceiling height and slope, the fan’s design, and the desired blade height. Some high-ceiling installations use downrods of 12 inches or more, but no single length works for every room.
Choose a downrod approved for your fan and mounting system. Check the manufacturer’s guidance before using a longer rod, especially on a sloped ceiling or with a heavy fan. The mount and ceiling support must also be suitable for the installation. If you’re uncertain about compatible parts or the support above the ceiling, ask an electrician to assess the setup before work begins.
What Tools and Equipment Do You Need?
A ceiling fan installation on a high ceiling takes careful preparation. Start by reading the fan’s instructions and checking the ceiling height, slope, and mounting requirements. The manual will identify the hardware and tools for your specific model, including any parts needed for a long downrod or angled ceiling.
Gather your supplies before you begin. Common tools include a screwdriver, pliers, wire strippers, an electric drill, and a voltage tester. You’ll also need suitable access equipment. A ladder that works in a room with standard-height ceilings may not let you reach a high ceiling safely. Depending on the height and layout, a properly rated scaffold or lift may be more appropriate.
Set up on firm, level ground, keep the area below the work clear, and ask a helper to assist with the fan and tools. Don’t use furniture as a platform or stretch beyond a stable position to reach the mounting point. If you can’t access the ceiling safely, or you’re uncertain about the wiring or support, pause and arrange professional help. AAA Electrical Services offers residential electrical services for homeowners in the Sacramento area.
Gather the instructions, mounting hardware, and required hand tools
Check the manufacturer’s instructions first, since tool and hardware needs vary by fan. Common tools include a ladder, screwdriver, pliers, wire strippers, electric drill, and the drill bit specified for the mounting hardware. Set out the fan’s mounting bracket, downrod, screws, and any parts required for a sloped ceiling. Use only hardware approved for your fan and mounting setup.
The Hunter ceiling fan installation guide lists tools that may be needed, including a wire tester and a 9/64-inch drill bit. Use your fan’s manual as the final reference, and confirm that all required parts are on hand before starting. Keeping small pieces organized can also prevent delays while you’re working overhead.
Use a voltage tester and verify power is off before handling wires
Turn off the breaker that supplies power to the ceiling fixture before removing it or handling wires. A wall switch alone does not confirm that the wiring is safe to touch. Use a suitable voltage tester according to its instructions, and check the wires before proceeding. Make sure the tester is working as directed so you can trust the result.
Breakers can be mislabeled, so verify the circuit rather than relying on its label. If the tester indicates voltage, or you’re unsure how to test the wires, stop and contact an electrician. HGTV’s ceiling fan installation demonstration also stresses checking that power is off before working. Keep the circuit off until wiring is complete and the fan is ready for testing.
Wear safety glasses and gloves; use a hard hat when overhead hazards warrant it
Wear safety glasses when drilling or working above your head to protect your eyes from dust and falling debris. Work gloves can help when you’re handling fan parts and hardware, but choose a pair that fits well and allows you to grip tools securely. Gloves are not a substitute for turning off the circuit and verifying that the wires are de-energized.
A hard hat may be appropriate if the work area has overhead hazards, such as exposed framing or equipment that could shift. Clear the floor below the fan, and keep people and pets out of the work area. The Home Depot ceiling fan installation guide can help you check your tool list before beginning.
Choose a ladder, scaffold, or lift rated for the work and ceiling height
Choose access equipment that lets you reach the ceiling without standing on the top step, leaning out, or stretching. Check the ladder’s height and duty rating, then follow its setup instructions. Place it on firm, level ground, open it fully, and lock its spreaders before climbing. Keep your body centered between the rails as you work.
For a very high or vaulted ceiling, a properly rated scaffold or lift may be more suitable than a ladder. Use equipment designed for the task, and follow its operating and safety instructions. If the room layout makes stable access difficult, don’t improvise with stacked furniture or an unsuitable ladder. Pause and arrange professional help instead.
Ask a helper to assist with lifting and steady the access equipment
A helper can pass up tools, steady the access equipment when permitted by its instructions, and help support the fan while you attach it. Fans can be awkward to lift and hold overhead, so plan how you’ll position the fan before climbing. Agree on clear signals and keep communication open while you work.
Keep the helper out from directly beneath the fan during installation, and make sure they stay clear of exposed wiring and tools. Follow the ladder or lift manufacturer’s guidance on whether someone should steady the equipment. If the fan is too heavy to handle securely, or the setup feels unstable, stop rather than trying to manage it through coordination alone. A licensed electrician can assess the installation and use suitable equipment for the ceiling height.
How Can You Work Safely at Height?
Installing a ceiling fan overhead combines electrical work with fall risks. Plan each step before climbing, keep the work area clear, and use equipment suited to the ceiling height. If you can’t work comfortably and securely, stop and get help.
Turn off the correct breaker and test wires before touching them
Turn off the breaker that supplies power to the existing light or fan. A wall switch alone doesn’t confirm the wiring is safe. Use a voltage tester according to its instructions to check the wires before touching them. If possible, confirm the tester works on a known live source before testing, then check it again afterward. If you can’t identify the correct breaker or the tester indicates that power is present, don’t handle the wires. Stop and contact a qualified electrician. HGTV’s ceiling fan installation guide also emphasizes shutting off power before starting. Never assume a circuit is safe simply because the light or fan won’t turn on.
Set access equipment on firm, level ground and follow its safety instructions
Choose a ladder, scaffold, or lift that is designed for the job and reaches the installation point without requiring you to stretch. Set it on firm, level ground, and check that it is secure before climbing. Follow the manufacturer’s instructions, including guidance about setup, weight limits, and safe use. Keep cords, tools, and other tripping hazards away from the base. If the floor is uneven or the equipment shifts, don’t climb until you have a stable setup. Home Depot’s ceiling fan installation guide provides additional project guidance, but always follow the instructions for your specific ladder, scaffold, or lift.
Avoid standing on furniture, overreaching, or working alone
Don’t use a chair, table, or other furniture to gain extra height. These surfaces can shift or tip, and they aren’t designed to support overhead work. Keep your body centered on the ladder or platform. If you can’t reach the work area comfortably, climb down and reposition the equipment rather than leaning to the side. Ask someone to stay nearby while you work, especially when installing a fan on a high or vaulted ceiling. A helper can pass up tools and get assistance if needed, but shouldn’t be expected to make an unstable setup safe. Prepare the work area and gather what you need before climbing to limit trips up and down.
Stop if the installation point is out of safe reach or needs specialized equipment
If you can’t reach the mounting point while keeping your balance, stop. Don’t improvise with stacked ladders, furniture, or makeshift platforms. High or vaulted ceilings may call for a taller ladder, scaffold, or lift, and using that equipment safely takes proper setup and experience. Stop as well if you’re unsure how to position the equipment or lift the fan into place. A licensed electrician can assess the job and complete the installation with suitable equipment. If you’re in the Sacramento area, explore AAA Electrical Services’ residential electrical services for help with ceiling fan installation and other home electrical work.
Does the Ceiling Support a Fan?
Before installing a ceiling fan, confirm that the electrical box, framing, and mounting hardware can support it. This is especially important when replacing a light fixture or installing a fan on a high, sloped ceiling. If you can’t verify the support or inspect it safely, pause and ask a licensed electrician to assess the setup.
Confirm the electrical box is fan-rated and secured to ceiling framing
Look for a box labeled or listed for ceiling fan support. It must be firmly attached to a ceiling joist or to an approved brace secured to the framing. A box held only by drywall or other ceiling material isn’t sufficient.
Check the fan and box instructions to make sure their ratings and mounting requirements are compatible. If you can’t confirm the box’s rating or how it’s secured, don’t assume it’s suitable. HGTV’s fan installation guide describes using a safety brace or an appropriate box when replacing a light fixture. If the existing box needs to be replaced or reinforced, make sure the new support is designed for a ceiling fan.
Never attach a fan to drywall or a standard light-fixture box
Drywall can’t support a ceiling fan, and a standard light-fixture box may not be designed to handle a fan’s weight and movement. Even if the existing box feels solid, that doesn’t confirm it’s rated for a fan. An unsuitable mounting point can loosen, allowing the fan to wobble or become unsafe.
Before mounting the fan, verify that its box is fan-rated and anchored to the ceiling framing. If it isn’t, the support must be corrected first. Don’t rely on drywall anchors or add improvised hardware to make a standard box work. PAC Lights’ installation guidance explains why a fan needs secure support from a joist or a fan-rated box.
Check that the mounting bracket and angled adapter fit the ceiling slope
For a sloped or vaulted ceiling, check that the fan’s mounting bracket is approved for the ceiling angle. Some models require a separate angled-ceiling adapter, and not every fan works with every slope. The downrod must also be compatible with the fan and long enough to meet the manufacturer’s clearance requirements.
Follow the fan’s instructions rather than modifying parts or forcing a bracket into place. Hunter’s ceiling fan guide notes that an angled ceiling may require a longer downrod and an angled mount adapter, depending on the fan and slope. Confirm the requirements before buying hardware or beginning installation.
Ask a licensed electrician to assess uncertain framing, wiring, or support
Pause if you can’t identify the electrical box, confirm that it’s connected to framing, or determine whether the wiring and mounting hardware are appropriate for the fan. A high ceiling can make the installation point difficult to inspect, while a vaulted ceiling may call for specific mounting components. Don’t guess about structural support or electrical connections.
A licensed electrician can assess the wiring and mounting point, then explain what needs to be done before installation. Home Depot’s installation guide recommends professional help if you’re unsure about electrical work or the stability of the setup. Sacramento-area homeowners can contact AAA Electrical Services for help with residential electrical work.
How to Install a Ceiling Fan on a High Ceiling
Installing a ceiling fan combines electrical work, overhead lifting, and access at height. Before you begin, make sure you have a stable platform that reaches the mounting point and a helper who can support the fan. Never stand on furniture or overreach from a ladder. If the ceiling is vaulted, the wiring is unfamiliar, or you cannot work safely from your equipment, pause and contact a licensed electrician.
Use the instructions for your specific fan throughout the installation. Check local requirements before starting, and do not improvise if the parts, wiring, or ceiling support differ from what the manual describes. Homeowners in the Sacramento area can review AAA Electrical Services’ residential electrical services or contact a licensed electrician for help with a high-ceiling installation.
1. Read the instructions and confirm the mounting requirements
Read the fan’s installation manual before unpacking or assembling parts. Check the required electrical box, mounting hardware, downrod size, ceiling slope limits, wiring diagram, and clearances. Confirm that the fan and any angled-ceiling adapter are compatible with your ceiling. Hardware from an existing light fixture may not support a fan.
Gather the tools and parts listed in the manual before you start. If a required component is missing, obtain the correct part rather than substituting another. Follow the manufacturer’s directions and check applicable local building and electrical requirements. Lowe’s ceiling fan installation guide also advises reviewing installation instructions and relevant codes before beginning.
2. Shut off power, verify the circuit is off, and remove the existing fixture
Switch off the circuit at the breaker, not only at the wall switch. Use a voltage tester on the fixture wires before touching them, following the tester’s instructions. If you cannot identify the correct breaker or the tester indicates that power is present, stop and call an electrician.
After confirming the power is off, remove the existing fixture according to its instructions. Support it as you loosen it so it cannot fall, and note how the wiring is arranged without relying on wire colors alone. Use a stable ladder or suitable platform, and ask your helper to assist. Do not remove a fixture while standing on furniture or reaching beyond your balance.
3. Install or verify the fan-rated box and secure the mounting bracket
A ceiling fan needs a support system designed for its weight and movement. A standard light-fixture box or drywall alone is not enough. Confirm that the electrical box is labeled for fan support and securely attached to ceiling framing. If you cannot verify its rating or attachment, stop and ask a licensed electrician to assess it.
Use the bracket and fasteners specified for your fan and support system. Tighten them as directed, then check that the bracket is firmly seated and does not shift. A sloped ceiling may require a compatible angled adapter. Do not alter the box, bracket, fasteners, or framing to force parts to fit. If the support is uncertain, have it checked before proceeding.
4. Assemble the downrod and motor housing as directed
Use a downrod approved for your fan model and appropriate for the ceiling height. Check that its diameter, connection, and wiring requirements match the fan. On a sloped ceiling, confirm that the fan can hang at the required angle and that the canopy fits the ceiling without interfering with the mount.
Assemble the downrod, motor housing, and safety components in the order shown in the manual. Secure all pins, clips, and set screws as directed, and do not leave out any parts. Keep the motor supported while assembling it. Hunter’s ceiling fan installation guidance notes that angled ceilings may require a longer downrod and a compatible angled mount. If parts do not fit as described, stop and check with the manufacturer or an electrician.
5. Connect the wiring according to the fan diagram and local requirements
Handle wiring only after confirming with a voltage tester that the circuit is off. Follow the diagram supplied with your fan, including instructions for any remote receiver, wall control, or light kit. Do not guess at connections based on wire color or copy an older fixture’s wiring, since the arrangements may differ.
Stop and contact a licensed electrician if wires are damaged, unfamiliar, ungrounded, or inconsistent with the fan diagram. Get professional help if the installation requires wiring changes you are not qualified to make. Keep all connections inside the electrical box, use approved connectors, and follow local requirements. Do not restore power while wiring or connections are exposed.
6. Secure the fan, attach the blades, and install the light kit or controls
Ask your helper to support the fan while you secure the motor assembly to the mounting bracket. Follow the manual’s method, and confirm that the fasteners and safety features are engaged before releasing the fan. Attach the canopy, blades, and light kit in the specified order. Use the supplied screws and tighten them evenly without overtightening.
Install a remote receiver or wall control only as directed for your model. Keep wiring contained inside the box and canopy. Check that the blades are firmly attached and clear of the ceiling, walls, beams, lights, and other objects. If you cannot hold and secure the fan safely from your access equipment, stop and arrange professional installation rather than attempting the lift alone.
7. Restore power and test the fan, light, and controls
Before turning the breaker back on, check that the canopy is secure, wiring is enclosed, and tools and loose parts are clear of the fan. Stand away from the fan, restore power, and test each speed, the light, and all controls. Follow the manual’s directions to pair a remote or set up a wall control.
Watch and listen while the fan runs. Turn it off if it wobbles excessively, makes unusual noise, shifts at the mount, or if the light or controls behave unexpectedly. Never reach toward moving blades or make adjustments while the fan is powered. If an inspection or adjustment is needed, turn off the breaker first. When the cause is unclear, have a licensed electrician check the installation.
What Should You Check Before Running the Fan?
Before turning on a ceiling fan, inspect the installation while the power is off. Check that the fan is securely mounted, the blades have room to move, and all parts appear properly assembled. Follow the instructions for your specific model, and don’t run the fan if anything seems loose or damaged.
Confirm the fan is secure and the blades have enough clearance
Check that the fan’s mounting bracket is attached to a fan-rated electrical box or support secured to the ceiling framing. A fan should not hang from drywall or a standard light-fixture box. Look for visible gaps, shifting, or damage around the mounting point, but don’t climb or reach beyond safe limits to inspect it.
Check the entire blade path for nearby walls, beams, light fixtures, and other objects. Follow the clearance requirements in the fan’s manual, since they vary by model and ceiling shape. PacLights’ ceiling fan guidance explains why proper support matters for safe installation. If you’re unsure whether the mounting point or clearance is adequate, keep the fan off and ask a licensed electrician to check it.
Check for wobbling, unusual noise, or loose parts
When you first test the fan, stand clear and run it at a low speed. Watch for pronounced wobbling, and listen for clicking, scraping, or other unusual sounds. Turn the fan off if you notice any of these signs, then wait until the blades stop completely before inspecting it.
With the power off, check the visible blade screws, light kit, and canopy for loose or damaged parts. Follow the fan’s instructions, and never try to tighten components while the blades are moving. If you need to change the fan’s direction, wait until it has stopped first. If wobbling or noise continues after you’ve checked the assembly, leave the fan off and arrange for a professional inspection.
Balance the blades and follow the manufacturer’s maintenance guidance
If the fan wobbles, check that the blades are attached securely and aligned as described in the manual. Many models include a balancing kit with instructions for correcting uneven blade movement. Use only the method and materials recommended for your fan, and make adjustments only when the fan is off and fully stopped.
Follow the manufacturer’s installation and maintenance guidance for balancing, cleaning, and checking fasteners. If the fan still wobbles, or you notice a loose mount, damaged part, or wiring concern, don’t keep testing it. AAA Electrical Services provides residential electrical services for homeowners in the Sacramento area, including help with ceiling fan installation and related electrical concerns.
When Should You Hire a Licensed Electrician?
Get help with uncertain wiring, missing fan-rated support, or a complex vaulted ceiling
Pause the installation if the wiring doesn’t match the fan’s instructions, you find damaged or unfamiliar wires, or you’re unsure which wires connect. A ceiling fan also needs a fan-rated electrical box that’s securely attached to ceiling framing. A standard light-fixture box may not be strong enough to support the fan’s weight and movement. HGTV’s ceiling fan installation guide explains that a fan may need a safety brace or another suitable support.
Vaulted ceilings can add extra considerations. The mounting bracket, angled adapter, and downrod must be compatible with the ceiling’s slope and the fan’s instructions. Don’t guess about the wiring or mounting support. A licensed electrician can inspect the setup and confirm what the installation requires.
Hire a professional if safe access requires specialized equipment
High ceilings can make it difficult to reach the mounting point while holding tools and supporting the fan. A tall ladder may not be suitable, especially if the floor is uneven, the ceiling is vaulted, or you would need to lean or stretch. Depending on the space, scaffolding or a lift may provide safer access, but the equipment must be appropriate and used correctly.
If you don’t have suitable equipment or experience using it, hire a professional rather than improvising with furniture or an unstable ladder. Follow OSHA’s ladder safety guidance, and stop if you can’t reach the work area without overextending yourself. A professional can bring the right equipment and focus on keeping the installation safe and secure.
Contact a licensed residential electrician, such as AAA Electrical Services, when the work exceeds your experience
If any part of the installation feels uncertain, stop and ask for help. Ceiling fan installation may involve electrical connections, overhead lifting, secure mounting, and working at height. A licensed electrician can assess the wiring, confirm the ceiling support, and install the fan according to its requirements.
For Sacramento-area homeowners, AAA Electrical Services offers residential electrical services, including fan installation. Its licensed, background-checked, and drug-tested technicians can help when the job is beyond your experience or requires equipment you don’t have. Before work begins, ask what the installation involves and confirm the pricing and next steps.
Related Articles
- How to Choose the Right Ceiling Fan
- Ceiling Fan Install
- Ceiling Fan Install – Fair Oaks, CA
- Ceiling Fan Installation – Elk Grove Homes
- Ceiling Fan Wiring – Sacramento Homes
Frequently Asked Questions
What size ceiling fan should I choose for a high-ceiling room?\ Choose based on the room’s dimensions and layout, then compare the fan’s blade span and airflow rating with the manufacturer’s recommendations. A high ceiling alone doesn’t determine the right fan size.
How do I choose the right downrod length?\ Measure the ceiling height and account for the fan’s full drop, including its canopy, motor, and any light kit. The blades should remain at least 7 feet above the floor, and the fan’s manual may specify additional clearance or mounting requirements.
Can I install a ceiling fan where a light fixture is now?\ Only if the electrical box and support are rated for a ceiling fan and securely attached to the ceiling framing. A standard light-fixture box or drywall alone may not provide adequate support.
What should I do if my ceiling is vaulted or sloped?\ Check that your fan is approved for the ceiling’s angle. The installation may require a compatible angled adapter and downrod. Follow the fan’s instructions, and ask an electrician to assess the mounting point if you’re unsure.
When should I hire an electrician to install a high-ceiling fan?\ Get professional help if the wiring or ceiling support is uncertain, the fan requires specialized mounting parts, or you can’t reach the installation point safely. Sacramento-area homeowners can contact AAA Electrical Services for residential electrical assistance.