
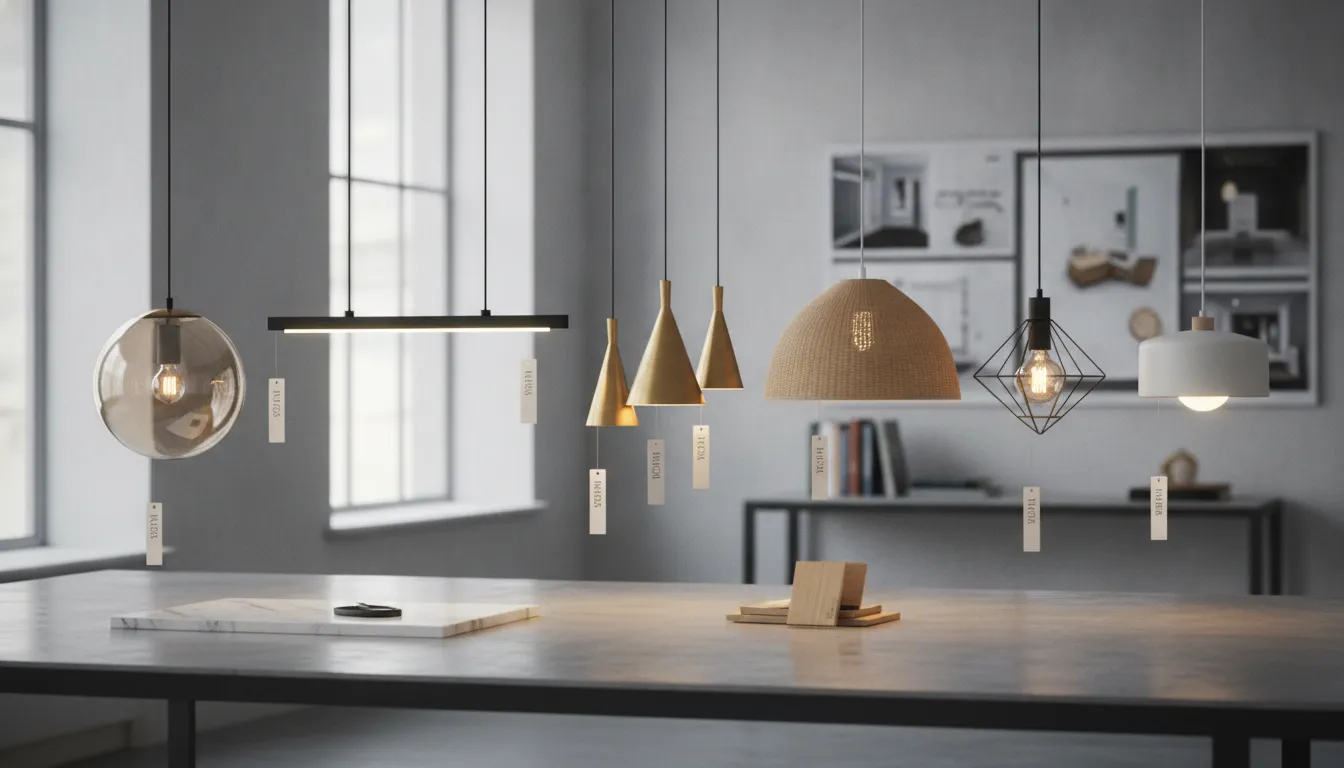
Pendant lighting is a popular choice for Sacramento homes because it combines useful illumination with a distinctive design feature. A well-placed fixture can make a kitchen island easier to use, give a dining room a more finished appearance, or brighten a high-ceiling entryway. Yet even a small pendant installation involves electrical components that deserve attention. The ceiling box must support the fixture, the wiring must connect correctly, and the circuit must handle the load. Location ratings also matter in bathrooms and other moisture-prone areas. Before you shop, learn what makes a pendant safe, comfortable, and suitable for your home.
Key Takeaways
- Match the pendant to the space: Consider the room’s purpose, surface size, ceiling height, décor, shade style, and desired light distribution before choosing a fixture.
- Plan placement and installation carefully: Measure clearances, select compatible bulbs and controls, and verify the ceiling box, wiring, circuit, grounding, and mounting hardware.
- Hire a licensed electrician for electrical work: Professional service is recommended for new wiring, ceiling box changes, dimmer installation, circuit problems, flickering, overheating, or damaged components.
What Is Pendant Lighting and How Does It Work?
Pendant lighting is a ceiling-mounted fixture that hangs over a specific area from a cord, chain, or metal rod. Unlike a flush-mount light, which sits close to the ceiling, a pendant extends downward and brings the light closer to the surface below. This makes it useful for everyday tasks while adding a distinct design feature to the room.
Pendant lights work by sending electricity through the fixture’s wiring to a socket, where the bulb produces light. The shade then directs, softens, or spreads that light based on its shape and material. Pendant fixtures may use LED, halogen, fluorescent, or other compatible bulbs. For many homes, LEDs are a practical option because they use less energy and produce less heat than older bulb types.
You will often find pendant lights above kitchen islands, dining tables, bathroom vanities, desks, bedside tables, and entryways. Their placement and height matter, however. A fixture that hangs too low can interfere with movement or sightlines, while one that hangs too high may not provide enough focused light. If you are unsure whether your ceiling box, wiring, or circuit can support a new fixture, schedule an electrical inspection before installation.
Understand ceiling-suspended fixtures
A pendant light usually has one main light source suspended from the ceiling. The fixture may hang from a slim cord, a decorative chain, or a rigid downrod. This design places the bulb closer to a countertop, table, vanity, or reading area than a typical overhead fixture would.
Pendant lights are common above kitchen islands, dining tables, billiard tables, and bathroom vanities. They also work well in hallways, stairwells, and bedrooms. Their focused position provides useful illumination, while the fixture adds shape, color, and personality to the room. This pendant light overview explains the fixture’s basic design and common applications.
Since the fixture hangs below the ceiling, measure the area underneath it before choosing a style. Consider head clearance, cabinet doors, windows, ceiling fans, and walking paths. These details help determine whether a pendant is practical and how far it should hang from the surface below.
Learn about canopies, cords, chains, downrods, sockets, and shades
A pendant light includes several parts that work together. The canopy covers the electrical box and secures the fixture to the ceiling. A cord, chain, or downrod supports the light and determines how far it hangs. Cords offer a softer, more casual look and are often adjustable. Chains add a traditional or industrial detail, while downrods create a cleaner, more structured appearance.
The socket holds the bulb and connects it to the fixture’s wiring. The shade surrounds or partially covers the bulb, directing the light and influencing its appearance. Glass shades can spread light throughout a room, while metal or fabric shades often direct light downward. Common materials include glass, metal, concrete, plastic, fabric, and rattan, as described in this pendant lighting reference.
Every component should match the fixture and its location. For example, a bathroom pendant needs the appropriate damp-location rating, while a heavier fixture requires a ceiling box designed to support its weight.
Compare ambient, task, and accent lighting
Pendant lights can provide three main types of illumination. Ambient lighting supplies general light for a room. A pendant with an open or translucent shade can spread light across a kitchen, bedroom, or entryway, especially when paired with recessed lights or wall sconces.
Task lighting focuses light where you need it most. Pendants above a kitchen island can illuminate food preparation, while a fixture over a desk, table, or reading chair can make close work easier. The shade and bulb both affect how concentrated the light will be.
Accent lighting draws attention to a specific feature, such as artwork, an architectural detail, or a decorative table. Smaller pendants and clustered fixtures are useful for this purpose. Pendant lighting can also shape a room’s mood and create a visual focal point, as noted in this pendant lighting guide. For the best result, layer pendant lights with other fixtures instead of relying on one light to illuminate the entire room.
Compare pendants with chandeliers, flush mounts, and recessed lights
The main difference between a pendant and a chandelier is the number and arrangement of light sources. A pendant generally has one light source, while a chandelier commonly has several arms or bulbs. Large linear pendants and multi-light fixtures can blur this distinction, so the fixture’s shape and purpose matter as much as its label.
Flush-mount and semi-flush-mount fixtures sit close to the ceiling. They are helpful in rooms with low ceilings or areas where a hanging fixture could get in the way. Recessed lights sit inside the ceiling and provide a clean, understated look. They work well for general illumination, but they do not offer the same decorative presence as a pendant.
Pendant lights combine practical illumination with visual interest. They provide focused light without taking up floor or wall space, which makes them useful in compact rooms. When comparing options, consider the ceiling height, surface size, amount of light needed, and overall look you want to create.
See how pendants save space and create focal points
Pendant lights can replace table lamps, floor lamps, and some wall-mounted fixtures, freeing up valuable surface and floor space. A pair of pendants beside a bed, for example, can provide reading light without filling each nightstand. A single fixture above a small breakfast table can illuminate the area while keeping nearby surfaces open.
Several pendants can also create a strong focal point. Three evenly spaced fixtures above a kitchen island add balance and make the island feel intentional. A cluster of small pendants in an entryway or stairwell can draw attention upward and make a tall space feel more finished. For a balanced result, keep the fixtures aligned and space them consistently.
Before choosing a dramatic arrangement, check the ceiling box and circuit. Some installations require additional wiring, a new box, or a new circuit installation. A licensed electrician can confirm that the ceiling can safely support the fixture and that the finished installation meets local electrical requirements.
Explore Pendant Lighting Styles and Types
Pendant lights combine practical illumination with decorative appeal. They can brighten a work surface, soften a room, or serve as a focal point above a table or island. Because they come in so many shapes, materials, and finishes, the best choice depends on more than appearance. Consider how the room is used, where people sit or stand, how much light is needed, and whether the fixture will be viewed directly.
Your ceiling height, existing hardware, and electrical setup matter, too. If you are replacing a fixture or adding a new lighting point, AAA Electrical Services can help with residential lighting installation and repair throughout the Sacramento area.
Compare modern, contemporary, industrial, vintage, transitional, and farmhouse styles
Modern pendants usually feature clean lines, simple silhouettes, and finishes such as matte black, white, chrome, or brushed metal. Contemporary fixtures can be more sculptural, with unusual shapes, mixed materials, or integrated LED technology. Industrial pendants often include metal shades, exposed bulbs, cage details, and darker finishes. Vintage designs may feature antique glass, aged brass, or decorative details inspired by earlier periods.
Transitional lighting combines traditional elements with streamlined shapes, making it easier to coordinate with changing décor. Farmhouse pendants often use painted metal, natural wood, seeded glass, or weathered finishes. Since a pendant can act as both a light source and a visual focal point, choose a style that complements the room instead of competing with nearby furniture or architectural details. This pendant lighting guide offers helpful examples of how different designs work with various interiors.
Choose single-light, mini, multi-light, cluster, or linear pendants
A single-light pendant works well beside a bed, above a small breakfast table, or over a compact sink. Mini pendants are useful when several smaller fixtures are needed across an island, peninsula, or long counter. Multi-light pendants combine multiple sockets or shades on one canopy, creating a coordinated look with fewer ceiling connection points.
Cluster pendants group several lights at different heights, which can create a striking display in a foyer, stairwell, or room with a high ceiling. Linear pendants arrange multiple lights along one horizontal fixture and are practical above dining tables and kitchen islands. A standard six- to seven-foot island often needs two or three evenly spaced pendants, according to this pendant placement guide. Also account for cabinet doors, sightlines, and food preparation areas.
Compare glass, metal, fabric, rattan, and exposed-bulb designs
Glass shades spread light while keeping the fixture visually light. Clear glass creates an open appearance, frosted glass softens the light, and seeded or tinted glass adds texture. Metal shades direct light downward, making them useful for focused illumination over an island, desk, or table. They also pair well with industrial, modern, and farmhouse interiors.
Fabric shades produce a softer glow and often suit bedrooms, living rooms, and dining areas. Rattan and woven materials add warmth and texture, but they may cast patterned shadows across nearby surfaces. Exposed-bulb pendants offer a simple industrial or vintage look, although the bulb remains visible and can create glare. Common pendant materials include metal, glass, concrete, and plastic, so compare durability, cleaning needs, and the kind of light each material produces.
Choose globe, dome, drum, cone, or decorative shades
Globe shades provide a rounded silhouette and even-looking illumination. They pair naturally with mid-century, contemporary, and transitional décor. Dome shades direct more light downward, making them a practical option for counters, islands, desks, and other work areas. Cone shades create a focused profile and often suit kitchens, offices, and industrial-inspired spaces.
Drum shades surround the bulb with a wider cylinder, creating a softer appearance over dining tables or in bedrooms. Decorative shades may use geometric frames, cages, rings, woven fibers, or sculptural forms. When comparing shapes, consider the light pattern as well as the fixture’s appearance. A narrow downward shade may leave the surrounding room dim, while a wider or translucent shade can spread light more broadly. This pendant lighting collection shows several common forms, including globe, dome, cone, cage, drum, and linear designs.
Select open or enclosed shades for your desired lighting effect
Open shades allow light to travel freely and make the bulb easy to replace. They can help a room feel bright and airy, but they may cause glare when viewed from a seated position or from across an island. Exposed bulbs can also send stronger light toward nearby walls, countertops, and floors.
Enclosed or partially enclosed shades hide the bulb and soften its direct brightness. Frosted glass, fabric, and opaque materials can create a calmer effect in bedrooms, dining rooms, and living spaces. Some enclosed designs hold more heat, so the bulb must match the fixture’s approved type and wattage. The bulb affects brightness, energy use, color, and heat output, so check the manufacturer’s requirements before choosing one. A professional can also confirm that the fixture has the correct rating for its location.
Coordinate finishes with existing fixtures and décor
Pendant lighting does not have to match every item in the room, but it should look intentional. Before choosing a finish, look at cabinet pulls, faucets, appliances, door hardware, sconces, and nearby ceiling fixtures. Brass, matte black, bronze, chrome, nickel, and white each create a different impression. Mixing two complementary finishes can add interest without making the room feel disjointed.
For example, a matte black pendant can relate to black cabinet hardware, while a brass fixture can coordinate with a faucet and drawer pulls. Shade material matters, too. Clear glass feels light around solid cabinetry, while rattan or wood can soften a room filled with stone, tile, and metal. This pendant lighting guide recommends relating the fixture’s finish to existing cabinet and plumbing hardware for a cohesive result.
Reduce glare with the right shade and bulb placement
Glare often comes from seeing a bright bulb directly, placing a fixture too low, or selecting more light than the room needs. If people will sit beneath or across from the pendant, consider a frosted bulb, enclosed shade, diffuser, or wider shade that blocks the direct view of the filament. A downward-facing shade keeps light focused on a work surface, while a translucent shade spreads it more gently.
The bulb’s shape and position affect the result as well. Decorative filament bulbs may look attractive in an open pendant, but they can feel harsh at high brightness. Choose a lower-lumen bulb when appropriate, and pair it with a compatible dimmer so you can adjust the room for cooking, dining, or relaxing. Lighting guidance from Steel Lighting Co. explains how bulb type and intensity affect comfort and function. If glare continues after changing the bulb or shade, an electrician can review the fixture’s height, wiring, and placement.
How Do You Choose Pendant Lighting Size and Height?
Choosing the right pendant light involves more than finding a fixture you like. Its width should suit the table, island, or vanity below it, while its height should provide comfortable illumination without blocking views or creating a hazard. The ceiling height, room layout, shade design, and location of the electrical box all affect the final placement.
Begin by measuring the surface you want to light, then review the surrounding clearances. Check nearby cabinets, walls, doors, appliances, and walkways before purchasing a fixture. If you are replacing an existing light, inspect the ceiling box and wiring as well. AAA Electrical Services offers residential electrical services for homeowners who need help with lighting, wiring, switches, or ceiling boxes.
A paper template or adjustable fixture can help you test the size and height before installation. Place it over the table or island, view it from different parts of the room, and check whether it interferes with conversation, cabinet doors, or everyday movement. These simple checks can prevent an expensive fixture from looking out of proportion or hanging in an uncomfortable location.
Measure the room, ceiling, table, island, or vanity
Use a tape measure to record the room’s length, width, and ceiling height. Then measure the table, island, counter, or vanity where the pendant will hang. The surface below the fixture usually matters more than the overall room size because it determines the pendant’s scale and position.
Measure the distance to nearby cabinets, walls, doors, and appliances. Note whether people will walk underneath the fixture or sit across from it. A pendant above a dining table can hang lower than one near a busy walkway, where extra head clearance is important.
If you are replacing a light, mark the ceiling box location and compare it with the center of the surface below. An electrician can confirm whether the box is secure and suitable for the new fixture.
Match pendant width to the surface and room size
As a general starting point, choose a single pendant that is about one-half to two-thirds the width of the table, island, or vanity below it. This proportion creates visual balance without allowing the fixture to overpower the surface. It is not a strict formula, so consider the room’s ceiling height and the pendant’s overall visual weight.
A wide, open metal shade may look lighter than a dense glass or fabric fixture of the same width. A compact pendant may suit a small breakfast nook, while a broader fixture may work better above a large kitchen island.
Leave enough room around the pendant for people, doors, cabinets, and appliances. Remember to measure the full shade width, not just the canopy or central stem. If the fixture has an unusual shape, use its widest point when checking clearances.
Choose one large pendant or several smaller fixtures
One large pendant can create a clear focal point above a round dining table, small island, or entryway. It also keeps the installation simple when one ceiling box is already centered over the surface. Choose a shade that spreads light across the area instead of concentrating it in one narrow spot.
Several smaller pendants can distribute light more evenly over a long island, table, or vanity. They also add rhythm and make it possible to illuminate separate work areas. However, multiple fixtures may require additional ceiling boxes, a compatible multi-light canopy, or changes to the existing wiring.
Consider the room’s proportions and décor before deciding. A single fixture often feels cleaner, while a group creates more visual interest. For a kitchen remodel or a new lighting arrangement, have an electrician confirm whether the circuit and ceiling support are suitable.
Hang pendants 30–36 inches above tables and islands
A common starting point is to hang the bottom of a pendant 30 to 36 inches above a table or kitchen island. Measure from the top of the surface to the fixture’s lowest point, rather than to the ceiling canopy. This range usually provides useful task lighting while keeping the fixture out of the way.
The ideal height depends on the shade, bulb, and people using the room. An exposed bulb may need to sit slightly higher if it creates glare. An opaque shade may work lower when it directs light downward without blocking views.
Before final installation, ask someone to hold the fixture or a paper template at the proposed height. Sit at the table, stand at the island, and look across the room. Raise or lower the pendant if it interrupts conversation, reflects harshly, or makes the area feel cramped.
Adjust height for ceilings, sightlines, and head clearance
The 30-to-36-inch guideline works well for many standard ceilings, but comfort and safety should guide the final decision. Check sightlines across the room, especially when the table or island sits near a living area. You should be able to see other people without the fixture cutting across faces.
Pendants near walkways need more clearance than fixtures centered over seating. Make sure tall household members can pass underneath comfortably, and confirm that doors, cabinet doors, and appliance lids can open fully.
The shade design also affects placement. Clear glass may preserve sightlines, while a large opaque shade can feel intrusive if it hangs too low. If the pendant will be near a sink or another moisture-prone area, check its location rating and installation requirements before work begins.
Add height for ceilings above 8 feet
Higher ceilings often call for a longer cord, chain, or downrod so the pendant maintains a comfortable relationship with the surface below. A useful planning guideline is to add about 3 inches of hanging height for each foot of ceiling height above 8 feet. Use this as a starting point, then adjust it for the fixture, room layout, and sightlines.
A pendant above a dining table may need a longer suspension on a 10-foot ceiling than on an 8-foot ceiling. However, it should not simply hang at the midpoint between the ceiling and the table. It still needs to provide effective light while remaining clear of people and everyday activity.
Tall rooms can also make a small pendant appear undersized. A larger shade, longer fixture, or group of pendants may better suit the space. Check the manufacturer’s maximum cord or downrod length before purchasing.
Space multiple pendants evenly over tables and islands
Even spacing helps multiple pendants read as one coordinated arrangement. Over a kitchen island, a common starting point is 24 to 30 inches between fixtures, measured from the center of one pendant to the center of the next. Adjust this distance according to the fixture width, island length, and light output.
Leave a similar margin between the outer pendants and the ends of the island or table. A fixture placed too close to an edge can look unbalanced and may interfere with people sitting or working there.
Before drilling or moving electrical boxes, mark the proposed center points with painter’s tape. Align the lights with the table or island below, even if that surface is not centered with the surrounding walls. The arrangement should follow the area being illuminated.
Use adjustable cords and downrods for high or sloped ceilings
Adjustable cords, chains, and downrods make it easier to set the final height after assembly. They are particularly helpful in rooms with tall, vaulted, or sloped ceilings. Choose hardware rated for the fixture’s weight, and follow the manufacturer’s instructions for the approved adjustment range.
A sloped ceiling may require a swivel canopy or listed adapter so the pendant hangs straight. The correct hardware prevents the fixture from tilting or placing unnecessary stress on the canopy and wiring. Do not substitute a decorative hook or unapproved component for lighting hardware.
For a heavy fixture or difficult ceiling access, professional installation is the safer option. AAA Electrical Services can inspect the mounting point, wiring, and support before installing or repositioning a pendant. You can also ask about a panel inspection or electrical repair if the existing circuit shows signs of damage or overloading.
Correct off-center boxes with approved hardware
An existing ceiling box may not line up with the center of a table or island, especially after a room’s layout changes. An approved swag hook, adjustable canopy, or listed offset mounting kit may help position the pendant correctly. The hardware must be rated for the fixture’s weight and installed according to its instructions.
Do not hang a heavy pendant from an ordinary decorative hook, and do not rely on a cord for support unless the fixture is specifically designed for that installation method. The ceiling box still needs secure mounting, proper grounding, and correctly connected wires.
If the box is far from the ideal location, moving it may provide a cleaner and safer result. A licensed electrician can assess the ceiling structure, extend the wiring correctly, and determine whether additional support or a new circuit is needed. This helps prevent loose fixtures, exposed wiring, and strain on electrical connections.
Where Does Pendant Lighting Work Best?
Pendant lighting works best in areas where you need focused illumination, a clear focal point, or both. Since pendants hang from the ceiling, they provide useful light without taking up counter, table, or floor space. They can also help define separate areas in open-concept homes, such as a kitchen island, dining nook, or reading corner.
The best location depends on the room’s purpose, ceiling height, existing fixtures, and how people move through the space. Before choosing a pendant, consider the surface you want to illuminate, the fixture’s size, and whether the shade directs light downward or spreads it throughout the room.
Electrical requirements matter, too. A pendant may need a suitable ceiling box, secure mounting hardware, new wiring, a dedicated circuit, or a compatible dimmer. Fixtures installed near moisture also need the correct dry, damp, or wet-location rating. AAA Electrical Services can inspect your setup and recommend the right solution through its residential electrical services.
Light kitchen islands, counters, and sinks
Kitchen islands and counters are popular locations for pendant lights because they need reliable task lighting. A well-placed fixture can brighten food preparation, serving, cooking, and homework while adding style to the room. Aim the light at the work surface without positioning the bulb where it shines directly into someone’s eyes.
When using multiple pendants, space them evenly to create consistent illumination and a balanced appearance. Keep each fixture clear of cabinet doors, appliance openings, and the main sightline across the kitchen. A dimmer lets you use brighter light for detailed tasks and softer light when the kitchen becomes a gathering space. For broader kitchen planning considerations, the National Kitchen and Bath Association provides useful design resources.
Brighten dining tables and breakfast nooks
A pendant above a dining table or breakfast nook can define the area and provide comfortable light for meals, reading, or conversation. Choose the fixture based on the table’s shape and size. One larger pendant may work well above a small round table, while a linear fixture or several smaller pendants can distribute light across a longer surface.
Hang the pendant high enough to preserve eye contact across the table, but low enough to illuminate the setting effectively. A dimmable bulb gives you more flexibility, with brighter light for meals and softer light for relaxed evenings. The fixture does not need to match every finish in the room, but its shade, shape, and material should complement nearby furniture and hardware.
Illuminate entryways, foyers, and stairwells
Pendant lighting can make an entryway or foyer feel more welcoming while helping people see flooring, steps, and nearby doors. A larger pendant can fill vertical space in a room with a tall ceiling. In an expansive foyer, a coordinated group of pendants may create a stronger focal point than one small fixture.
Stairwells require careful planning because people pass beneath and beside the light. Check head clearance, handrails, doors, and the path used to carry furniture or boxes. The fixture should not obstruct movement or cast distracting shadows on the stairs. Before installation, have the ceiling support and wiring checked, especially if the pendant is heavy or the mounting location is difficult to reach.
Choose fixtures for bathroom vanities and damp areas
Pendant lights can work beside or above a bathroom vanity when the fixture provides even illumination without creating harsh reflections in the mirror. A shade that softens the bulb can make grooming more comfortable. You can also combine pendants with recessed lighting or a vanity fixture to reduce shadows across the face.
Always check the fixture’s location rating before installing it near water. A damp-rated pendant may suit some bathroom locations or covered porches, but it is not automatically safe where it could receive direct water exposure. The National Electrical Code resources explain why fixture ratings and clearances matter. If you are unsure whether a fixture belongs in a particular location, ask a licensed electrician to verify the setup.
Light living rooms, bedrooms, hallways, and reading corners
In living rooms and bedrooms, pendant lights can provide general illumination or act as a decorative statement. A small pendant beside the bed can replace a table lamp and free up space on the nightstand. In a reading corner, choose a fixture that directs light toward the chair without shining into your eyes.
Smaller pendants can also work in hallways when they preserve comfortable walking clearance. Consider the shade and bulb when selecting a fixture. An opaque shade directs light more precisely, while an open design spreads illumination throughout the room. A dimmer makes the pendant more versatile, allowing it to support reading, relaxing, entertaining, or nighttime movement.
Create an entryway focal point with clustered pendants
A group of pendant lights can add height and personality to an entryway, stairwell, or foyer. This arrangement works especially well in rooms with tall ceilings, where several fixtures can draw the eye upward and fill the vertical space. Hanging the pendants at different heights creates movement without requiring an oversized single fixture.
For a cohesive arrangement, choose fixtures with a shared finish, similar proportions, or complementary shades. The grouping should look intentional rather than crowded. Before installation, confirm that the ceiling box and mounting hardware can support the combined weight. AAA Electrical Services can inspect the existing box and provide lighting installation and repair when the project requires new wiring or additional support.
Layer pendants with recessed, sconce, and under-cabinet lighting
Pendant lighting does not need to handle every lighting task in a room. Combining it with recessed lights, wall sconces, or under-cabinet fixtures creates more balanced illumination and reduces dark areas. In a kitchen, for example, pendants can brighten the island while under-cabinet lighting covers the counters and recessed fixtures illuminate the surrounding floor.
Use separate switches or compatible dimmers when possible. This allows you to adjust each lighting layer for the activity, time of day, and amount of natural light. In a living room, the pendant can provide a decorative focal point while sconces add softer light around the walls. An electrician can connect the fixtures to suitable switches and circuits as part of a complete electrical installation.
Keep fixtures clear of doors, cabinets, fans, and walkways
Placement affects both safety and comfort. Keep pendant lights away from doors that swing open, cabinet doors, ceiling fans, and areas where people regularly walk or carry large items. In a kitchen, open cabinet doors, appliance lids, and refrigerator doors fully before finalizing the fixture’s location.
Check the hanging height from several viewpoints, including while standing at a counter, sitting at a table, and walking through the room. Sloped ceilings may require an adjustable canopy or downrod to keep the pendant level. If the existing electrical box is off-center, use approved hardware or have a licensed electrician relocate it. Avoid improvised extensions, loose supports, or mounting methods that do not match the fixture manufacturer’s instructions.
How Do You Choose Pendant Bulbs, Brightness, and Controls?
The right pendant bulb affects more than a room’s brightness. It also influences energy use, color accuracy, glare, heat, and whether the fixture works properly with a dimmer or smart control. Start by checking the pendant’s instructions, then choose a bulb based on the room’s purpose and the atmosphere you want.
For example, a kitchen island needs clear, comfortable task lighting, while a dining room may benefit from a softer glow. If you are adding pendant lights or replacing an existing fixture, an electrician can check the ceiling box, wiring, circuit capacity, and controls. AAA Electrical Services provides residential lighting services throughout the Sacramento area, including installation, repairs, and electrical safety checks.
Compare LED, incandescent, halogen, and fluorescent bulbs
LED bulbs are usually the most practical option for pendant lighting. They use less energy and typically last longer than incandescent and halogen bulbs. They also produce less heat, which is helpful when a fixture hangs over a table, counter, or seating area.
Incandescent bulbs create a familiar warm glow, but they use more energy and require more frequent replacement. Halogen bulbs offer crisp light, although they can become very hot. Fluorescent bulbs provide efficient general lighting, but their shape may not fit every pendant, and some take time to reach full brightness. LED lighting guidance can help you compare efficiency, lifespan, and fixture compatibility.
Choose LEDs for efficiency, longevity, and lower heat
LEDs work especially well in pendant fixtures that stay on for several hours each day, such as kitchen island, dining room, or entryway lights. They use less electricity than traditional incandescent bulbs and generally last much longer, which means fewer replacements in hard-to-reach fixtures.
LEDs also produce less heat, helping keep the area below the pendant more comfortable. Lower heat can be particularly useful with enclosed shades, although you still need to follow the fixture’s rating. Choose an LED with the correct brightness, color temperature, shape, and base for your pendant. If you prefer a cozy appearance, select a warm-white LED instead of assuming every LED creates a cool blue tone.
Use lumens for brightness and watts for energy use
Lumens measure how much light a bulb produces. Watts measure how much energy it uses. Use lumens when comparing brightness, and use watts to confirm that the bulb stays within the pendant’s maximum rating.
A decorative fixture over a dining table may need less light than a task-focused pendant over a kitchen island. Several smaller pendants can also provide more total light than one decorative bulb. Avoid choosing a replacement based only on wattage, especially when comparing LED and incandescent bulbs. An LED may produce similar brightness while using far fewer watts.
Check the fixture label and manufacturer’s instructions before installation. If you are uncertain about the appropriate output, consider the room’s size, the surface you want to illuminate, and the amount of light supplied by recessed fixtures or under-cabinet lighting.
Select warm, neutral, or cool color temperatures by room
Color temperature affects the mood and appearance of a room. Warm bulbs, often between 2,700 and 3,000 Kelvin, create a soft glow that suits dining rooms, bedrooms, living rooms, and entryways. Neutral bulbs, often between 3,500 and 4,100 Kelvin, can provide a cleaner appearance in kitchens and bathrooms.
Cooler light may work well in utility areas or rooms where you want a crisp, energetic feel. It can seem harsh in spaces designed for relaxation, however. Coordinate pendant bulbs with nearby recessed lights, sconces, and under-cabinet fixtures so the room does not have noticeably different shades of white. Pendant lighting ideas by room can help you compare warm, neutral, and cool options.
Check color rendering in kitchens, bathrooms, and living spaces
Color rendering describes how accurately a bulb displays the colors of nearby objects. A bulb with a high color rendering index, or CRI, can make food, countertops, clothing, artwork, and finishes appear closer to their natural colors.
This is especially useful in kitchens and bathrooms, where you need to distinguish ingredients, surfaces, and skin tones. It also helps living rooms look their best when pendant lights illuminate artwork, furniture, and décor. A CRI of 80 or higher works for general residential lighting. For kitchens, bathrooms, and areas where accurate color matters, consider a bulb with a CRI of 90 or higher. Combine good color rendering with comfortable brightness to avoid a room that feels either dim or overly intense.
Match bulb shape, base, wattage, and fixture rating
Before buying a bulb, confirm its base size and shape. Medium E26 bases and candelabra E12 bases are common, but your pendant may require another option. The bulb should fit inside the shade without touching glass, metal, or fabric.
Check the fixture’s maximum wattage and whether it accepts LED bulbs. Enclosed pendants may require bulbs labeled for enclosed fixtures because trapped heat can shorten bulb life. Also verify the fixture’s location rating. A pendant in a dry dining room has different requirements from one near a sink or in a humid bathroom. Matching the bulb and fixture specifications helps prevent overheating, poor performance, and early bulb failure.
Manage glare and heat with exposed or enclosed bulbs
Exposed bulbs can give a pendant a decorative, industrial appearance, but they may create glare when viewed from a seated position or across the room. If the light feels uncomfortable, try a frosted bulb, a filament-style LED with softer diffusion, or a shade that blocks direct eye contact.
Enclosed shades can spread light more gently and reduce glare, though they may retain more heat. Use a bulb approved for the fixture and stay within its wattage rating. Pendant height matters, too. A bulb positioned directly in your line of sight may feel harsh, while a wider shade can direct more light toward the surface below. Pendant lighting design guidance offers additional tips for balancing glare, heat, and appearance.
Pair compatible bulbs, fixtures, and dimmers
Not every LED bulb works with every dimmer. Incompatible components can cause flickering, buzzing, uneven dimming, or a bulb that will not turn on. Before installing a dimmable pendant, confirm that the bulb, fixture, and dimmer are all labeled as compatible.
The dimmer should also support the bulb type and the total electrical load of the pendant. Some LED bulbs have a minimum load requirement, which can cause problems when a single low-wattage bulb is connected. If you are replacing an older dimmer, choose one designed for LEDs instead of assuming the existing control will work. An electrician can inspect the switch and wiring if the light flickers, hums, or behaves inconsistently.
Consider smart bulbs, timers, and lighting controls
Smart bulbs allow you to control pendant lights from a phone, voice assistant, or scheduled routine. They can be useful for entryways, kitchens, or fixtures that are difficult to reach. Timers and automated schedules can turn lights on and off at set times, while occupancy sensors can limit unnecessary use in suitable areas.
Check that the smart bulb fits the pendant’s base, shade, and fixture rating. It also needs a compatible wireless system and a constant power supply. If someone turns off the wall switch, the bulb may lose its connection until power is restored. For multiple pendants controlled together, a compatible smart dimmer may be simpler than installing individual smart bulbs.
Prevent flickering by matching bulbs, fixtures, and dimmers
Flickering can result from an incompatible dimmer, loose wiring, a low-quality bulb, or a fixture that does not support the selected lamp. Begin by confirming that the bulb is dimmable and that the dimmer is rated for LED use. If the pendant has multiple bulbs, use matching bulbs with the same color temperature and electrical specifications.
Persistent flickering deserves attention, particularly when it affects other lights or occurs as appliances turn on. Turn off the fixture and arrange an inspection if you notice buzzing, heat, discoloration, a burning odor, or loose connections. AAA Electrical Services can inspect lighting, switches, and electrical connections and recommend a safe repair or replacement when the issue involves more than a bulb mismatch.
How Do You Choose Pendant Lighting for Style, Function, and Budget?
Choosing pendant lighting involves more than finding a fixture you like. The right pendant should suit the room’s purpose, provide enough light, fit the available space, and work safely with your home’s electrical system. It should also fit your budget beyond the purchase price.
Start by measuring the room and the surface below the fixture, such as a kitchen island, dining table, or bathroom vanity. Then consider the pendant’s materials, shade, bulb type, hanging height, installation requirements, and maintenance needs. A pendant can provide task lighting over a work surface, ambient lighting in a dining room, or an eye-catching accent in an entryway. HOMEnhancements’ pendant lighting guide explains how these fixtures can combine practical illumination with a strong visual focal point.
Match the fixture to the room’s purpose and décor
Start with how you use the room. A pendant over a kitchen island should provide clear task lighting for cooking, food preparation, and cleanup. A dining room fixture may call for softer, more comfortable light, while an entryway pendant can focus on creating a welcoming first impression.
Next, compare the fixture with the room’s existing design. Clean-lined metal pendants often suit modern interiors, while glass, woven, or vintage-inspired designs may complement traditional, transitional, or farmhouse spaces. Consider your cabinets, countertops, furniture, wall colors, flooring, and nearby light fixtures before choosing a style.
Your pendant does not have to match every finish in the room. Instead, look for a design that feels intentional. A bold fixture can add personality to a simple space, while a more understated pendant can prevent a highly detailed room from feeling crowded.
Balance statement pendants with smaller fixtures
A large pendant can create a dramatic focal point, but an oversized fixture may block sightlines or make a room feel cramped. Measure the surface below it and the surrounding furniture before choosing a statement design.
A standard kitchen island measuring about 6 to 7 feet often works well with two or three smaller pendants. Space them evenly so the island receives balanced light and the fixtures do not interfere with food preparation or conversation. A single linear pendant can offer similar coverage with fewer ceiling attachment points.
One statement pendant may be enough above a dining table. Keep its width proportional to the tabletop, and check the view across the room before installation. A fixture that is too wide or hangs too low can obstruct faces, affect conversation, and make the dining area less comfortable.
Coordinate metal finishes, shades, and bulb appearance
Look at the finishes already used in the room, including cabinet hardware, faucets, door handles, curtain rods, and nearby light fixtures. Coordinating a pendant’s finish with these details can create a unified look. Common options include matte black, brass, bronze, chrome, nickel, and brushed metal.
The shade affects both the fixture’s appearance and the quality of light. Clear glass shows more of the bulb and creates a brighter, more direct effect. Frosted or opal glass softens the light and can reduce glare. Fabric, wood, and woven shades add warmth, but they may block more light.
Pay attention to the bulb’s shape and appearance, too. An exposed filament bulb may suit a vintage fixture, while a standard LED bulb may look better inside an enclosed shade. Architizer’s pendant lighting guide explains how bulb selection affects brightness, color, energy use, and heat.
Consider ceiling height, room size, and nearby furniture
Ceiling height affects both the pendant’s appearance and the available clearance. Over a table or kitchen island, a common starting point is to hang the bottom of the fixture about 30 to 36 inches above the surface. With an 8-foot ceiling, many pendants sit near the lower end of this range. Taller ceilings may require additional height to preserve open sightlines.
Room size matters as well. A small pendant can disappear in a large kitchen, while a wide fixture may overwhelm a compact breakfast nook. Measure the room, table, island, and nearby furniture before shopping. Include the pendant’s full hanging length, not only the shade width.
Check the surrounding clearance before installation. Cabinet doors should open freely, tall people should have enough headroom where needed, and the pendant should not interfere with ceiling fans, entry doors, or windows. Adjustable cords and downrods can make it easier to fine-tune the final height.
Compare budget fixtures with premium materials and custom features
Pendant lights are available at many price points. Budget fixtures may use painted metal, plastic, basic glass, or standard hardware. They can still work well when the design suits the room and the fixture has the correct safety rating.
Premium pendants may include solid brass, hand-blown glass, natural stone, or high-quality woven materials. You may also pay more for custom finishes, adjustable height systems, integrated LEDs, dimming capabilities, or replaceable components. Common pendant materials include metal, glass, concrete, and plastic, as described in this overview of pendant light designs.
Price alone does not determine quality. Check how the fixture is assembled, whether replacement parts are available, and whether you can access the bulb or clean the shade after installation. A reasonably priced pendant with sturdy hardware and accessible bulbs may offer better long-term value than a costly design that is difficult to maintain.
Budget for bulbs, dimmers, wiring, hardware, and labor
The fixture’s price is only one part of the project. Add the cost of bulbs, compatible dimmers, mounting hardware, extension rods, ceiling box upgrades, wiring, and professional installation. Integrated LED fixtures may not require replacement bulbs, but their internal components can be harder to repair if they fail.
If you want adjustable lighting, confirm that the pendant, bulb, and dimmer are compatible. Some LED bulbs flicker, buzz, or fail to dim properly with an incompatible control. Also check the fixture’s required bulb shape, base, wattage, and voltage before purchasing.
Installation costs depend on the condition and location of the existing electrical box. Replacing a fixture in the same location is usually simpler than adding a ceiling box or new circuit. AAA Electrical Services provides residential electrical services for lighting, switches, wiring, and related work in the Sacramento area.
Plan for circuits, ceiling boxes, permits, and repairs
Before buying a pendant, confirm that the ceiling box can support its weight. Fixtures made from metal, glass, or stone may be heavier than they appear. A standard box may not be suitable for every pendant, especially when the fixture hangs from a long rod or can move when touched.
You may also need a new switch, dimmer, wiring run, or circuit if the existing setup cannot support the installation. Older wiring, loose connections, damaged insulation, and overloaded circuits should be addressed before the new fixture goes up.
Local requirements can vary depending on the project. An electrician can help determine whether you need a permit or inspection. If the installation involves new wiring, a relocated ceiling box, or an unfamiliar circuit, arrange an assessment before ordering the pendant. AAA Electrical Services also offers new circuit installation and electrical inspections.
Check safety certifications, durability, efficiency, and replacement costs
Look for a recognized safety certification on the fixture, and confirm that it is rated for the planned location. A pendant in a dry dining room has different requirements from one near a sink, bathroom, or covered outdoor area. Check the manufacturer’s instructions for dry-, damp-, or wet-location ratings.
Durability matters when a fixture hangs in a busy area. Inspect the canopy, cord, chain, downrod, socket, and shade attachments. These parts should feel secure and show no signs of cracking, sharp edges, or loose connections.
Energy use and replacement costs also affect long-term value. LEDs typically use less energy and last longer than many older bulb types, which can reduce electricity use and replacement frequency. Before choosing an integrated LED pendant or specialty bulb, confirm that replacement components will remain available.
Plan for cleaning, bulb changes, and maintenance
Choose a pendant that you can safely reach and clean. Fixtures with intricate shades, exposed bulbs, or open frames may collect dust quickly. Glass shades can also show fingerprints and grease, especially when installed above a kitchen island or near a range.
Turn off the power and let bulbs cool before cleaning. Dust the fixture with a soft, dry cloth, then follow the manufacturer’s instructions for washing glass or metal parts. Keep water away from sockets, wiring, and electrical connections. Remove any shade or component only when the fixture is cool and de-energized.
Consider bulb access before installation. If changing a bulb requires a tall ladder, moving furniture, or removing several parts, routine maintenance may become inconvenient. For high ceilings, choose long-life bulbs or an accessible design, or arrange professional help for future cleaning and repairs.
Avoid mistakes with size, height, glare, style, and light output
One common mistake is choosing a fixture based on appearance alone. A pendant may look attractive online but feel too large, too low, or too dim once installed. Before ordering, check the fixture’s diameter, height, cord or rod length, and shade opening.
Glare is another concern. Clear bulbs and open shades can shine directly into your eyes, particularly when the pendant hangs near eye level. Frosted bulbs, diffusers, deeper shades, and careful positioning can create more comfortable light. View the planned location from the kitchen, adjacent rooms, and seating areas before finalizing the height.
Finally, make sure the pendant provides enough light for the task. A decorative fixture may need support from recessed lights, under-cabinet lighting, sconces, or another ceiling fixture. If the ceiling box is off-center or the existing circuit cannot support your plan, have a licensed electrician assess the setup before installation.
What Should You Check Before Installing Pendant Lighting?
Pendant lighting can change the look and function of a room, but a safe installation starts before you unpack the fixture. The ceiling box, wiring, switch, mounting hardware, and circuit capacity must match the pendant’s weight and electrical requirements. A fixture that looks simple may still require new wiring, a stronger support box, or a different control.
Start by reviewing the fixture’s installation instructions and product ratings. Note its weight, bulb requirements, location rating, recommended box type, and dimmer compatibility. Then inspect the proposed installation area for moisture, heat, limited clearance, and nearby moving objects.
Turn off power at the breaker before examining an existing ceiling box, and use an appropriate tester to confirm that the wires are de-energized. If you find damaged insulation, loose connections, missing grounding, discoloration, or signs of overheating, stop the project. Do not assume that a decorative canopy will cover an electrical problem.
AAA Electrical Services can help with lighting installation and repair, including the wiring and electrical components behind the fixture. A professional inspection is especially important when you are replacing a lightweight light with a large pendant, adding a new switch, or making changes inside a finished ceiling.
Inspect the ceiling box, wiring, grounding, and circuit capacity
Look at the ceiling box and its connection to the framing. It should be firmly secured, not held in place only by drywall or loose screws. Check the visible wiring for cracked insulation, corrosion, discoloration, loose connections, or signs of heat damage. The circuit should include the grounding conductors required for the fixture and electrical system.
Consider everything else connected to the circuit, including recessed lights, fans, outlets, and appliances. The pendant’s total load should fit within the circuit’s capacity. An electrician can identify overloaded circuits and confirm that the hot, neutral, and ground connections are correctly matched. AAA’s electrical inspection services can help uncover problems that may not be visible from outside the box.
Confirm the box supports the fixture’s weight and movement
Check the pendant’s listed weight and compare it with the ceiling box and mounting hardware ratings. Large glass shades, metal fixtures, and multi-light pendants can weigh much more than a basic ceiling light. The box must be attached to ceiling framing or an approved support brace that can carry the fixture securely.
Movement matters, too. A pendant may shift when it is cleaned, adjusted, or exposed to air from a ceiling fan or open door. Do not rely on drywall anchors or decorative hardware to support a heavy fixture. If the existing box is not properly rated, it may need replacement before the pendant is installed. A licensed electrician can choose the correct box and support method for the ceiling structure.
Check whether you need a new switch, dimmer, or wiring
An existing wall switch may work with a new pendant, but compatibility depends on the fixture, bulb, and control. LED bulbs, smart bulbs, and low-voltage fixtures may require a compatible dimmer or specialized control. An incompatible dimmer can cause flickering, buzzing, limited dimming, or early bulb failure.
Think about how you want to control the light. A pendant over a kitchen island may need a separate switch from recessed or under-cabinet lighting. Adding a switch or extending a circuit can require new cable and access inside the wall or ceiling. Review the fixture instructions and the dimmer manufacturer’s compatibility information before purchasing parts. AAA provides new circuit installation when an existing circuit cannot safely support the planned lighting.
Verify dry-, damp-, or wet-location ratings
Choose a pendant rated for its installation environment. Dry-location fixtures are intended for areas without regular moisture. Damp-location fixtures can handle limited moisture or condensation, while wet-location fixtures are designed for direct water exposure when installed according to the manufacturer’s instructions.
Bathrooms, covered patios, laundry areas, and spaces near sinks require extra care. A location rating does not make a fixture suitable for every position, so check the required clearances and placement instructions. Never install a dry-rated pendant where steam, splashes, or water could reach the socket, wiring, or canopy. If the light will be near moisture, ask an electrician to confirm the fixture rating and proposed location before installation.
Check ceiling height, slopes, clearances, and mounting hardware
Measure the ceiling height and the distance between the proposed pendant and nearby surfaces. Account for tables, islands, counters, cabinets, doors, stairways, and walking paths. The pendant should provide useful light without blocking sightlines or creating a head-clearance hazard.
Sloped ceilings may require an angled canopy, swivel, extension, or other approved hardware. High ceilings may need a longer downrod or adjustable cord, while low ceilings may call for a shorter fixture. Do not force a standard canopy to sit flat against a sloped surface. Confirm that the mounting hardware is designed for the ceiling angle and fixture weight, then follow the manufacturer’s instructions for height and spacing.
Keep fixtures away from heat, moisture, doors, and fans
Pendant lights should not interfere with doors, cabinet doors, ceiling fans, or moving furniture. Before installation, open nearby doors and drawers fully to confirm that they will not strike the shade. Also check sightlines and walking areas, especially when installing a fixture in a hallway, entryway, or stairwell.
Keep pendants away from heat-producing appliances and places where grease or moisture may collect. Kitchen installations need appropriate clearance from cooktops, ovens, and sinks. Ceiling fans can make lightweight pendants swing, placing stress on the fixture and ceiling box. If a pendant must hang near a fan, consider a different location or ask an electrician to assess the clearance and support.
Follow the manufacturer’s instructions for multi-light fixtures
Multi-light pendants have more components and connections than single-light fixtures, so read the instructions before assembling the fixture. Confirm which sockets, arms, shades, cords, chains, or downrods belong in each position. Use the supplied hardware unless the manufacturer identifies an approved replacement.
Pay close attention to total wattage, wire routing, strain relief, and grounding instructions. Keep wires away from sharp edges and hot components, and enclose every connection as directed. Do not leave unused conductors exposed inside the canopy. If the instructions are missing, unclear, or inconsistent with the wiring in your home, pause the installation. Contact the manufacturer or have a licensed electrician review the fixture before proceeding.
Confirm local electrical codes and permit requirements
Electrical work must follow applicable requirements for boxes, grounding, conductor connections, clearances, and fixture support. The requirements for replacing a fixture may differ from those for adding a switch, relocating a ceiling box, extending a circuit, or installing wiring in a finished ceiling.
Sacramento homeowners can review the city’s building permits and inspections information or contact the local building department before changing the electrical system. If a permit or inspection is required, skipping it can create safety concerns and complications during a future home sale. Ask for clarification before work begins, particularly when the project involves new wiring or changes near the electrical panel.
Know when to hire a licensed electrician
Professional help is the right choice when the ceiling box is loose, the wiring is damaged, the circuit lacks grounding, or the fixture is heavier than the existing support. You should also hire an electrician for new circuits, relocated boxes, unfamiliar wiring, frequent breaker trips, burning smells, water damage, or an installation that requires access inside a finished wall or ceiling.
Stop if you cannot positively identify the hot, neutral, and ground conductors. You should also pause when the fixture instructions do not match the wiring in your home. A licensed electrician can inspect the circuit, install the correct support, connect the fixture, and test the completed work. AAA Electrical Services uses licensed, background-checked, and drug-tested technicians, offers clear upfront pricing, and provides same-day service when available.
How Do You Install Pendant Lighting Safely?
Installing pendant lighting involves more than attaching a decorative fixture to the ceiling. The fixture needs proper support, secure wiring, and enough clearance from cabinets, doors, fans, and walkways. A loose connection or unsupported pendant can create shock, fire, or falling-object hazards.
Before you begin, read the manufacturer’s instructions from start to finish. Pendant lights vary in weight, mounting hardware, wire configuration, and installation requirements. If the fixture is heavy, the ceiling box is damaged, or you are unsure whether the circuit can support the new light, contact a licensed electrician. AAA Electrical Services provides lighting installation and repair, including work involving ceiling boxes, switches, dimmers, and new circuits.
Shut off the breaker and test for power
Turn off the wall switch that controls the existing light, then switch off the correct circuit breaker at the electrical panel. Do not rely on the wall switch alone, since wires inside the ceiling box may still be energized. Let everyone in the home know that the circuit is off, and prevent anyone from turning the breaker back on while you work.
Remove the existing fixture only after testing the wires with a properly rated non-contact voltage tester or voltage meter. Test each conductor and the box itself, following the tester’s instructions. If the tester detects voltage, stop and identify the correct breaker. Lamps Plus recommends testing for power before installing pendant lights, and this step should never be skipped.
Assemble the fixture according to the instructions
Place the pendant’s parts on a protected surface and compare them with the installation guide. Depending on the design, you may need to attach the shade, socket, canopy, chain, cord, or downrod before mounting the fixture. Assemble each part in the specified order, since some hardware may be difficult to reach after the pendant is attached to the ceiling.
Feed wires through downrods or other channels carefully. Avoid pinching, twisting, or scraping the insulation. Do not modify the fixture or replace its hardware unless the manufacturer permits it. The Hunter Fan lighting installation guide also recommends following the instructions for the specific fixture rather than assuming every pendant installs the same way.
Secure the bracket to an approved ceiling box
The mounting bracket or plate should attach directly to an approved electrical box, not simply to drywall or a decorative ceiling surface. Guide the house wires through the opening in the bracket, align the screw holes with the box, and tighten the supplied screws evenly.
Check that the ceiling box is firmly attached to the framing and rated for the pendant’s weight. A standard box may not be suitable for a heavy fixture or one that hangs from a long chain or rod. If the box shifts, pulls away from the ceiling, or shows damage, stop before continuing. The box may need additional support or replacement.
Connect hot, neutral, and ground wires correctly
Connect the fixture wires to the home’s conductors according to the manufacturer’s instructions. In many installations, the black or marked conductor is hot, the white conductor is neutral, and the bare or green conductor is ground. Wire colors can vary in older or modified wiring, so do not rely on color alone if the installation looks unfamiliar.
Use approved wire connectors and make sure no bare copper extends beyond the connector unless the instructions specifically require it. Attach the grounding conductor to the grounding screw or wire provided by the box and fixture. Never connect a ground wire to a neutral wire. If the wiring is confusing or damaged, schedule professional electrical service before proceeding.
Add strain relief for cords, chains, and downrods
Strain relief prevents the pendant’s weight from pulling on its electrical connections. Use the cord grip, bushing, chain support, or other hardware supplied with the fixture. The electrical wires should not support the weight of the shade, socket, chain, or downrod.
Inspect the cord as you position the pendant. It should not rub against a sharp edge, sit beneath a clamp, or bend tightly inside the canopy. For chain-hung fixtures, attach the chain to the intended support point rather than relying on the wire connections. Long or heavy pendants may require additional support rated for the fixture and electrical box.
Set the hanging height and tighten the hardware
Before tightening everything, hold the pendant at its intended height and view it from several positions in the room. Over a dining table or kitchen island, the fixture should provide useful illumination without blocking conversation or creating a head hazard. A common starting point is 30 to 36 inches above the surface, but the correct height depends on the fixture, ceiling, furniture, and sightlines.
Adjust the cord, chain, or downrod while the fixture is supported. Then tighten locknuts, set screws, and other hardware according to the installation guide. Do not overtighten parts that could crack a shade or strip a screw. The PacLights pendant installation guide offers more guidance on placement, clearance, and fixture height.
Secure the canopy against the ceiling
The canopy covers the electrical box and wire connections, so it should sit flat and securely against the ceiling. Carefully tuck the wires into the box without forcing them into sharp bends or pinching them between the box and canopy. If the wires do not fit comfortably, pause and reorganize them instead of applying pressure.
Align the canopy with the mounting bracket and install the decorative nuts or screws supplied with the fixture. Tighten them enough to hold the canopy in place without damaging the finish or ceiling surface. The canopy should not wobble, sag, or leave a visible gap around the box. If it will not sit flush, the bracket, box, or fixture hardware may need correction.
Test brightness, dimming, heat, and stability
After the fixture is fully assembled and secured, install bulbs that match the socket type, wattage limit, and fixture rating. Restore power at the breaker, then turn on the wall switch. Watch for flickering, buzzing, delayed startup, or intermittent operation. These signs may indicate an incompatible bulb, loose connection, faulty dimmer, or wiring problem.
If the pendant is dimmable, test it through its full range with a compatible bulb and dimmer. After it has operated briefly, turn it off and check for unusual heat, smoke, odor, or discoloration. Do not touch hot bulbs or metal parts. Confirm that the fixture remains stable and that the canopy and mounting hardware have not shifted.
Stop if you find damage, missing grounding, or overloaded circuits
Do not continue if you find frayed insulation, scorched wires, cracked sockets, a loose ceiling box, water damage, or signs of overheating. Missing grounding is also a serious concern, especially with a metal fixture. The pendant may need replacement parts, a new electrical box, rewiring, or a broader inspection.
An overloaded circuit may cause repeated breaker trips, warm outlets, flickering lights, or recurring fixture failures. Never try to solve the problem by installing a larger breaker, since the existing wiring may not be rated for the additional load. AAA Electrical Services offers panel repair and installation and electrical inspections to help identify circuit and equipment concerns.
Get professional help when wiring or instructions seem unclear
Call a licensed electrician if you cannot identify the correct circuit, the wiring does not match the instructions, or the ceiling box is not rated for the fixture. Professional help is also appropriate when the installation requires a new circuit, a relocated box, a dimmer, panel repairs, or work in a damp area.
Stop immediately if you feel a shock, smell burning, see sparks, or cannot confirm that the power is off. Do not guess with electrical connections or force incompatible parts together. AAA Electrical Services serves homeowners throughout the Sacramento metropolitan area with licensed, background-checked, and drug-tested technicians, clear upfront pricing, and same-day service when available.
How Do You Maintain and Repair Pendant Lighting?
Pendant lights need occasional care to stay attractive, stable, and safe. Dust can reduce light output, while loose hardware, damaged cords, and incorrect bulbs can create larger electrical problems. Regular cleaning also gives you a chance to spot warning signs before the fixture fails.
Turn off the light before cleaning, and shut off the circuit breaker before handling sockets, wiring, mounting hardware, or other electrical components. A wall switch may not disconnect power from every part of the fixture. The National Fire Protection Association’s electrical safety guidance recommends taking signs of heat, damage, and unusual electrical activity seriously.
If you are unsure whether a pendant needs a simple repair or a larger wiring solution, contact a licensed professional. AAA Electrical Services offers residential lighting repair and installation for homeowners throughout the Sacramento metropolitan area.
Dust shades and bulbs with the power off
Dust pendant shades, bulbs, canopies, and exposed hardware with a soft microfiber cloth. Always switch off the light first, then let the bulbs cool before cleaning. For textured or narrow shades, use a clean, soft-bristled brush to remove dust without scratching the finish.
Do not spray cleaner directly onto the fixture. Liquid can enter the socket, canopy, or wiring and create a shock or fire risk. If the pendant hangs above an island or table, clear the area before cleaning so you can use a stable step stool. Keep both feet on the stool, and ask someone to steady it when needed.
Deep-clean glass and metal shades without wetting sockets
Removable glass and metal shades may need deeper cleaning, especially in kitchens where grease and cooking residue collect. Turn off power, remove the shade according to the manufacturer’s instructions, and clean it separately with warm, soapy water and a soft cloth.
Keep sockets, bulbs, wiring, and the canopy dry. Never immerse a shade while it remains attached to the pendant. Rinse away soap, then dry the shade completely before reinstalling it. Avoid abrasive cleaners and scouring pads, which can scratch metal finishes or glass. For attached shades, use a lightly damp cloth and keep moisture away from electrical components.
Let bulbs cool and wear gloves when needed
Bulbs can stay hot for several minutes after you turn off a pendant. Wait until the bulb feels cool before removing or replacing it. Halogen and incandescent bulbs typically produce more heat than LEDs, so give them extra time.
Clean cotton or nitrile gloves can protect your hands and prevent fingerprints on glass bulbs. Do not force a bulb that will not turn. Turn off power at the breaker and stop if the base is damaged, the socket moves, or the glass begins to crack. A stuck bulb may require professional removal, particularly when the socket or wiring also appears worn.
Dry each component before reassembly
Moisture left behind after cleaning can damage finishes and create an electrical hazard. Place removable components on a dry towel, then inspect rims, seams, mounting holes, and other areas where water may collect. Wipe each part until it is completely dry.
Do not turn on the pendant while any component is damp. Avoid using a hair dryer on glass, since sudden temperature changes can cause some shades to crack. Before reassembly, confirm that retaining screws, clips, and washers are in their original positions. If the shade does not sit securely or the hardware seems incomplete, stop and review the manufacturer’s instructions before using the fixture.
Replace bulbs with the correct base, rating, and lumen output
Choose a replacement bulb that matches the pendant’s socket and electrical rating. Check the fixture label or installation guide for the correct base, maximum wattage, and location rating. Make sure the bulb fits inside the shade without touching it.
Use lumens to compare brightness and watts to compare energy use. An LED bulb can often provide the same light as a higher-wattage incandescent bulb while producing less heat. If the pendant uses a dimmer, choose a bulb marked as dimmable and compatible with that control. The wrong bulb may cause flickering, excess heat, poor light distribution, or socket damage.
Check for loose hardware, frayed cords, discoloration, and heat damage
Inspect the fixture whenever you clean it. Look for loose screws, a shifting canopy, bent parts, cracked glass, frayed cords, damaged chain links, and missing hardware. Darkened metal, melted insulation, yellowing around the socket, or discoloration on the ceiling may point to overheating.
Do not tighten or reposition parts connected to the ceiling while the fixture has power. Turn off the breaker before checking mounting hardware. A loose decorative screw may be a minor issue, but a damaged cord, mounting bracket, or ceiling box needs prompt attention. Never cover frayed insulation with tape and continue using the pendant. Arrange professional electrical repair service instead.
Troubleshoot flickering, buzzing, intermittent operation, and burning smells
Begin with the bulb. Confirm that it is seated correctly and that its base, wattage, and dimming compatibility match the fixture. Flickering that occurs only with a dimmer may indicate an incompatible bulb or control. Buzzing can also result from a loose bulb, a failing dimmer, or a connection that needs repair.
Intermittent operation, repeated bulb failure, or a burning smell requires more caution. Turn off the pendant and circuit breaker, then let the fixture cool. If the issue returns after replacing the bulb, the cause may involve the socket, switch, wiring, or circuit. Do not keep testing a fixture that smells hot or shows discoloration. Have a licensed electrician inspect the problem.
Stop using fixtures that spark, shock, smoke, or overheat
Sparks, smoke, shocks, and excessive heat are serious warning signs. Turn off the fixture immediately and shut off the circuit breaker if you can do so safely. Keep everyone away from the pendant, switch, and nearby metal surfaces if you suspect the fixture is energized.
Do not continue using the light because the problem disappears after switching it off and on. Never cover scorch marks or replace a fuse without finding the cause. If there is active smoke or fire, leave the home and call emergency services. Once the area is safe, arrange an inspection of the fixture, wiring, ceiling box, and circuit before restoring power.
Schedule an inspection when problems continue
A pendant that keeps flickering, buzzing, shutting off, or overheating needs more than repeated bulb changes. Possible causes include a loose connection, overloaded circuit, defective dimmer, damaged ceiling box, or wiring problem hidden behind the canopy. Multi-light fixtures may require additional testing because several sockets and connections share the same assembly.
Schedule an inspection if the pendant is older, has been modified, or shows damage you cannot identify. A professional can test the circuit, check grounding, inspect mounting support, and recommend repair or replacement. AAA Electrical Services provides electrical inspections for Sacramento-area homes, with clear upfront pricing and same-day service when available.
Repair or replace outdated and damaged fixtures safely
Some pendant lights only need a new bulb, socket, shade, cord, or mounting component. Replacement may be safer when the fixture has brittle insulation, corrosion, repeated overheating, missing grounding, or discontinued parts. A proper repair should restore safe operation rather than hide visible damage.
Choose a replacement pendant rated for its location. Bathrooms and covered outdoor areas may require damp-rated fixtures, while wet locations need products approved for direct moisture exposure. Confirm that the ceiling box can support the new fixture and that the existing wiring is suitable. If the work involves a new ceiling box, wiring, circuit changes, or damaged connections, hire a licensed electrician. You can also review AAA Electrical Services’ financing options before scheduling a larger lighting project.
How Can AAA Electrical Services Help With Pendant Lighting?
Pendant lighting can give a kitchen, dining room, entryway, or bathroom a finished look while providing useful light where you need it. However, a safe installation involves more than attaching a shade and installing a bulb. The ceiling box, wiring, switch, dimmer, circuit, mounting hardware, and fixture rating all need to work together.
AAA Electrical Services helps Sacramento-area homeowners install, replace, repair, and maintain pendant lights. The team can evaluate your existing electrical setup, discuss your lighting goals, and recommend work that suits your home. Their residential electrical services include lighting, circuits, panels, inspections, and other systems that may affect a pendant installation.
Professional help can also identify concerns that are easy to miss, such as a loose ceiling box, damaged wire, overloaded circuit, or incompatible dimmer. Addressing these issues before installation can help your new fixture operate reliably and reduce the risk of repeated repairs.
Install, replace, and repair pendant lights in Sacramento
AAA Electrical Services can install pendant lights in new locations or replace fixtures that no longer suit your space. Common projects include lighting for kitchen islands, dining tables, bathroom vanities, hallways, foyers, and reading areas.
Pendant lights vary in weight, shape, shade material, and mounting method. A technician can confirm that the ceiling box and hardware support the fixture, connect the wiring correctly, and set the height for comfortable use. Proper placement also helps keep the pendant clear of doors, cabinets, fans, and walkways.
If an existing light flickers or stops working, the team can inspect the socket, switch, wiring, connections, and breaker. When repair is not practical, they can help you replace the fixture with one that matches the room and the electrical system.
Service ceiling boxes, wiring, switches, dimmers, and new circuits
Pendant lighting relies on a secure ceiling box and properly connected wiring. If the box is loose, damaged, or not rated for the fixture’s weight, AAA Electrical Services can repair or replace it before mounting the pendant. This helps reduce movement and stress on the electrical connections.
The team can also service wall switches and dimmers. Dimming problems often occur when the bulb, fixture, and dimmer are not compatible. An electrician can check the components and address flickering, buzzing, or inconsistent brightness.
If the existing circuit does not have enough capacity for new lighting, the project may require a new circuit. This can be helpful during a kitchen remodel or when you are adding several fixtures. AAA Electrical Services can assess the setup and recommend an appropriate electrical service.
Perform electrical inspections, breaker repairs, and panel checks
A pendant light that trips the breaker may have a fixture problem, damaged wiring, an overloaded circuit, or an issue with the breaker itself. AAA Electrical Services can inspect the installation and test the related electrical components to find the cause.
An inspection may identify loose connections, heat damage, grounding concerns, or wiring that needs attention. These problems are especially important to address before installing a new fixture in an older home or a room with several appliances and lights on the same circuit.
If the lighting project requires additional capacity, the electrician can review the electrical panel and explain the available options. AAA Electrical Services provides panel repair and installation, helping homeowners determine whether the panel can support planned lighting and other electrical improvements.
Design lighting solutions for kitchens, dining rooms, bathrooms, and entries
The right pendant lighting arrangement depends on how you use the room. Over a kitchen island, several smaller pendants can provide even task lighting while preserving sightlines. Over a dining table, a larger fixture or linear pendant can create a defined focal point.
AAA Electrical Services can help you consider placement, height, switching, and brightness for different spaces. Bathroom fixtures need suitable location ratings and careful placement around moisture and mirrors. Entryway fixtures need enough clearance for doors, stairs, and normal foot traffic.
Pendants can also work with recessed lights, sconces, or under-cabinet lighting. Layering these sources helps reduce dark areas and glare while giving you more control over the room’s atmosphere and function.
Work with licensed, background-checked, and drug-tested technicians
Electrical work affects your home’s wiring and safety, so the technician handling the project matters. AAA Electrical Services works with licensed, background-checked, and drug-tested technicians for residential electrical services.
A qualified technician can evaluate the fixture and the supporting system together. That includes the ceiling box, grounding, circuit, breaker, switch, dimmer, and mounting hardware. This broader assessment can help prevent shortcuts that may lead to loose fixtures, unreliable operation, or future electrical problems.
You can also ask questions before work begins. Your technician can explain whether the existing wiring is suitable, whether the dimmer will work with your chosen bulb, and whether a new circuit or additional support is needed. Clear guidance helps you make informed decisions about the project.
Provide same-day service and clear upfront pricing
A pendant that will not turn on can leave an important room without enough light. A fixture that feels loose, overheats, or produces a burning smell needs prompt attention. AAA Electrical Services offers same-day service when available, helping Sacramento-area homeowners address electrical concerns without unnecessary delays.
The team also provides clear upfront pricing before work begins. This makes it easier to compare repair and replacement options or decide whether to address a related switch, circuit, or panel concern during the same visit.
A visible lighting problem does not always reveal its source. A pendant that is not working may have a failed bulb, socket, switch, wire connection, or breaker issue. A professional assessment can identify the needed service and explain the cost before the repair starts.
Back every service with a 100% satisfaction guarantee
AAA Electrical Services backs its work with a 100% satisfaction guarantee. This gives homeowners a clear standard for both the electrical work and the finished result.
Pendant lighting is often installed in a prominent location, so small details affect the room. The fixture should hang at the intended height, remain securely mounted, operate reliably, and provide the right level of light. The wiring and controls should also function as expected.
Before installation, discuss your preferences with the technician. You can review the fixture’s position, switch location, dimming requirements, and purpose for the room. Setting these expectations in advance helps ensure the completed work is practical as well as visually pleasing.
Complete 93% of repairs on the spot
AAA Electrical Services completes 93% of repairs on the spot. For homeowners, this can mean less waiting when a pendant light develops a problem.
Many lighting repairs involve issues that a trained electrician can address during the first visit, including faulty switches, loose connections, damaged sockets, and breaker problems. If the fixture requires a special part or full replacement, the technician can explain the next step and provide guidance on the work involved.
Efficient service still requires a careful inspection. The electrician needs to determine why the pendant failed and confirm that the repair is safe before completing the job. Addressing the underlying cause can help prevent recurring flickering, tripped breakers, or early fixture failure.
Offer financing options and VIP membership support for ongoing care
A pendant lighting project may be part of a larger electrical update involving new circuits, a panel repair, dimmers, or multiple fixtures. AAA Electrical Services offers financing options for qualifying homeowners, which may help you plan approved work around your household budget.
For continued support, the VIP Membership offers a convenient option for homeowners who want ongoing attention to their electrical systems. Membership may be useful if you expect to schedule inspections, repairs, lighting updates, or other residential electrical services over time.
Before scheduling work, ask about current financing terms, membership benefits, included services, and eligibility. Understanding these details helps you choose the arrangement that fits your pendant lighting project and your home’s wider electrical needs.
Related Articles
- Lighting Install
- Lighting Installation for Folsom Homes
- Lighting Installation Contractor West Sacramento
- Lighting Installation for Davis Homes
- Kitchen Lighting Electrician Roseville
Frequently Asked Questions
What is the ideal height for a pendant light over a kitchen island or table?\ A good starting point is 30 to 36 inches between the surface and the bottom of the fixture. Adjust the height based on glare, ceiling height, sightlines, and the people using the space. The pendant should provide useful light without blocking conversation or creating a head-clearance concern.
How many pendant lights should I install over a kitchen island?\ The number depends on the island’s length, the pendant size, and the amount of light each fixture provides. Two or three smaller pendants often suit a standard island, while a single linear fixture may provide similar coverage. Space multiple lights evenly and keep them clear of cabinet doors, appliances, and sightlines.
Can I install a pendant light where another ceiling fixture already exists?\ Often, yes, but the ceiling box must be secure and rated for the new fixture’s weight. The wiring, grounding, circuit, and switch should also be checked, particularly if the pendant is heavier or includes multiple bulbs. AAA Electrical Services can inspect the existing setup and complete the installation safely.
Why is my pendant light flickering or buzzing?\ The issue may come from an incompatible LED bulb and dimmer, a loose bulb, a faulty switch, or a wiring problem. Replace the bulb only if it does not show signs of heat damage or other electrical concerns. Persistent flickering, buzzing, burning odors, or discoloration should be inspected by a licensed electrician.
Do pendant lights need special electrical ratings in bathrooms or near sinks?\ Yes. The fixture must have a rating suitable for the amount of moisture in its location. A dry-rated pendant is not appropriate for areas exposed to steam, splashes, or direct water. Check the manufacturer’s requirements and have a professional confirm the placement when moisture is involved.